Assembly
5 6 
![]()
![]()
![]() 4
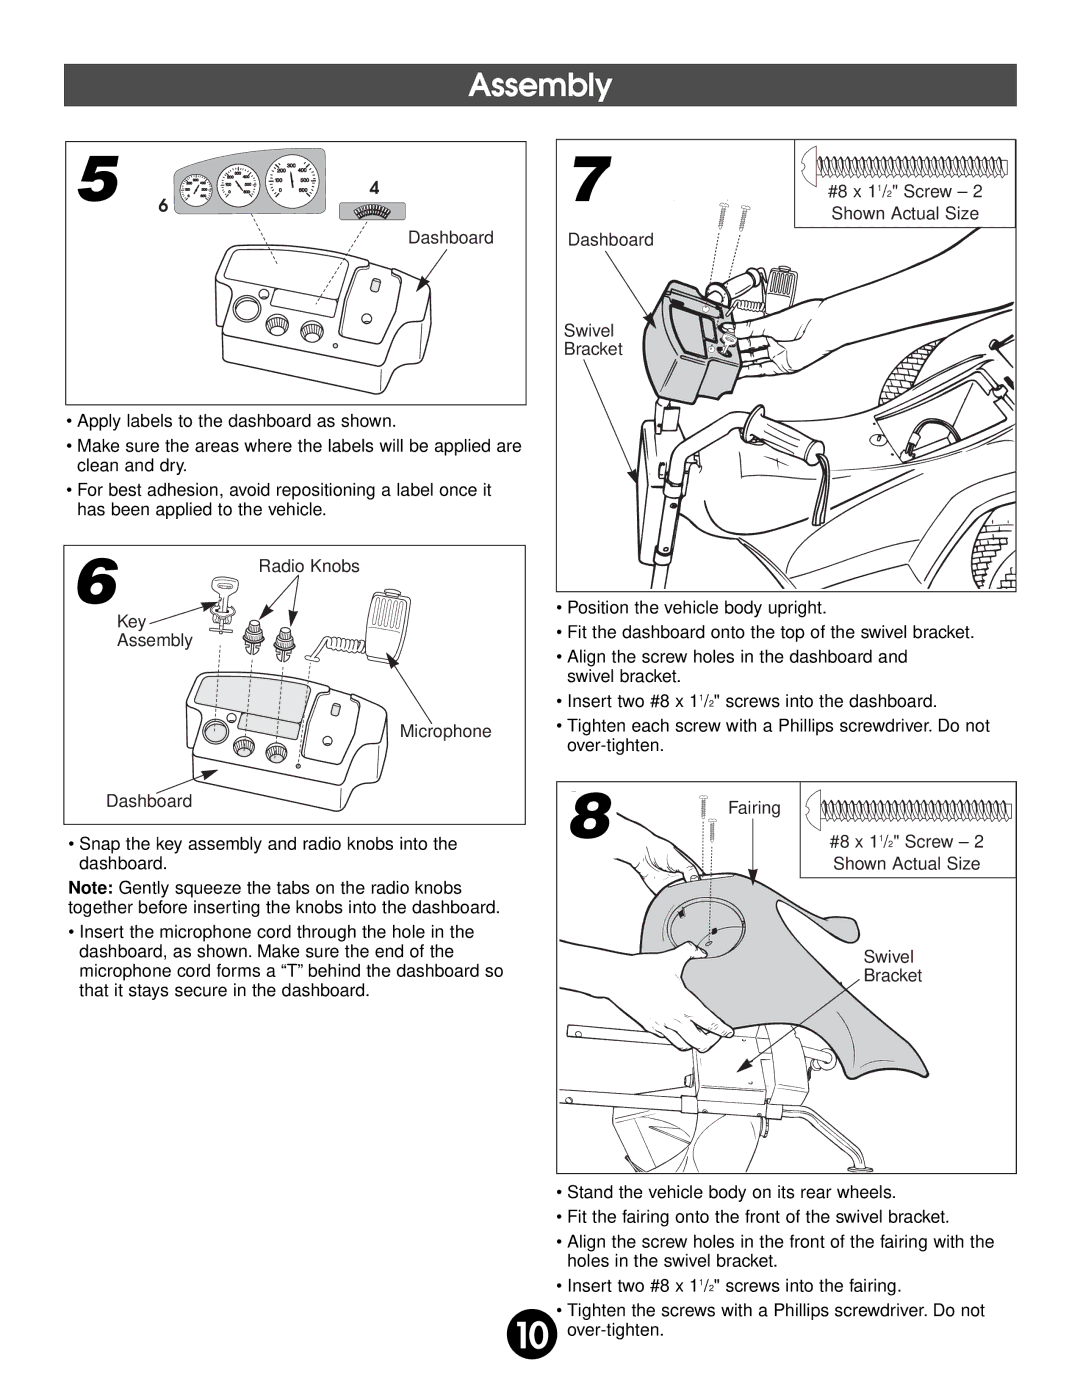
4
Dashboard
•Apply labels to the dashboard as shown.
•Make sure the areas where the labels will be applied are clean and dry.
•For best adhesion, avoid repositioning a label once it has been applied to the vehicle.
6 | Radio Knobs |
|
Key ![]()
![]()
![]()
Assembly
Microphone
Dashboard
•Snap the key assembly and radio knobs into the dashboard.
Note: Gently squeeze the tabs on the radio knobs together before inserting the knobs into the dashboard.
•Insert the microphone cord through the hole in the dashboard, as shown. Make sure the end of the microphone cord forms a “T” behind the dashboard so that it stays secure in the dashboard.
7 | #8 x 11/2" Screw – 2 | |
Shown Actual Size | ||
| ||
Dashboard |
| |
Swivel |
| |
Bracket |
|
•Position the vehicle body upright.
•Fit the dashboard onto the top of the swivel bracket.
•Align the screw holes in the dashboard and swivel bracket.
•Insert two #8 x 11/2" screws into the dashboard.
•Tighten each screw with a Phillips screwdriver. Do not
8 | Fairing |
#8 x 11/2" Screw – 2 | |
| Shown Actual Size |
| Swivel |
| Bracket |
•Stand the vehicle body on its rear wheels.
•Fit the fairing onto the front of the swivel bracket.
•Align the screw holes in the front of the fairing with the holes in the swivel bracket.
•Insert two #8 x 11/2" screws into the fairing.
•Tighten the screws with a Phillips screwdriver. Do not
10