Battery Installation | Battery Tips |
Hint: We recommend using alkaline batteries for longer battery life.
Battery
Compartment
Door


 Swing
Swing


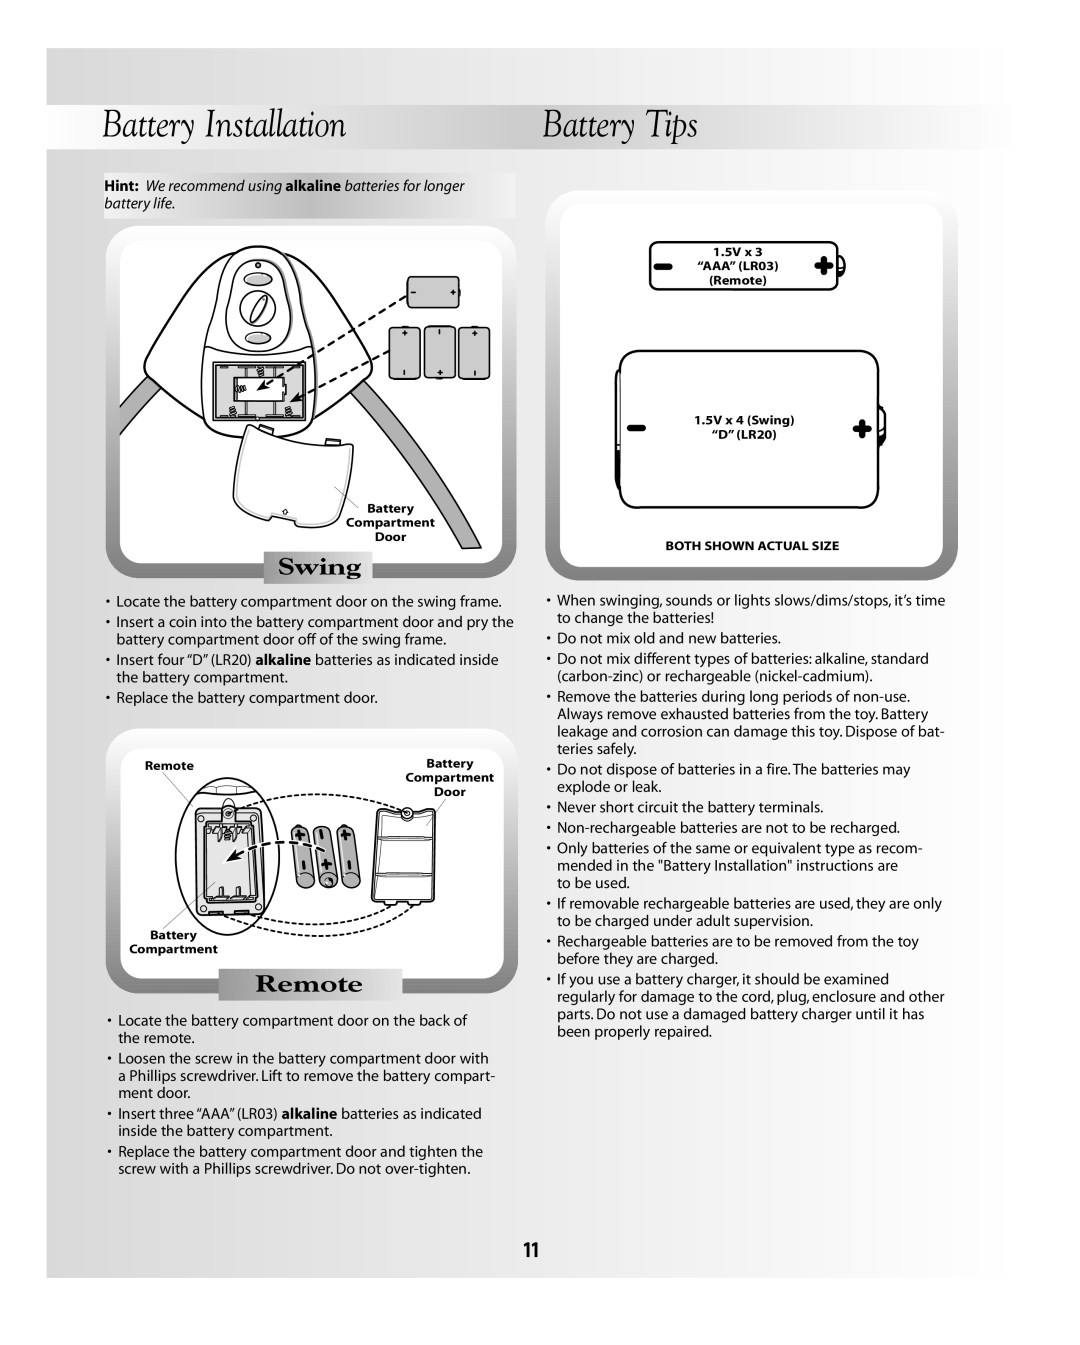
•Locate the battery compartment door on the swing frame.
•Insert a coin into the battery compartment door and pry the battery compartment door off of the swing frame.
•Insert four “D” (LR20) alkaline batteries as indicated inside the battery compartment.
•Replace the battery compartment door.
Remote | Battery |
| Compartment |
| Door |
Battery
Compartment


 Remote


•Locate the battery compartment door on the back of the remote.
•Loosen the screw in the battery compartment door with a Phillips screwdriver. Lift to remove the battery compart- ment door.
•Insert three “AAA” (LR03) alkaline batteries as indicated inside the battery compartment.
•Replace the battery compartment door and tighten the screw with a Phillips screwdriver. Do not
1.5V x 3
“AAA” (LR03)
(Remote)
1.5V x 4 (Swing)
“D” (LR20)
BOTH SHOWN ACTUAL SIZE
•When swinging, sounds or lights slows/dims/stops, it’s time to change the batteries!
•Do not mix old and new batteries.
•Do not mix different types of batteries: alkaline, standard
•Remove the batteries during long periods of
•Do not dispose of batteries in a fire. The batteries may explode or leak.
•Never short circuit the battery terminals.
•
•Only batteries of the same or equivalent type as recom- mended in the "Battery Installation" instructions are to be used.
•If removable rechargeable batteries are used, they are only to be charged under adult supervision.
•Rechargeable batteries are to be removed from the toy before they are charged.
•If you use a battery charger, it should be examined regularly for damage to the cord, plug, enclosure and other parts. Do not use a damaged battery charger until it has been properly repaired.
11
