Assembly
Holder
![]() Front Leg
Front Leg
5 | M4 Bolt - 1 |
Shown Actual Size
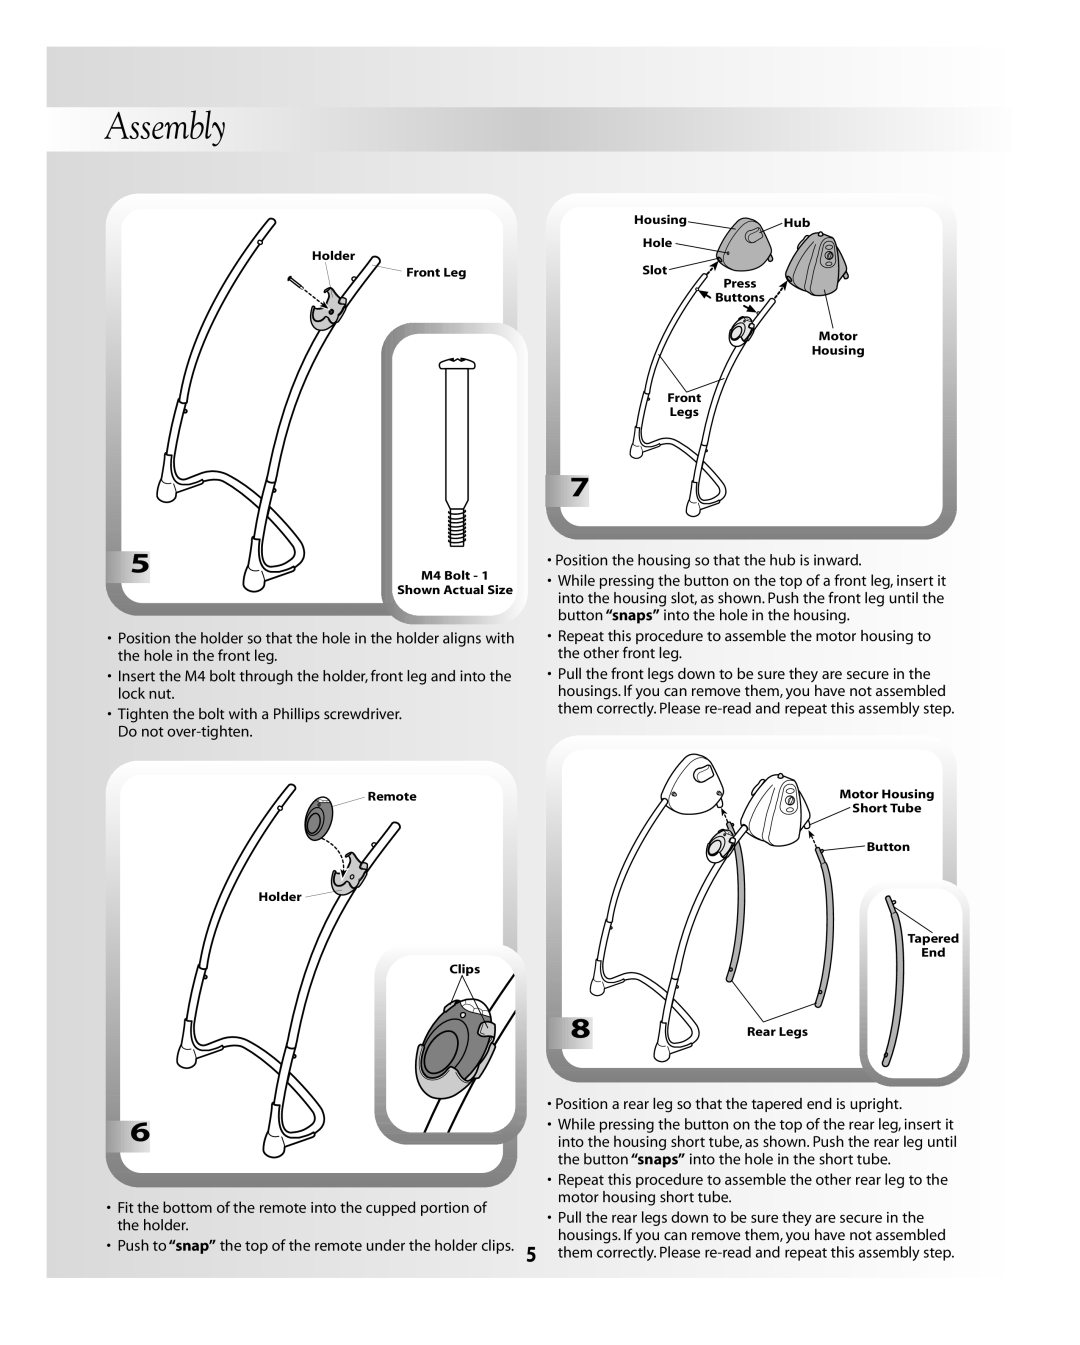
•Position the holder so that the hole in the holder aligns with the hole in the front leg.
•Insert the M4 bolt through the holder, front leg and into the lock nut.
•Tighten the bolt with a Phillips screwdriver. Do not
HousingHub
Hole
Slot
Press
![]() Buttons
Buttons
Motor
Housing
Front
Legs
![]()
![]()
![]()
![]()
![]()
![]()
![]()
![]()
![]()
![]()
![]()
![]()
![]()
![]()
![]()
![]()
![]()
![]()
![]()
![]()
![]() 7
7![]()
![]()
![]()
![]()
![]()
![]()
![]()
•Position the housing so that the hub is inward.
•While pressing the button on the top of a front leg, insert it into the housing slot, as shown. Push the front leg until the button “snaps” into the hole in the housing.
•Repeat this procedure to assemble the motor housing to the other front leg.
•Pull the front legs down to be sure they are secure in the housings. If you can remove them, you have not assembled them correctly. Please
Remote
Holder ![]()
Clips
![]()
![]()
![]()
![]()
![]()
![]()
![]()
![]()
![]()
![]()
![]()
![]()
![]()
![]()
![]()
![]()
![]()
![]()
![]()
![]()
![]() 6
6![]()
![]()
![]()
![]()
![]()
![]()
![]()
•Fit the bottom of the remote into the cupped portion of the holder.
•Push to “snap” the top of the remote under the holder clips.
Motor Housing
![]() Short Tube
Short Tube
![]() Button
Button
Tapered
End
8 | Rear Legs |
•Position a rear leg so that the tapered end is upright.
•While pressing the button on the top of the rear leg, insert it into the housing short tube, as shown. Push the rear leg until the button “snaps” into the hole in the short tube.
•Repeat this procedure to assemble the other rear leg to the motor housing short tube.
•Pull the rear legs down to be sure they are secure in the
housings. If you can remove them, you have not assembled
5 them correctly. Please
