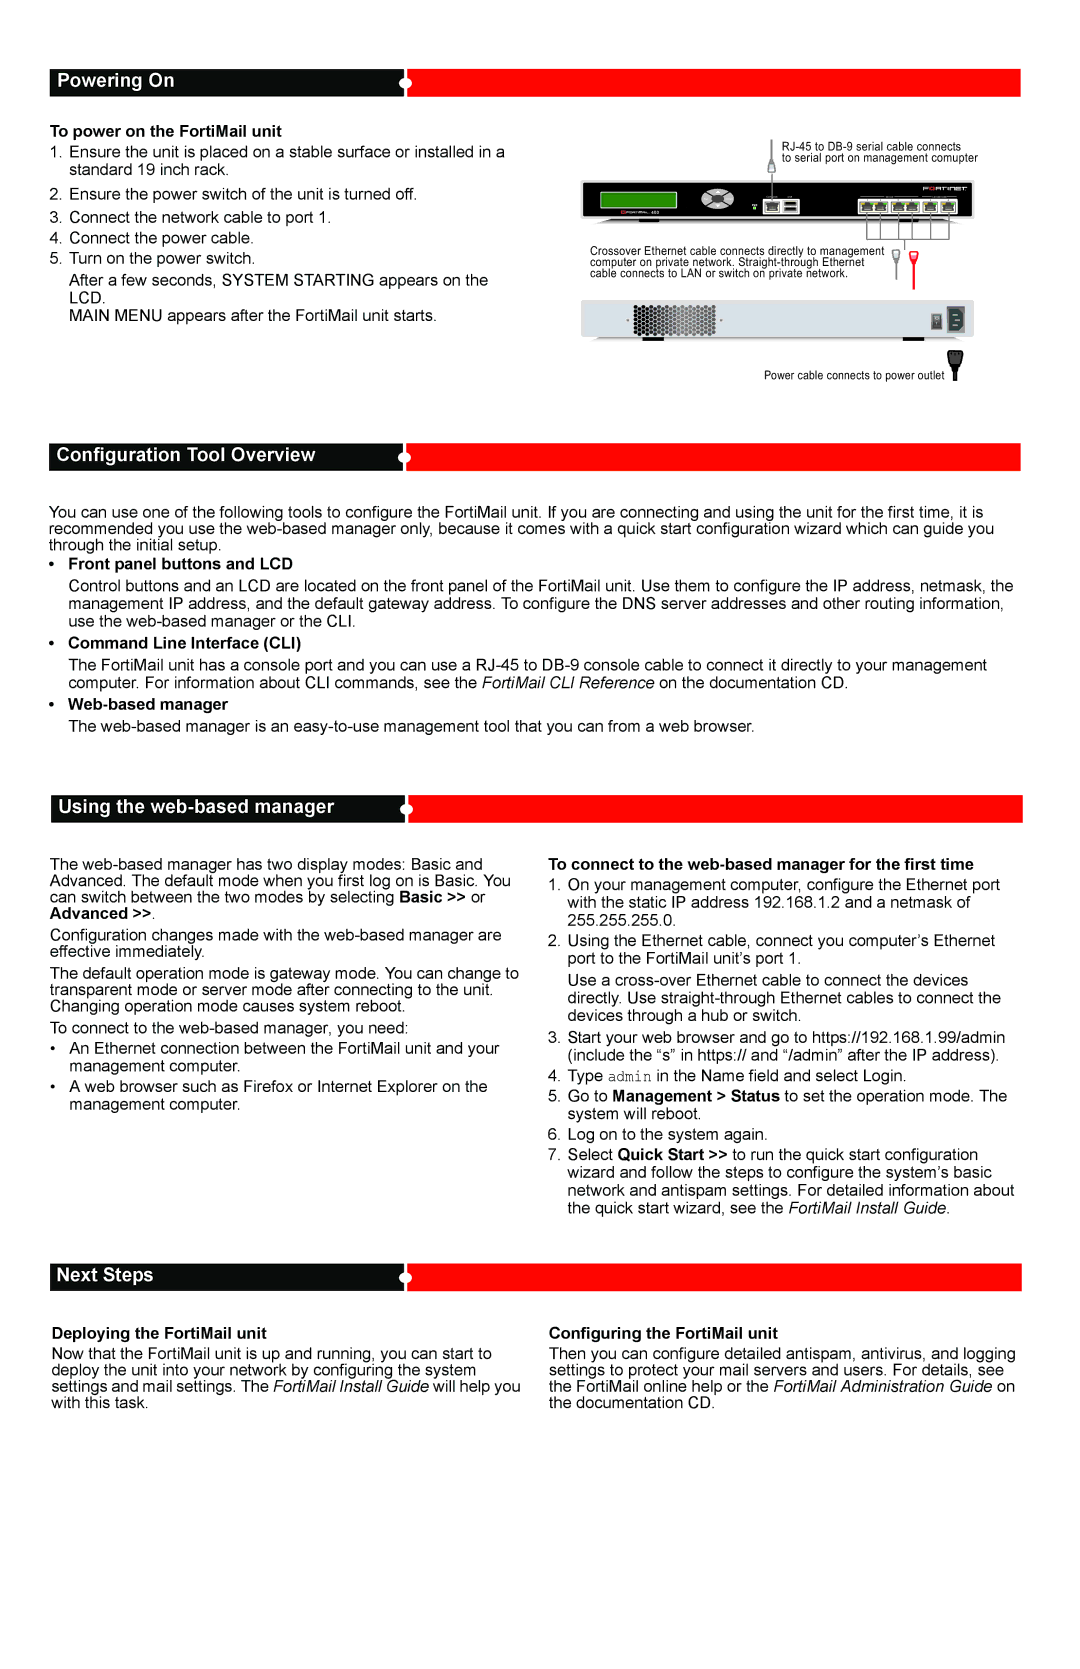
Powering On
To power on the FortiMail unit
1.Ensure the unit is placed on a stable surface or installed in a standard 19 inch rack.
2.Ensure the power switch of the unit is turned off.
3.Connect the network cable to port 1.
4.Connect the power cable.
5.Turn on the power switch.
After a few seconds, SYSTEM STARTING appears on the LCD.
MAIN MENU appears after the FortiMail unit starts.
![]() to serial port on management comupter
to serial port on management comupter
Esc | Enter | CONSOLE | USB |
|
| 10/100 |
|
| 10/100/1000 |
|
| 1 | 2 | 3 | 4 | 5 | 6 |
Crossover Ethernet cable connects directly to management ![]() computer on private network.
computer on private network. ![]() cable connects to LAN or switch on private network.
cable connects to LAN or switch on private network.
Power cable connects to power outlet ![]()
Configuration Tool Overview
You can use one of the following tools to configure the FortiMail unit. If you are connecting and using the unit for the first time, it is recommended you use the
•Front panel buttons and LCD
Control buttons and an LCD are located on the front panel of the FortiMail unit. Use them to configure the IP address, netmask, the management IP address, and the default gateway address. To configure the DNS server addresses and other routing information, use the
•Command Line Interface (CLI)
The FortiMail unit has a console port and you can use a
•
The
Using the web-based manager
The
Configuration changes made with the
The default operation mode is gateway mode. You can change to transparent mode or server mode after connecting to the unit. Changing operation mode causes system reboot.
To connect to the
•An Ethernet connection between the FortiMail unit and your management computer.
•A web browser such as Firefox or Internet Explorer on the management computer.
Next Steps
To connect to the web-based manager for the first time
1.On your management computer, configure the Ethernet port with the static IP address 192.168.1.2 and a netmask of 255.255.255.0.
2.Using the Ethernet cable, connect you computer’s Ethernet port to the FortiMail unit’s port 1.
Use a
3.Start your web browser and go to https://192.168.1.99/admin (include the “s” in https:// and “/admin” after the IP address).
4.Type admin in the Name field and select Login.
5.Go to Management > Status to set the operation mode. The system will reboot.
6.Log on to the system again.
7.Select Quick Start >> to run the quick start configuration wizard and follow the steps to configure the system’s basic network and antispam settings. For detailed information about the quick start wizard, see the FortiMail Install Guide.
Deploying the FortiMail unit
Now that the FortiMail unit is up and running, you can start to deploy the unit into your network by configuring the system settings and mail settings. The FortiMail Install Guide will help you with this task.
Configuring the FortiMail unit
Then you can configure detailed antispam, antivirus, and logging settings to protect your mail servers and users. For details, see the FortiMail online help or the FortiMail Administration Guide on the documentation CD.