Meter status display
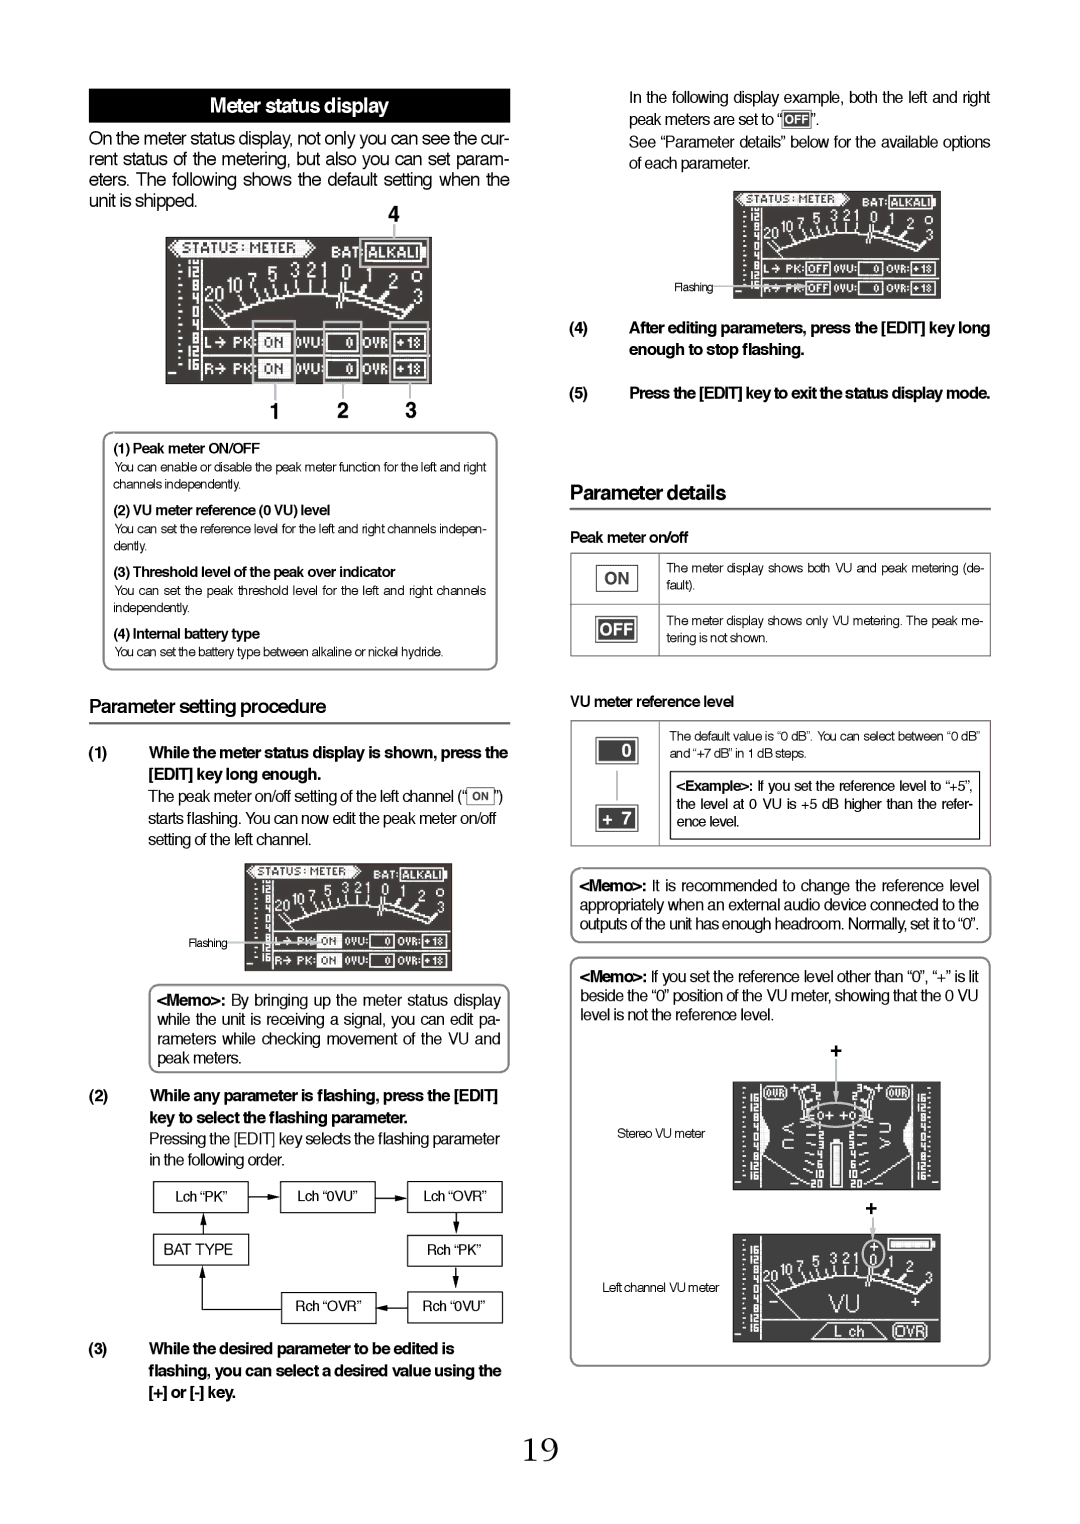
On the meter status display, not only you can see the cur- rent status of the metering, but also you can set param- eters. The following shows the default setting when the unit is shipped.
(1) Peak meter ON/OFF
You can enable or disable the peak meter function for the left and right channels independently.
(2) VU meter reference (0 VU) level
You can set the reference level for the left and right channels indepen- dently.
(3) Threshold level of the peak over indicator
You can set the peak threshold level for the left and right channels independently.
(4) Internal battery type
You can set the battery type between alkaline or nickel hydride.
Parameter setting procedure
(1)While the meter status display is shown, press the [EDIT] key long enough.
The peak meter on/off setting of the left channel (“![]() ”) starts flashing. You can now edit the peak meter on/off setting of the left channel.
”) starts flashing. You can now edit the peak meter on/off setting of the left channel.
Flashing
<Memo>: By bringing up the meter status display while the unit is receiving a signal, you can edit pa- rameters while checking movement of the VU and peak meters.
(2)While any parameter is flashing, press the [EDIT] key to select the flashing parameter.
Pressing the [EDIT] key selects the flashing parameter in the following order.
Lch “PK” | Lch “0VU” | Lch “OVR” |
BAT TYPE |
| Rch “PK” |
| Rch “OVR” | Rch “0VU” |
(3)While the desired parameter to be edited is flashing, you can select a desired value using the
[+] or [-] key.
In the following display example, both the left and right peak meters are set to “![]() ”.
”.
See “Parameter details” below for the available options of each parameter.
Flashing |
(4)After editing parameters, press the [EDIT] key long enough to stop flashing.
(5)Press the [EDIT] key to exit the status display mode.
Parameter details
Peak meter on/off
The meter display shows both VU and peak metering (de- fault).
The meter display shows only VU metering. The peak me- tering is not shown.
VU meter reference level
The default value is “0 dB”. You can select between “0 dB” and “+7 dB” in 1 dB steps.
<Example>: If you set the reference level to “+5”, the level at 0 VU is +5 dB higher than the refer- ence level.
<Memo>: It is recommended to change the reference level appropriately when an external audio device connected to the outputs of the unit has enough headroom. Normally, set it to “0”.
<Memo>: If you set the reference level other than “0”, “+” is lit beside the “0” position of the VU meter, showing that the 0 VU level is not the reference level.
+
Stereo VU meter
+ |
Left channel VU meter
19
