Grill Assembly
Note: Prior to assembly remove protective film from stainless steel parts
Assembly requires: 4 tools and a Friend
Tools required:
Power screwdriver Screwdriver extension 1/4” socket wrench 1/2” socket wrench adjustable wrench scissors
Caution: Gas regulator is not flush with bottom. DO NOT let the Grill head sit flat without placing support around regulator to prevent damage to the regulator prior to installing on cart.
Cart Assembly, Door Stops & Door Pivot Bolts
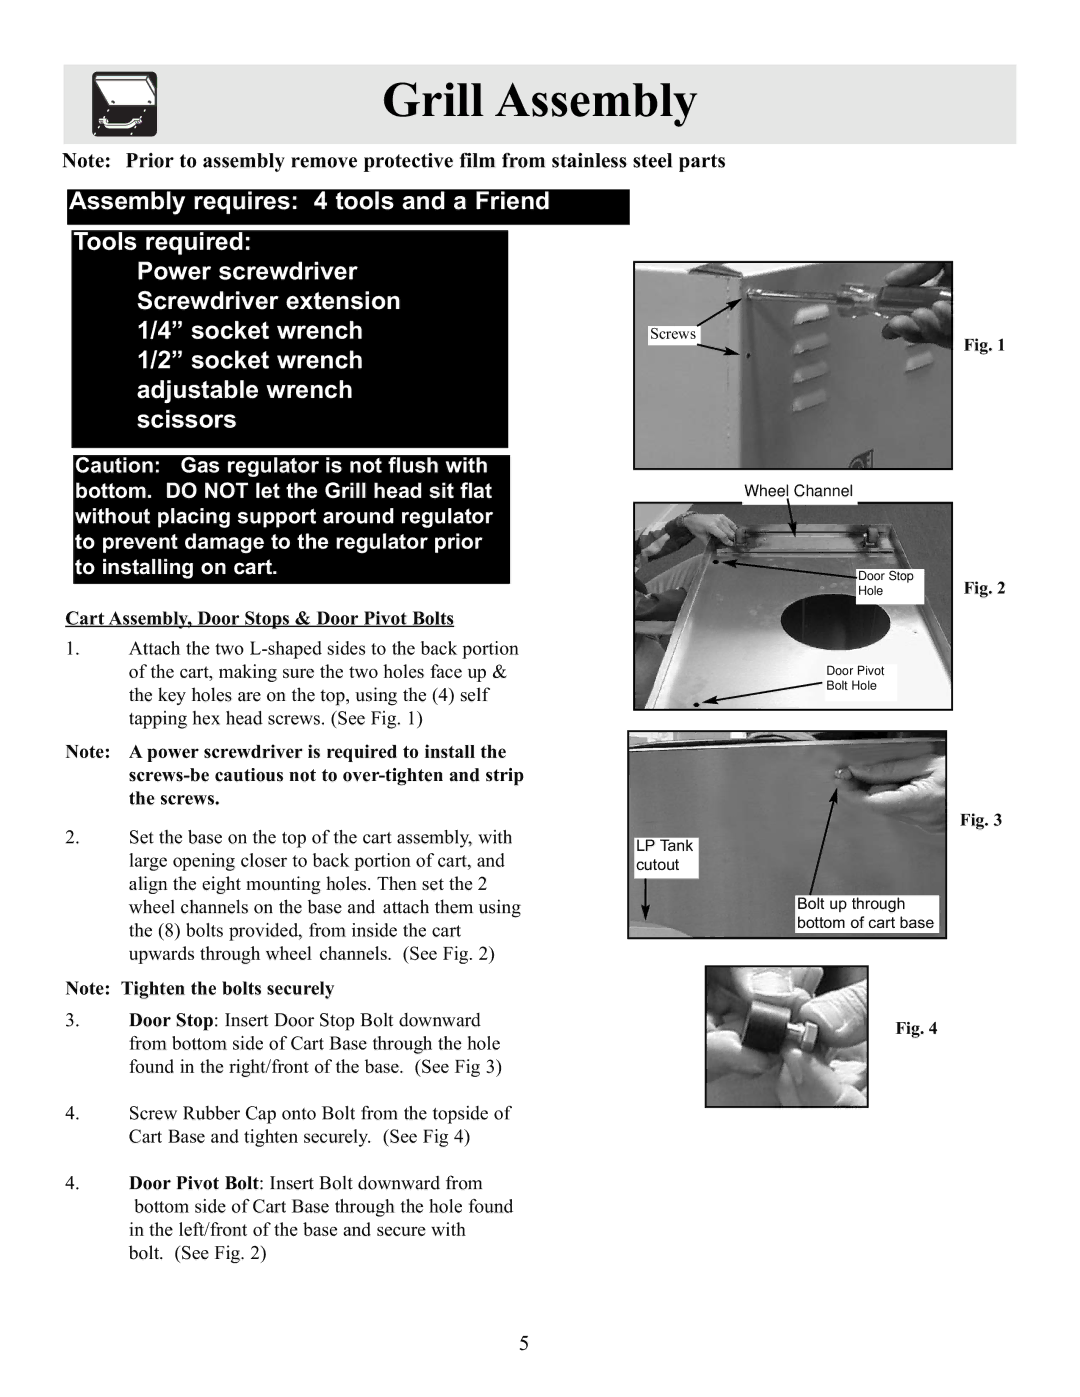
1.Attach the two
Note: A power screwdriver is required to install the
2.Set the base on the top of the cart assembly, with large opening closer to back portion of cart, and align the eight mounting holes. Then set the 2 wheel channels on the base and attach them using the (8) bolts provided, from inside the cart upwards through wheel channels. (See Fig. 2)
Note: Tighten the bolts securely
3.Door Stop: Insert Door Stop Bolt downward from bottom side of Cart Base through the hole found in the right/front of the base. (See Fig 3)
4.Screw Rubber Cap onto Bolt from the topside of Cart Base and tighten securely. (See Fig 4)
4.Door Pivot Bolt: Insert Bolt downward from bottom side of Cart Base through the hole found in the left/front of the base and secure with bolt. (See Fig. 2)
Screws
Wheel Channel
![]() Door Stop
Door Stop
Hole
Door Pivot
![]() Bolt Hole
Bolt Hole
LP Tank cutout
Bolt up through bottom of cart base
Fig. 4
Fig. 1
Fig. 2
Fig. 3
5