LCD status display
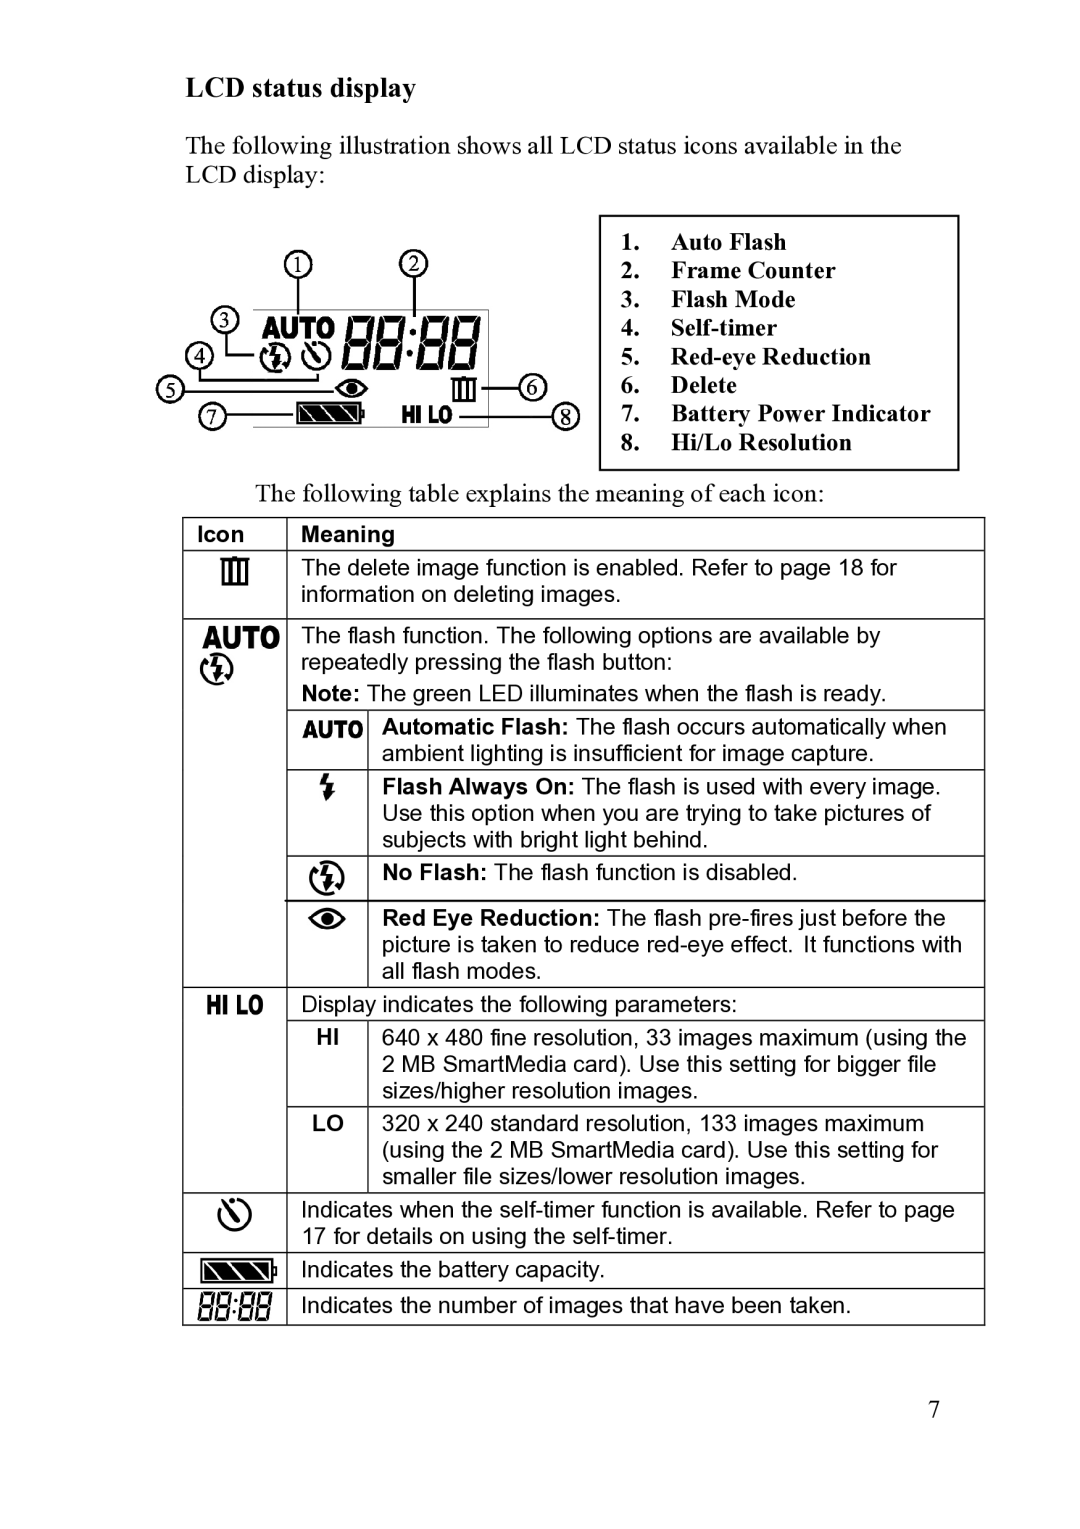
The following illustration shows all LCD status icons available in the LCD display:
1. Auto Flash
2. Frame Counter
3. Flash Mode
4.
5.
6. Delete
7. Battery Power Indicator
8. Hi/Lo Resolution
The following table explains the meaning of each icon:
Icon | Meaning | ||
|
| The delete image function is enabled. Refer to page 18 for | |
|
| information on deleting images. | |
|
|
|
|
|
| The flash function. The following options are available by | |
|
| repeatedly pressing the flash button: | |
|
| Note: The green LED illuminates when the flash is ready. | |
|
|
| Automatic Flash: The flash occurs automatically when |
|
|
| ambient lighting is insufficient for image capture. |
|
|
| Flash Always On: The flash is used with every image. |
|
|
| Use this option when you are trying to take pictures of |
|
|
| subjects with bright light behind. |
|
|
| No Flash: The flash function is disabled. |
|
|
|
|
|
|
| Red Eye Reduction: The flash |
|
|
| picture is taken to reduce |
|
|
| all flash modes. |
|
| Display indicates the following parameters: | |
|
| HI | 640 x 480 fine resolution, 33 images maximum (using the |
|
|
| 2 MB SmartMedia card). Use this setting for bigger file |
|
|
| sizes/higher resolution images. |
|
| LO | 320 x 240 standard resolution, 133 images maximum |
|
|
| (using the 2 MB SmartMedia card). Use this setting for |
|
|
| smaller file sizes/lower resolution images. |
|
| Indicates when the | |
|
| 17 for details on using the | |
|
| Indicates the battery capacity. | |
|
|
| |
|
| Indicates the number of images that have been taken. | |
|
|
|
|
7
