1. INSTALLATION
Hailer horn (local supply)
Mount the hailer horns (local supply) facing away from the Loud Hailer to prevent feedback. They should also be pointed in the opposite direction of the microphone as you are speaking into it. Before mounting any horn, you should test it with the HAIL feature with the horn in the desired location to check for suitability of mounting location.
Connect horns to the Loud Hailer with cable type
Burglar alarm (local supply)
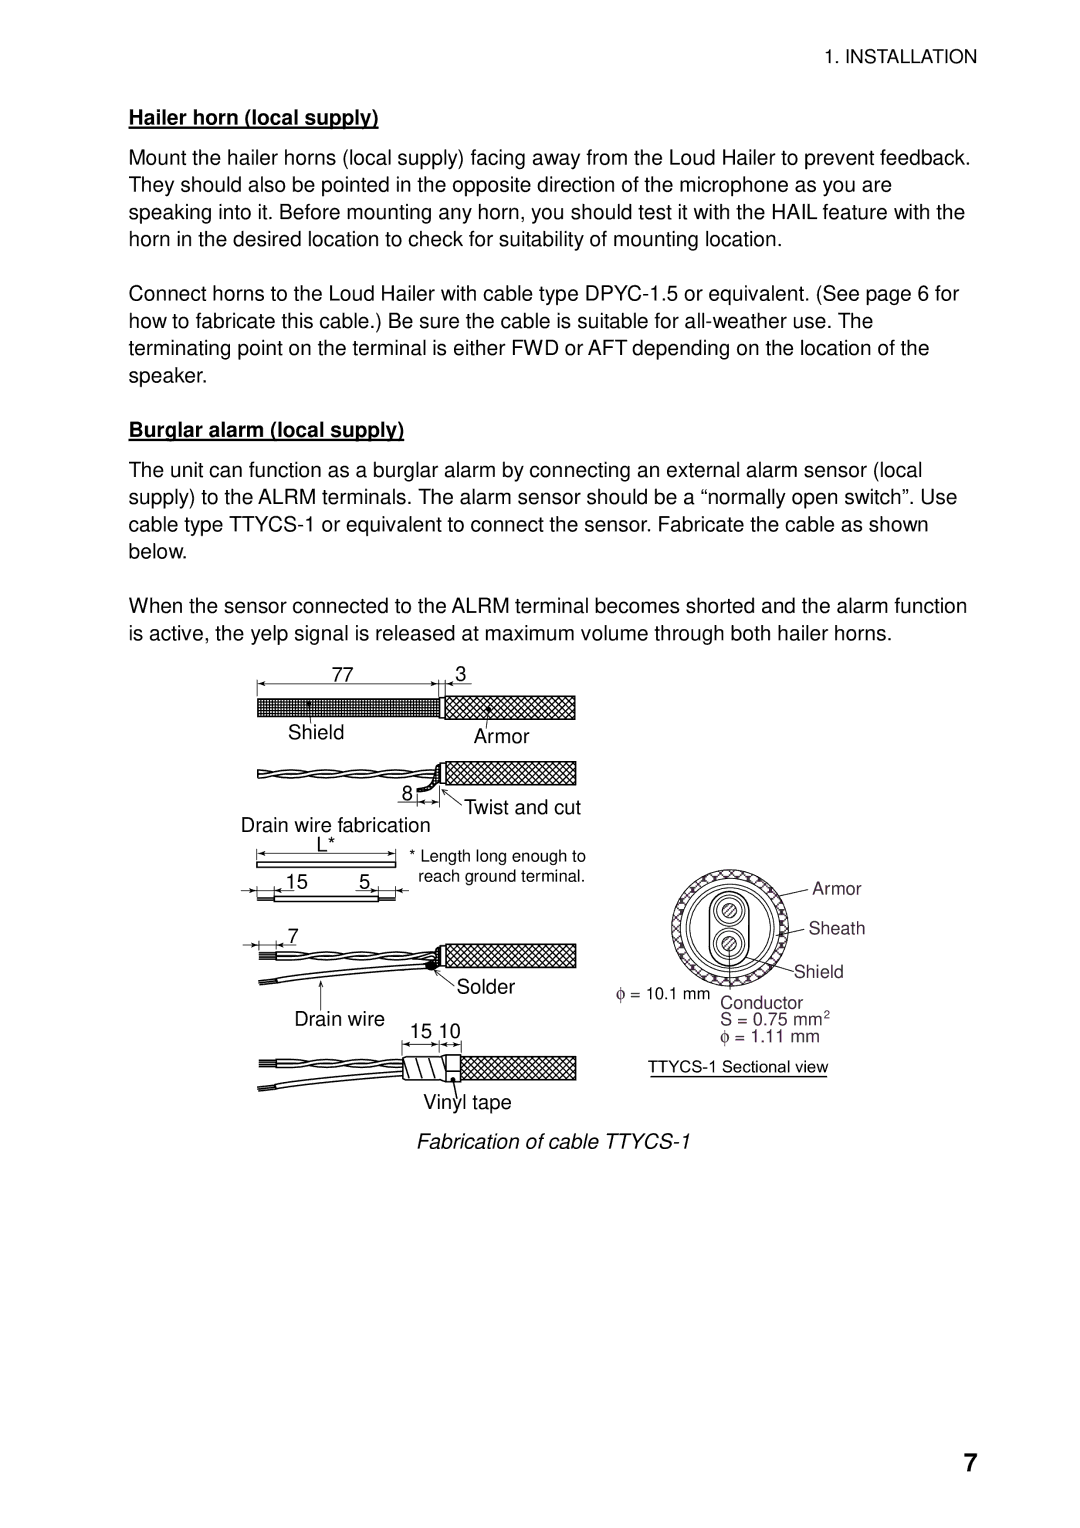
The unit can function as a burglar alarm by connecting an external alarm sensor (local supply) to the ALRM terminals. The alarm sensor should be a “normally open switch”. Use cable type
When the sensor connected to the ALRM terminal becomes shorted and the alarm function is active, the yelp signal is released at maximum volume through both hailer horns.
77 | 3 |
ShieldArmor
8![]()
Drain wire fabrication
Twist and cut
L*
* Length long enough to
15 | 5 | reach ground terminal. |
Armor |
7 |
|
| Sheath |
|
|
| |
| Solder | φ | Shield |
| = 10.1 mm Conductor | ||
Drain wire |
| ||
15 10 |
| S = 0.75 mm2 | |
|
| φ = 1.11 mm | |
|
|
|
Vinyl tape
Fabrication of cable TTYCS-1
7