G
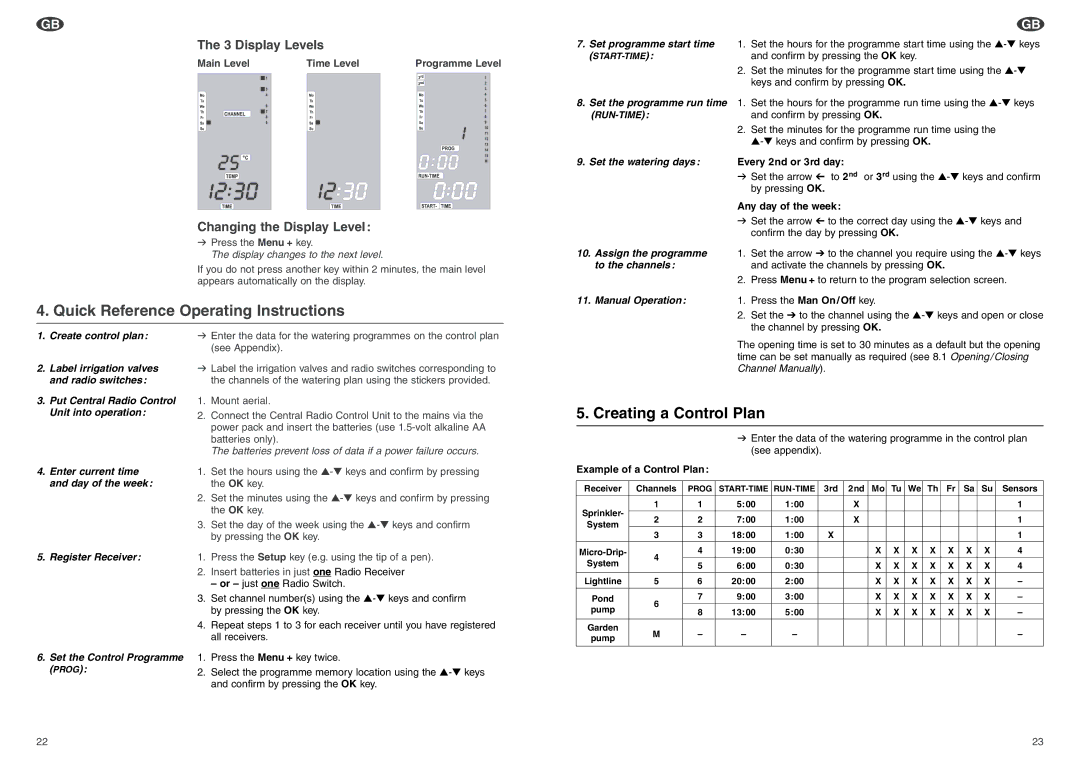
The 3 Display Levels
Main Level | Time Level | Programme Level |
Changing the Display Level:
vPress the Menu + key.
The display changes to the next level.
If you do not press another key within 2 minutes, the main level appears automatically on the display.
4. Quick Reference Operating Instructions
G
7.Set programme start time 1. Set the hours for the programme start time using the
and confirm by pressing the OK key. |
2.Set the minutes for the programme start time using the
8.Set the programme run time 1. Set the hours for the programme run time using the
and confirm by pressing OK. |
2.Set the minutes for the programme run time using the
9. Set the watering days: | Every 2nd or 3rd day: |
| v Set the arrow L to 2nd or 3rd using the |
| by pressing OK. |
Any day of the week:
vSet the arrow L to the correct day using the
10.Assign the programme 1. Set the arrow V to the channel you require using the
to the channels:and activate the channels by pressing OK.
2. Press Menu + to return to the program selection screen.
11. Manual Operation: | 1. | Press the Man On/Off key. |
| 2. | Set the V to the channel using the |
|
| the channel by pressing OK. |
1.Create control plan:
2.Label irrigation valves and radio switches:
3.Put Central Radio Control Unit into operation:
4.Enter current time and day of the week:
5.Register Receiver:
6.Set the Control Programme (PROG):
vEnter the data for the watering programmes on the control plan (see Appendix).
vLabel the irrigation valves and radio switches corresponding to the channels of the watering plan using the stickers provided.
1.Mount aerial.
2.Connect the Central Radio Control Unit to the mains via the power pack and insert the batteries (use
The batteries prevent loss of data if a power failure occurs.
1.Set the hours using the
2.Set the minutes using the
3.Set the day of the week using the
1.Press the Setup key (e.g. using the tip of a pen).
2.Insert batteries in just one Radio Receiver
– or – just one Radio Switch.
3.Set channel number(s) using the
4.Repeat steps 1 to 3 for each receiver until you have registered all receivers.
1.Press the Menu + key twice.
2.Select the programme memory location using the
The opening time is set to 30 minutes as a default but the opening time can be set manually as required (see 8.1 Opening/Closing Channel Manually).
5.Creating a Control Plan
v Enter the data of the watering programme in the control plan (see appendix).
Example of a Control Plan:
Receiver | Channels | PROG |
| RUN | 3rd | 2nd | Mo | Tu | We | Th | Fr | Sa | Su | Sensors |
|
|
|
|
|
|
|
|
|
|
|
|
|
|
|
Sprinkler- | 1 | 1 | 5:00 | 1:00 |
| X |
|
|
|
|
|
|
| 1 |
|
|
|
|
|
|
|
|
|
|
|
|
|
| |
2 | 2 | 7:00 | 1:00 |
| X |
|
|
|
|
|
|
| 1 | |
System |
|
|
|
|
|
|
|
| ||||||
|
|
|
|
|
|
|
|
|
|
|
|
|
| |
3 | 3 | 18:00 | 1:00 | X |
|
|
|
|
|
|
|
| 1 | |
|
|
|
|
|
|
|
|
| ||||||
|
|
|
|
|
|
|
|
|
|
|
|
|
|
|
4 | 4 | 19:00 | 0:30 |
|
| X | X | X | X | X | X | X | 4 | |
System | 5 | 6:00 | 0:30 |
|
| X | X | X | X | X | X | X | 4 | |
|
|
| ||||||||||||
|
|
|
|
|
|
|
|
|
|
|
|
|
|
|
Lightline | 5 | 6 | 20:00 | 2:00 |
|
| X | X | X | X | X | X | X | – |
|
|
|
|
|
|
|
|
|
|
|
|
|
|
|
Pond | 6 | 7 | 9:00 | 3:00 |
|
| X | X | X | X | X | X | X | – |
pump | 8 | 13:00 | 5:00 |
|
| X | X | X | X | X | X | X | – | |
|
|
| ||||||||||||
|
|
|
|
|
|
|
|
|
|
|
|
|
|
|
Garden | M | – | – | – |
|
|
|
|
|
|
|
|
| – |
pump |
|
|
|
|
|
|
|
|
| |||||
|
|
|
|
|
|
|
|
|
|
|
|
|
| |
|
|
|
|
|
|
|
|
|
|
|
|
|
|
|
22 | 23 |