G
8. Special Functions
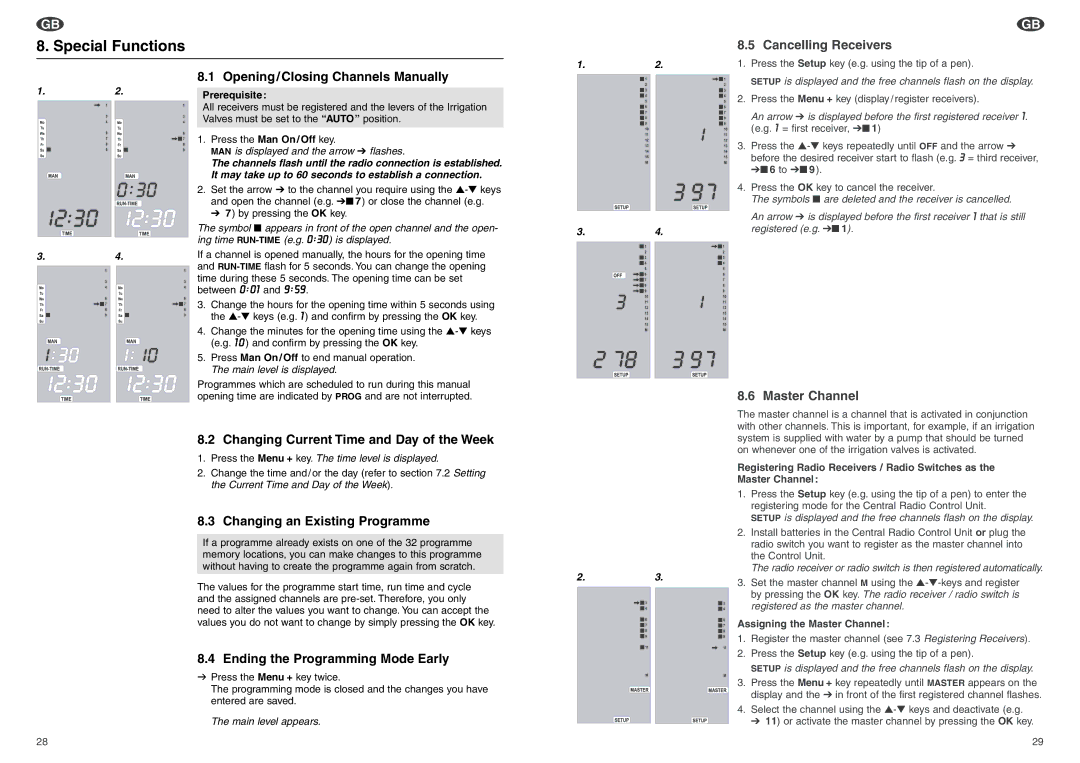
8.1 Opening/Closing Channels Manually
1. | 2. | Prerequisite: |
|
| |
|
| All receivers must be registered and the levers of the Irrigation |
|
| Valves must be set to the “AUTO” position. |
|
| 1. Press the Man On/Off key. |
|
| MAN is displayed and the arrow V flashes. |
|
| The channels flash until the radio connection is established. |
|
| It may take up to 60 seconds to establish a connection. |
|
| 2. Set the arrow V to the channel you require using the |
|
| and open the channel (e.g. V■ 7) or close the channel (e.g. |
|
| V 7) by pressing the OK key. |
|
| The symbol ■ appears in front of the open channel and the open- |
|
| ing time |
3. | 4. | If a channel is opened manually, the hours for the opening time |
|
| and |
time during these 5 seconds. The opening time can be set between 0 : 01 and 9 : 59 .
3. Change the hours for the opening time within 5 seconds using the
4. Change the minutes for the opening time using the
5. Press Man On/Off to end manual operation. The main level is displayed.
Programmes which are scheduled to run during this manual opening time are indicated by PROG and are not interrupted.
8.2 Changing Current Time and Day of the Week
1.Press the Menu + key. The time level is displayed.
2.Change the time and/or the day (refer to section 7.2 Setting the Current Time and Day of the Week).
8.3 Changing an Existing Programme
If a programme already exists on one of the 32 programme memory locations, you can make changes to this programme without having to create the programme again from scratch.
The values for the programme start time, run time and cycle and the assigned channels are
8.4 Ending the Programming Mode Early
vPress the Menu + key twice.
The programming mode is closed and the changes you have entered are saved.
The main level appears.
28
G
8.5 Cancelling Receivers
1. | 2. | 1. | Press the Setup key (e.g. using the tip of a pen). |
|
|
| SETUP is displayed and the free channels flash on the display. |
|
| 2. | Press the Menu + key (display/register receivers). |
|
|
| An arrow V is displayed before the first registered receiver 1. |
|
|
| (e.g. 1 = first receiver, V■ 1) |
|
| 3. | Press the |
|
|
| before the desired receiver start to flash (e.g. 3 = third receiver, |
|
|
| V■ 6 to V■ 9 ). |
|
| 4. | Press the OK key to cancel the receiver. |
|
|
| The symbols ■ are deleted and the receiver is cancelled. |
|
|
| An arrow V is displayed before the first receiver 1 that is still |
3. | 4. |
| registered (e.g. V■ 1). |
|
|
8.6 Master Channel
The master channel is a channel that is activated in conjunction with other channels. This is important, for example, if an irrigation system is supplied with water by a pump that should be turned on whenever one of the irrigation valves is activated.
Registering Radio Receivers / Radio Switches as the
Master Channel:
1.Press the Setup key (e.g. using the tip of a pen) to enter the registering mode for the Central Radio Control Unit.
SETUP is displayed and the free channels flash on the display.
2.Install batteries in the Central Radio Control Unit or plug the radio switch you want to register as the master channel into the Control Unit.
The radio receiver or radio switch is then registered automatically.
2. | 3. | 3. | Set the master channel M using the |
|
| ||
|
|
| by pressing the OK key. The radio receiver / radio switch is |
|
|
| registered as the master channel. |
|
| Assigning the Master Channel: | |
|
| 1. | Register the master channel (see 7.3 Registering Receivers). |
2.Press the Setup key (e.g. using the tip of a pen).
SETUP is displayed and the free channels flash on the display.
3.Press the Menu + key repeatedly until MASTER appears on the display and the V in front of the first registered channel flashes.
4.Select the channel using the
V 11) or activate the master channel by pressing the OK key.
29