G
8.7 Changing the Default Manual Opening Time
|
| The default value for the manual opening time can be set | ||
3. | 4. | between 0 :01 and 9 :59 . The Central Radio Control Unit is | ||
|
| |||
|
| 1. | Press the Setup key (e.g. using the tip of a pen). | |
|
|
| SETUP is displayed and the free channels flash on the display. | |
|
| 2. | Press and hold down the Man On/Off key for approx. | |
|
|
| 3 seconds. | |
|
|
| MAN and | |
|
|
| time flash. | |
|
| 3. | Set the hours for the opening time using the | |
|
|
| (e.g. 1 ) and confirm by pressing the OK key. | |
|
| 4. | Set the minutes for the opening time using the | |
G
3. | 4. | 3. | Set the arrow V to the sensor you require (e.g. V 7 = |
|
|
| sensor 7) using the |
|
|
| channel (e.g. V■ 7 ) by pressing the OK key. |
|
| 4. | Once you have assigned all the sensors you require (e.g. ■ 1 |
|
|
| and ■ 7 ), to the channel (e.g. channel 9 ) press the Menu +. |
The display then changes to point 2 again and the channel and the sensors assigned to this channel are displayed.
8.10 Temperature Sensor
(e.g. 10 ) and confirm by pressing the OK key. |
8.8 Changing the PIN
1.2.
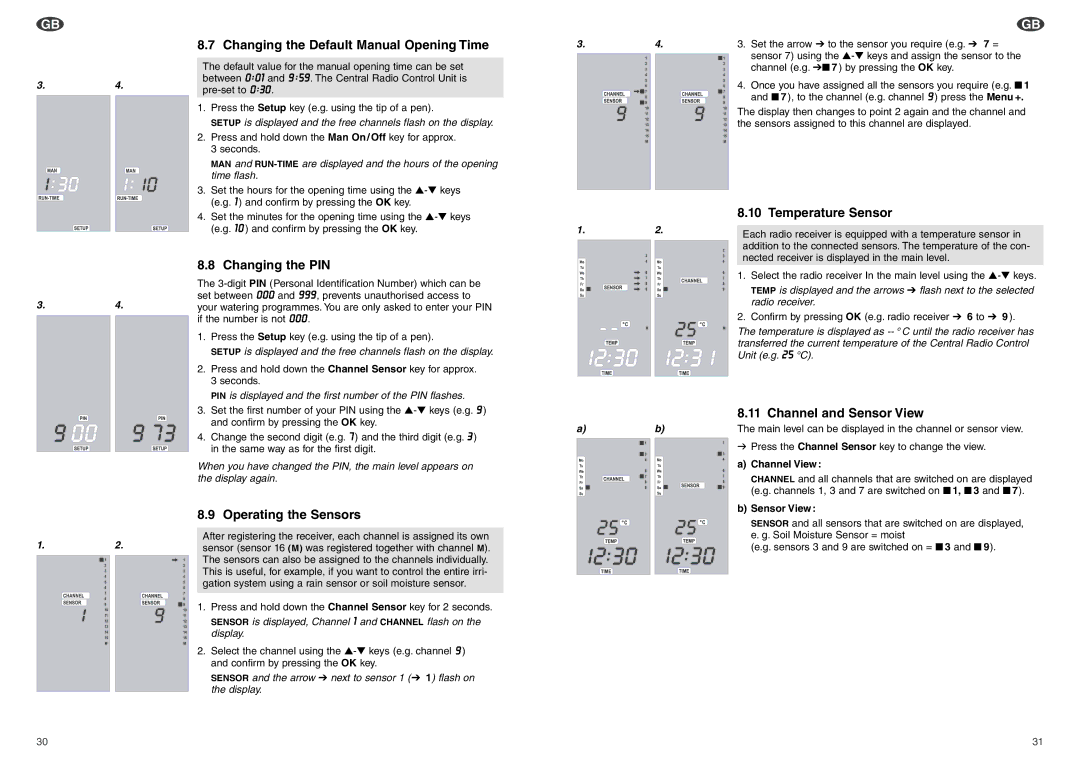
Each radio receiver is equipped with a temperature sensor in addition to the connected sensors. The temperature of the con- nected receiver is displayed in the main level.
|
| The | |
3. | 4. | set between 000 and 999 , prevents unauthorised access to | |
your watering programmes. You are only asked to enter your PIN | |||
|
| if the number is not 000 . | |
|
| 1. | Press the Setup key (e.g. using the tip of a pen). |
|
|
| SETUP is displayed and the free channels flash on the display. |
|
| 2. | Press and hold down the Channel Sensor key for approx. |
|
|
| 3 seconds. |
|
|
| PIN is displayed and the first number of the PIN flashes. |
|
| 3. | Set the first number of your PIN using the |
|
|
| and confirm by pressing the OK key. |
4. Change the second digit (e.g. 7 ) and the third digit (e.g. 3 )
|
| in the same way as for the first digit. |
|
| When you have changed the PIN, the main level appears on |
|
| the display again. |
|
| 8.9 Operating the Sensors |
1. | 2. | After registering the receiver, each channel is assigned its own |
sensor (sensor 16 (M) was registered together with channel M). |
The sensors can also be assigned to the channels individually. This is useful, for example, if you want to control the entire irri- gation system using a rain sensor or soil moisture sensor.
1. Press and hold down the Channel Sensor key for 2 seconds.
SENSOR is displayed, Channel 1 and CHANNEL flash on the display.
2.Select the channel using the
SENSOR and the arrow V next to sensor 1 (V 1) flash on the display.
1. Select the radio receiver In the main level using the
TEMP is displayed and the arrows V flash next to the selected radio receiver.
2. Confirm by pressing OK (e.g. radio receiver V 6 to V 9 ).
The temperature is displayed as
|
| 8.11 Channel and Sensor View |
a) | b) | The main level can be displayed in the channel or sensor view. |
|
| v Press the Channel Sensor key to change the view. |
|
| a) Channel View: |
|
| CHANNEL and all channels that are switched on are displayed |
|
| (e.g. channels 1, 3 and 7 are switched on ■ 1, ■ 3 and ■ 7). |
|
| b) Sensor View: |
|
| SENSOR and all sensors that are switched on are displayed, |
|
| e. g. Soil Moisture Sensor = moist |
|
| (e.g. sensors 3 and 9 are switched on = ■ 3 and ■ 9). |
30 | 31 |