WALL MOUNT INSTALLATION
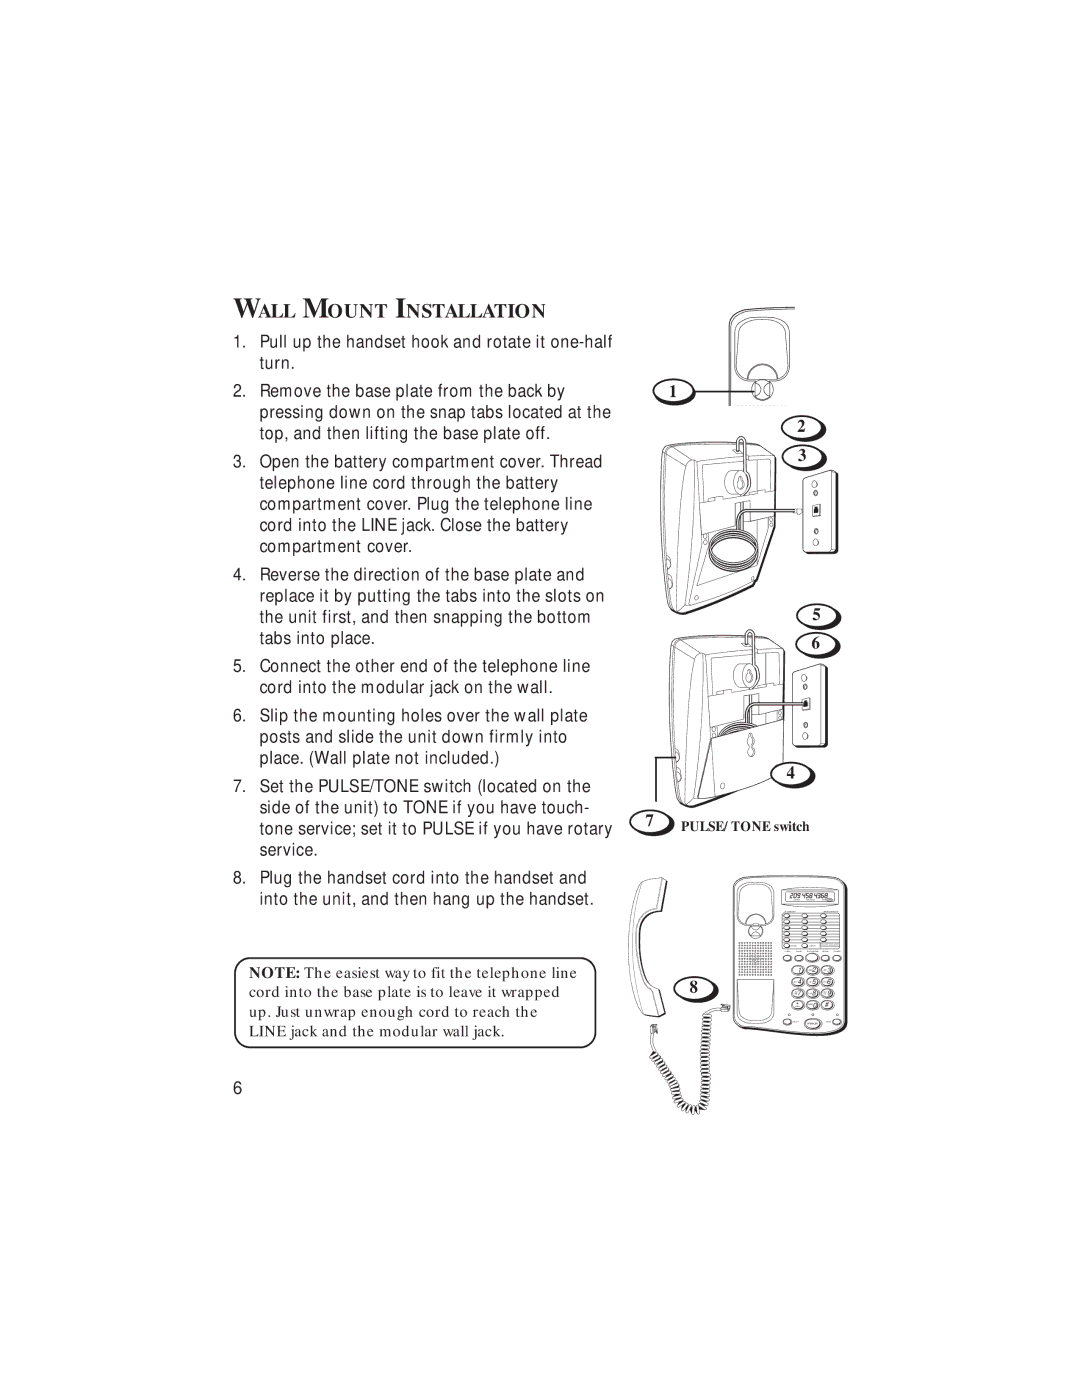
1.Pull up the handset hook and rotate it
2.Remove the base plate from the back by pressing down on the snap tabs located at the top, and then lifting the base plate off.
3.Open the battery compartment cover. Thread telephone line cord through the battery compartment cover. Plug the telephone line cord into the LINE jack. Close the battery compartment cover.
4.Reverse the direction of the base plate and replace it by putting the tabs into the slots on the unit first, and then snapping the bottom tabs into place.
5.Connect the other end of the telephone line cord into the modular jack on the wall.
6.Slip the mounting holes over the wall plate posts and slide the unit down firmly into place. (Wall plate not included.)
7.Set the PULSE/TONE switch (located on the side of the unit) to TONE if you have touch-
tone service; set it to PULSE if you have rotary | 7 |
| |
service. |
|
8.Plug the handset cord into the handset and into the unit, and then hang up the handset.
NOTE: The easiest way to fit the telephone line cord into the base plate is to leave it wrapped up. Just unwrap enough cord to reach the LINE jack and the modular wall jack.
6
1
2
3
5
6
![]() 4
4
PULSE/TONE switch
| LOWER | SPEAKER | ABR LOW |
|
32 MEMORY |
| SPEAKER PHONE | ||
| STORE | LOWER |
|
|
FLASH | PAUSE | BUSY/REDIAL | REDIAL | ALARM |
| 1 | ABC2 | DEF 3 |
|
8 | GHI 4 | JKL5 | MNO6 |
|
PQ | TUV8 | WX |
| |
RS 7 | YZ 9 |
| ||
| * | 0 | # |
|
|
| OPER |
|
|
| TONE |
|
|
|
| MUTE | SPEAKER | HOLD |
|
|
|
|
| |
