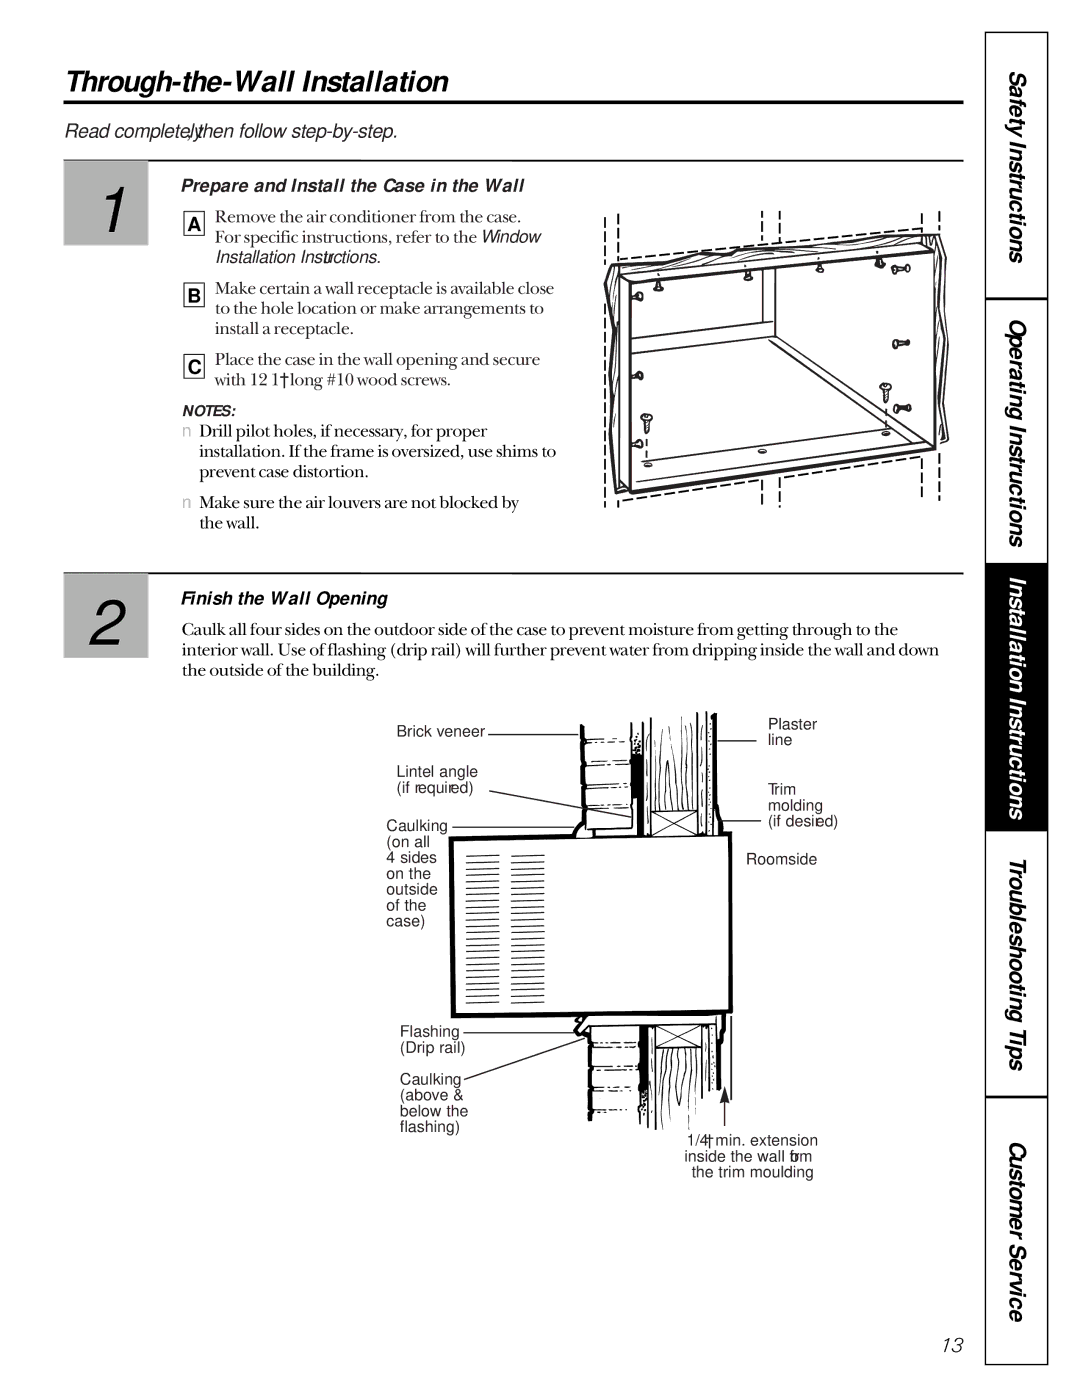
AMH10, AMH12 specifications
The GE AMH12 and AMH10 are sophisticated air handling units designed for a variety of commercial and industrial applications. These units are particularly known for their efficiency, versatility, and advanced features, making them suitable for maintaining optimal indoor air quality in a wide range of environments.One of the standout features of the GE AMH12 and AMH10 models is their modular design. This allows for easy customization to meet specific air handling requirements, whether for a large commercial space or a smaller facility. The modular construction also simplifies transportation, installation, and future expansion.
Both the AMH12 and AMH10 units are equipped with high-efficiency EC fans that significantly reduce energy consumption while ensuring optimal air circulation. These fans operate quietly, making them ideal for noise-sensitive environments like schools, hospitals, and offices. The improved energy efficiency not only helps in reducing operational costs but also contributes to environmental sustainability.
In terms of technologies, both models use advanced controls that allow for precise management of temperature and humidity levels. The intuitive interface enables users to monitor and adjust settings remotely, enhancing convenience and operational efficiency. Additionally, the units are equipped with smart sensors that detect changes in the indoor air quality, triggering automatic adjustments to maintain a comfortable environment.
The AMH12 and AMH10 also feature advanced filtration systems that effectively capture airborne particulates, allergens, and pollutants. Their multi-stage filtration process ensures that the air circulated within buildings is clean and healthy, promoting better health and productivity for occupants.
Another notable characteristic of these units is their compatibility with various HVAC systems, enabling them to integrate seamlessly into existing setups. Both models can be configured for fresh air intake, helping to improve air quality further by reducing the concentration of indoor air pollutants.
Reliability and durability are also hallmarks of the GE AMH12 and AMH10. Constructed with high-quality materials and designed to withstand demanding indoor conditions, these units require minimal maintenance while providing consistent performance over time.
In conclusion, the GE AMH12 and AMH10 air handling units exemplify modern HVAC technology, combining efficiency, customizable design, and cutting-edge features. Their capabilities make them an excellent choice for facilities aiming for superior air quality and energy savings.

