
ED5KVEXVQ, GARF19XXYK specifications
The GE GARF19XXYK,ED5KVEXVQ is a state-of-the-art appliance that combines cutting-edge technology with exceptional functionality, making it an ideal addition to modern kitchens. One of its standout features is the innovative energy-efficient design which not only reduces electricity consumption but also contributes to lower utility bills. This appliance is built with the latest energy-saving technologies that comply with stringent energy standards, ensuring that it is both environmentally friendly and cost-effective.The GARF19XXYK,ED5KVEXVQ offers a spacious interior that provides ample room for all your food storage needs. With adjustable shelving and a flexible layout, users can customize the interior to accommodate large items, such as party trays or bulk grocery purchases. The unit's capacity is perfect for families and home cooks alike, ensuring that you never run out of space for your favorite foods.
Another noteworthy feature of this model is its advanced cooling technology. Equipped with a reliable cooling system, the GARF19XXYK,ED5KVEXVQ maintains optimal temperature control, keeping your food fresher for longer. The multi-air flow technology ensures even cooling throughout the refrigerator, eliminating hot spots and preserving the quality of all stored items.
This appliance also boasts a user-friendly interface, allowing for easy temperature adjustments and settings to match your preferences. The digital display provides real-time information on the current temperature and allows users to make changes with ease. The included smart connectivity feature enables users to control and monitor their appliance remotely through a smartphone app, providing convenience and peace of mind.
In addition to its impressive functionality, the GE GARF19XXYK,ED5KVEXVQ is designed with an aesthetically appealing finish that complements any kitchen decor. Its sleek and modern look fits in seamlessly with other high-end kitchen appliances, enhancing the overall visual appeal of the space.
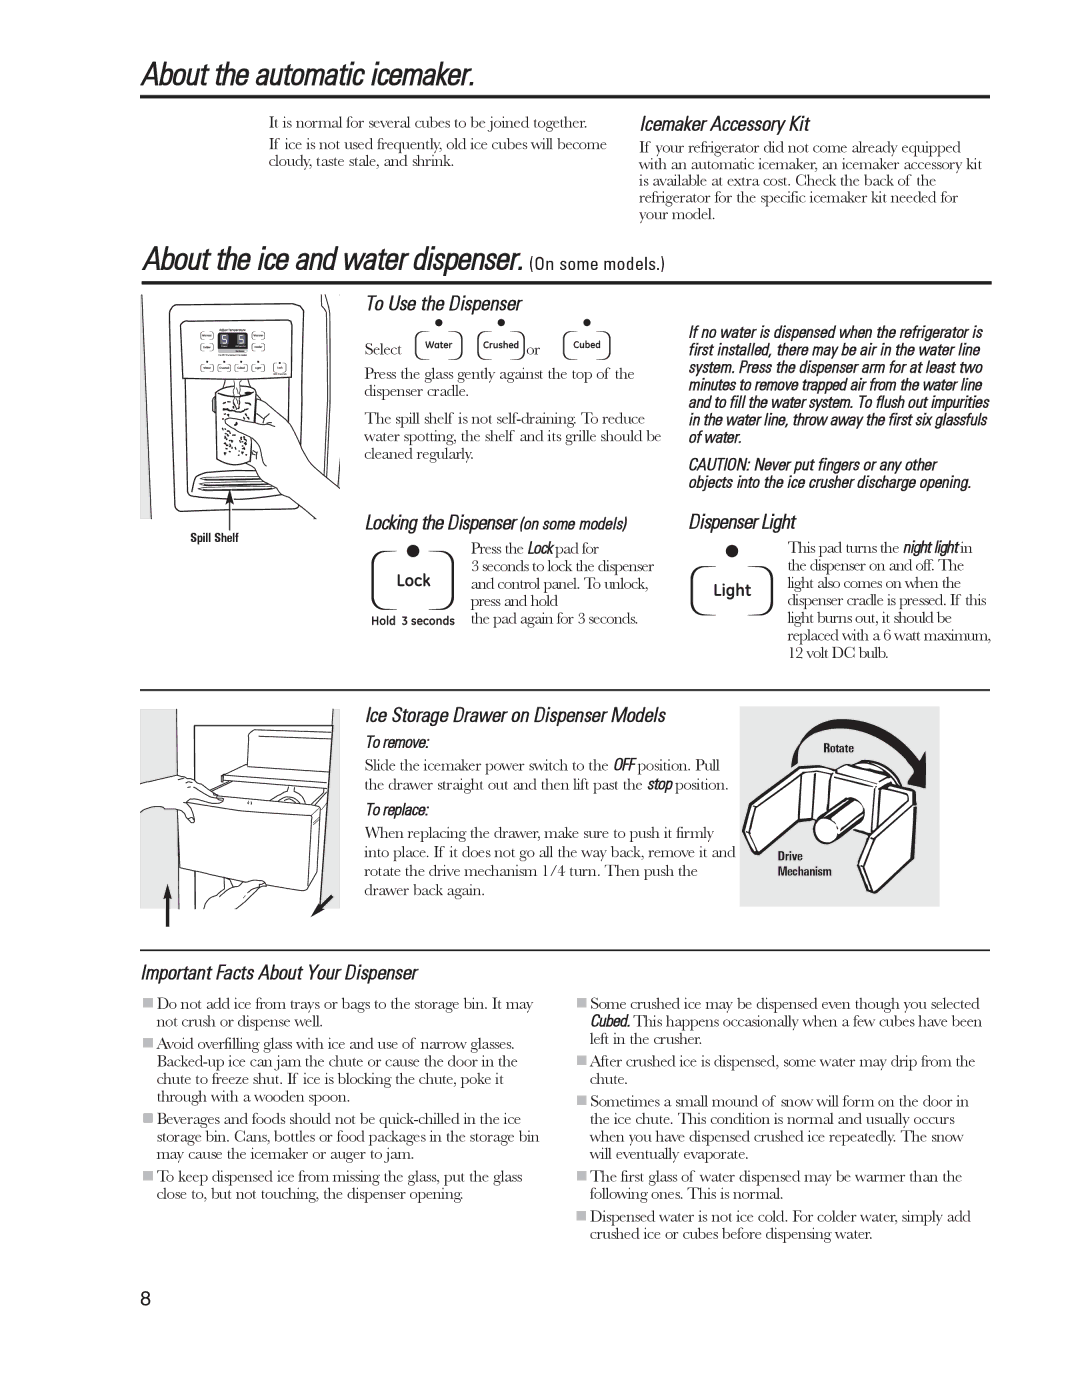
The built-in water and ice dispenser is another convenience feature, providing fresh and filtered water at the push of a button while ensuring that your family stays hydrated. The appliance also includes a variety of storage options like door bins and crisper drawers designed to keep fruits and vegetables fresher for longer while preventing spoilage.
Durability and reliability are hallmarks of the GE GARF19XXYK,ED5KVEXVQ, ensuring that it will be a staple in your home for years to come. With its combination of innovative technologies, user-centric features, and stylish design, this model redefines what consumers can expect from modern kitchen appliances.