Care and Cleaning
Proper care and cleaning are important so your range will give you efficient and satisfactory service. Follow these directions carefully in caring for your range to assure safe and proper maintenance.
Finishes
The porcelain enamel finish is sturdy but breakable if misused. This finish is
Lamp Replacement
(Model JAS03M)
CAUTION: Before replacing your oven lamp bulb, disconnect the electric power for your range
at the main fuse or circuit breaker panel. Be sure to let the bulb cool completely before removing or replacing it.
●Replace bulb with
●Connect electric power to range.
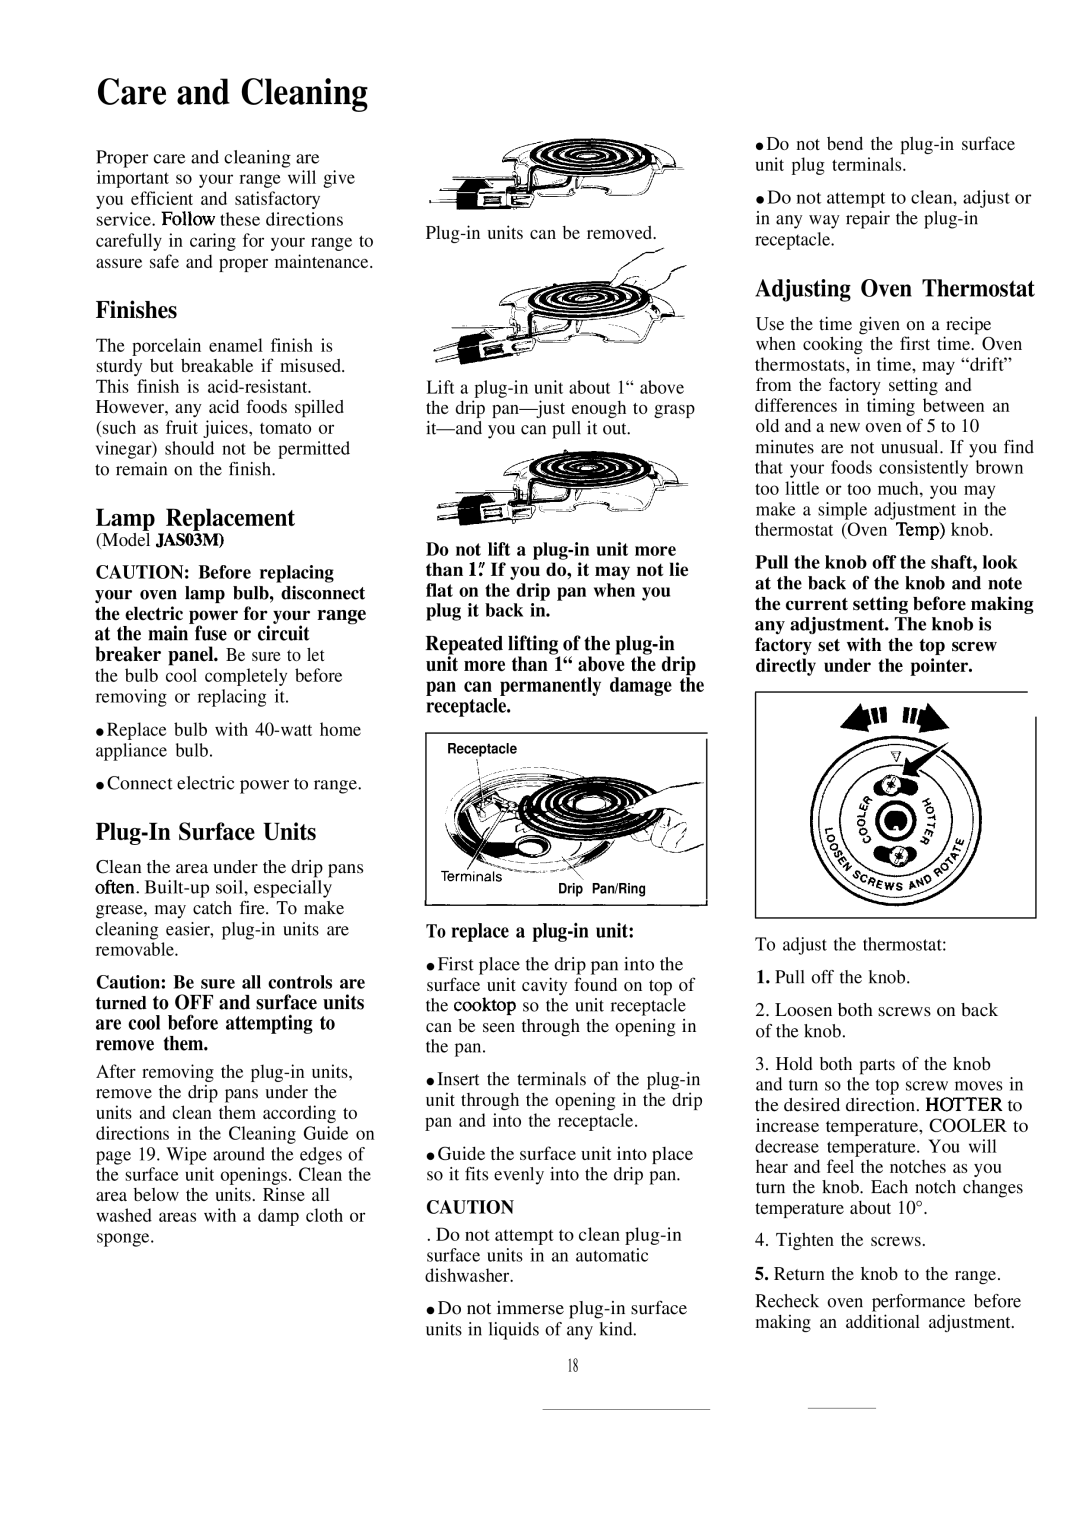
Plug-In Surface Units
Clean the area under the drip pans ofien.
Caution: Be sure all controls are
turned to OFF and surface units are cool before attempting to remove them.
After removing the
//
&!!!!!!*
Lift a
Do not lift a
Repeated lifting of the
Receptacle
Drip Pan/Ring
To replace a plug-in unit:
●First place the drip pan into the surface unit cavity found on top of the cooktop so the unit receptacle can be seen through the opening in the pan.
●Insert the terminals of the
●Guide the surface unit into place so it fits evenly into the drip pan.
CAUTION
. Do not attempt to clean
●Do not immerse
●Do not bend the
●Do not attempt to clean, adjust or in any way repair the
Adjusting Oven Thermostat
Use the time given on a recipe when cooking the first time. Oven thermostats, in time, may “drift” from the factory setting and differences in timing between an old and a new oven of 5 to 10 minutes are not unusual. If you find that your foods consistently brown too little or too much, you may make a simple adjustment in the thermostat (Oven Temp) knob.
Pull the knob off the shaft, look at the back of the knob and note the current setting before making any adjustment. The knob is factory set with the top screw directly under the pointer.
To adjust the thermostat:
1.Pull off the knob.
2.Loosen both screws on back of the knob.
3.Hold both parts of the knob and turn so the top screw moves in the desired direction. HOI’TER to increase temperature, COOLER to decrease temperature. You will hear and feel the notches as you turn the knob. Each notch changes temperature about 10°.
4.Tighten the screws.
5.Return the knob to the range.
Recheck oven performance before making an additional adjustment.
18