Installation Instructions
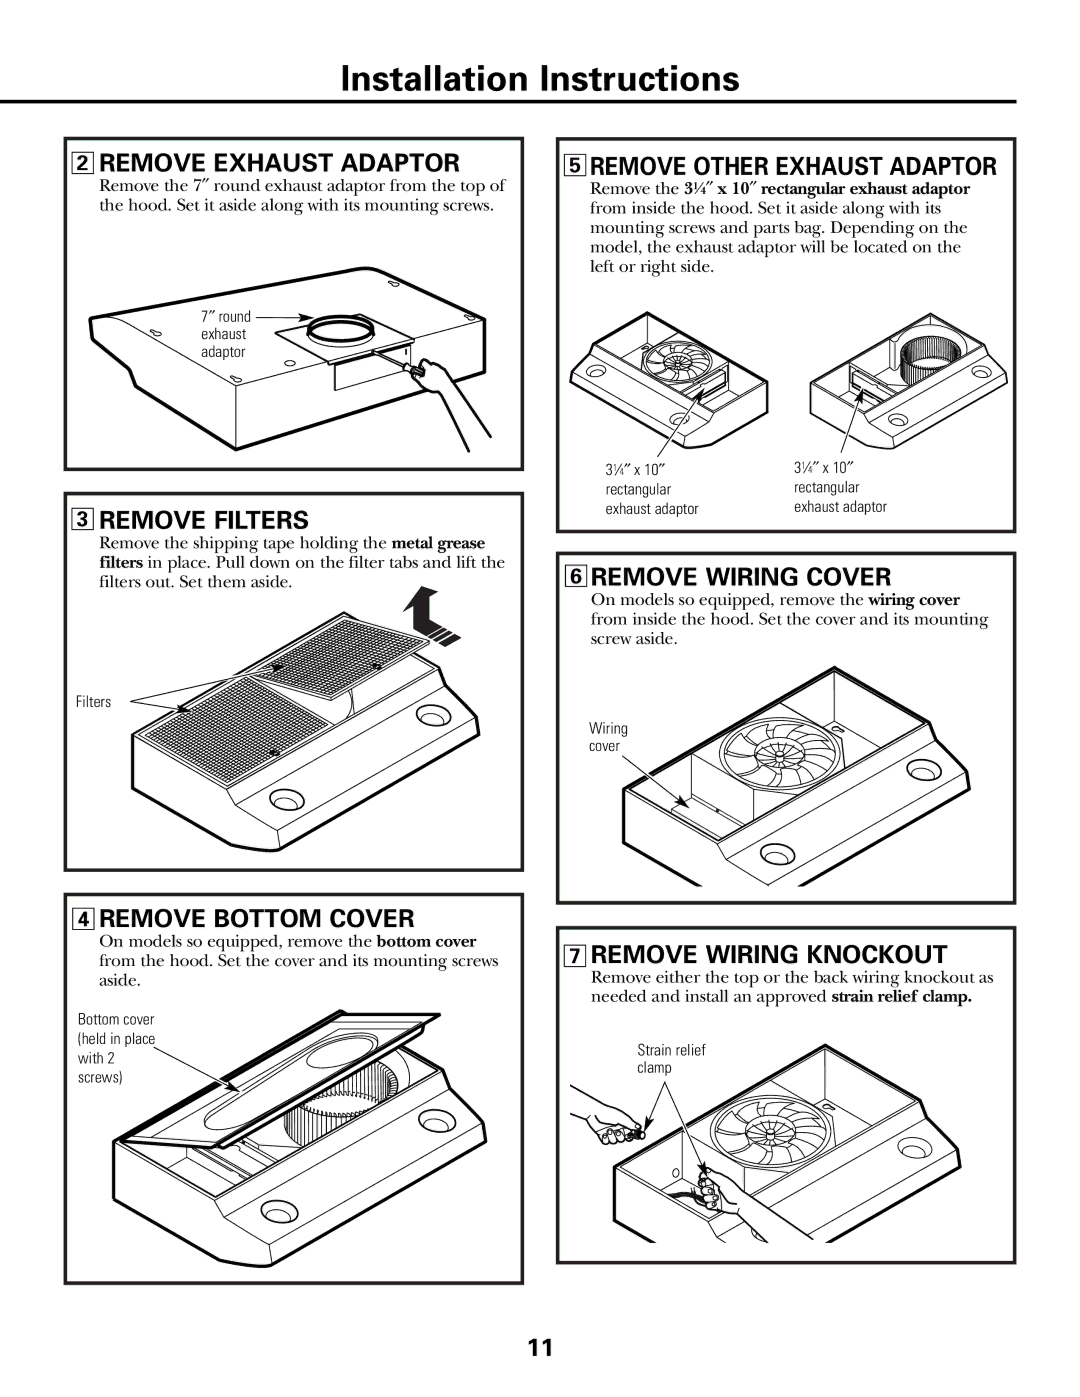
2REMOVE EXHAUST ADAPTOR
Remove the 7″ round exhaust adaptor from the top of the hood. Set it aside along with its mounting screws.
7″ round ![]() exhaust adaptor
exhaust adaptor
3REMOVE FILTERS
Remove the shipping tape holding the metal grease filters in place. Pull down on the filter tabs and lift the filters out. Set them aside.
Filters
5REMOVE OTHER EXHAUST ADAPTOR
Remove the 31⁄4″ x 10″ rectangular exhaust adaptor from inside the hood. Set it aside along with its mounting screws and parts bag. Depending on the model, the exhaust adaptor will be located on the left or right side.
31⁄4″ x 10″ | 31⁄4″ x 10″ |
rectangular | rectangular |
exhaust adaptor | exhaust adaptor |
6REMOVE WIRING COVER
On models so equipped, remove the wiring cover from inside the hood. Set the cover and its mounting screw aside.
Wiring cover
4REMOVE BOTTOM COVER
On models so equipped, remove the bottom cover from the hood. Set the cover and its mounting screws aside.
Bottom cover (held in place with 2 screws)
7REMOVE WIRING KNOCKOUT
Remove either the top or the back wiring knockout as needed and install an approved strain relief clamp.
Strain relief clamp
11
