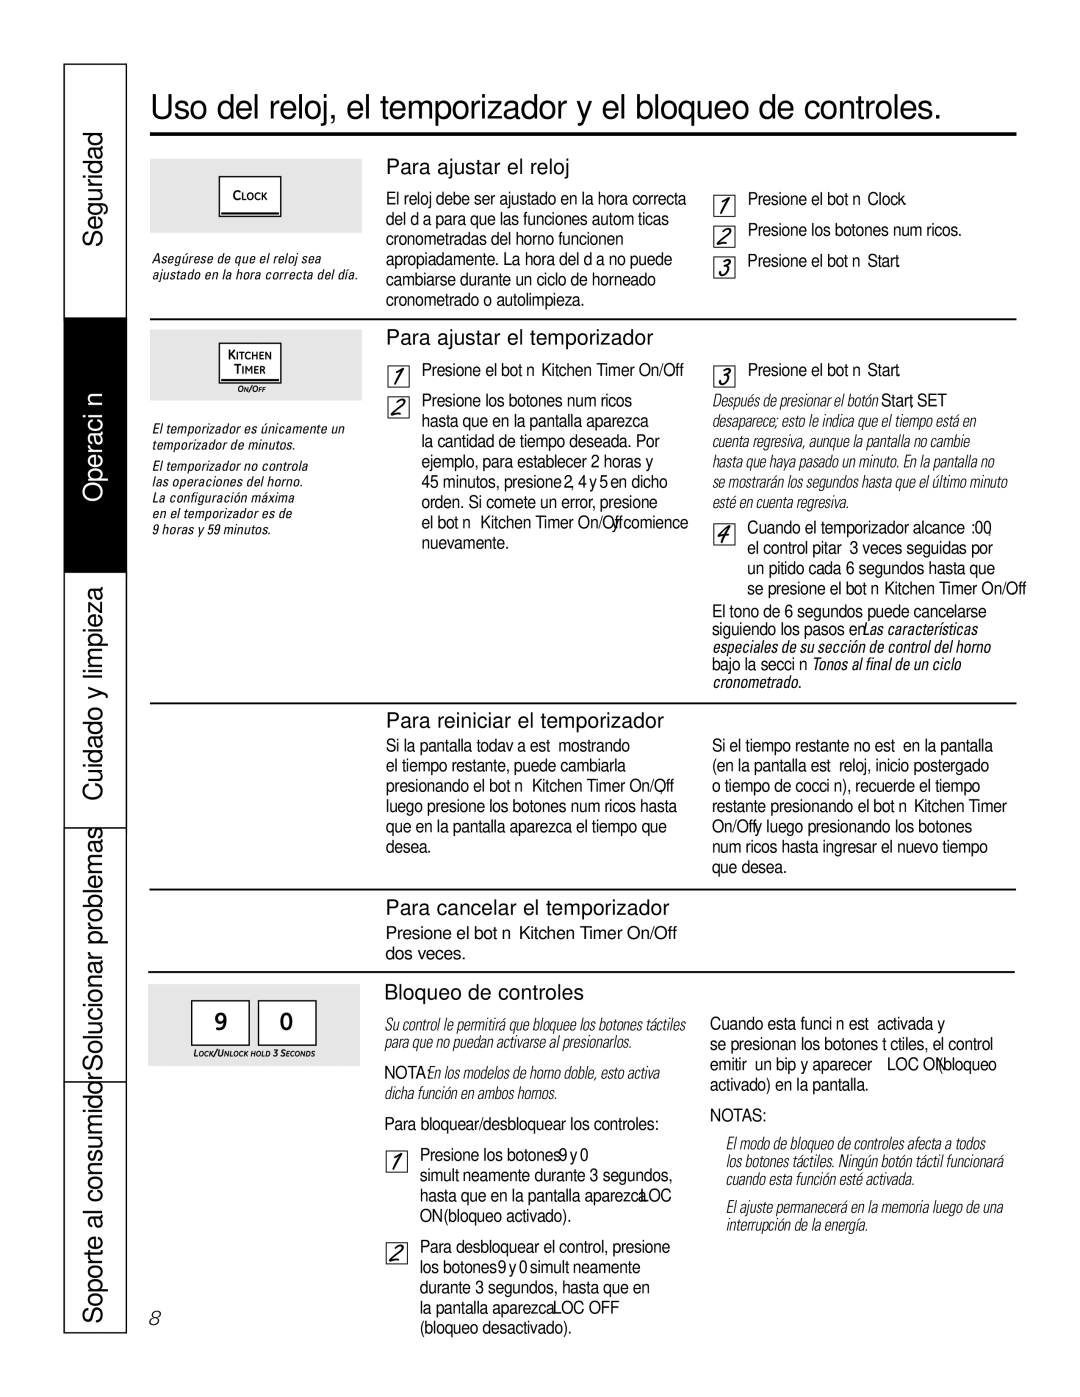
Uso del reloj, el temporizador y el bloqueo de controles.

Seguridad

Asegúrese de que el reloj sea ajustado en la hora correcta del día.

Para ajustar el reloj

El reloj debe ser ajustado en la hora correcta del día para que las funciones automáticas cronometradas del horno funcionen apropiadamente. La hora del día no puede cambiarse durante un ciclo de horneado cronometrado o autolimpieza.

Presione el botón Clock. Presione los botones numéricos. Presione el botón Start.

Operación

y limpieza

El temporizador es únicamente un temporizador de minutos.

El temporizador no controla las operaciones del horno. La configuración máxima en el temporizador es de

9 horas y 59 minutos.

Para ajustar el temporizador

Presione el botón Kitchen Timer On/Off.


Presione el botón Start.


Presione los botones numéricos

Después de presionar el botón Start, SET

hasta que en la pantalla aparezca

desaparece; esto le indica que el tiempo está en

la cantidad de tiempo deseada. Por

cuenta regresiva, aunque la pantalla no cambie

ejemplo, para establecer 2 horas y

hasta que haya pasado un minuto. En la pantalla no

45 minutos, presione 2, 4 y 5 en dicho

se mostrarán los segundos hasta que el último minuto

orden. Si comete un error, presione

esté en cuenta regresiva.

el botón Kitchen Timer On/Off y comience


Cuando el temporizador alcance :00,


nuevamente.


el control pitará 3 veces seguidas por


un pitido cada 6 segundos hasta que


se presione el botón Kitchen Timer On/Off.


El tono de 6 segundos puede cancelarse


siguiendo los pasos en Las características


especiales de su sección de control del horno


bajo la sección Tonos al final de un ciclo


cronometrado.

problemas Cuidado

Para reiniciar el temporizador

Si la pantalla todavía está mostrando el tiempo restante, puede cambiarla presionando el botón Kitchen Timer On/Off, luego presione los botones numéricos hasta que en la pantalla aparezca el tiempo que desea.

Si el tiempo restante no está en la pantalla (en la pantalla está reloj, inicio postergado o tiempo de cocción), recuerde el tiempo restante presionando el botón Kitchen Timer On/Off y luego presionando los botones numéricos hasta ingresar el nuevo tiempo que desea.

Para cancelar el temporizador

Presione el botón Kitchen Timer On/Off dos veces.

Bloqueo de controles

Soporte al consumidor Solucionar

Su control le permitirá que bloquee los botones táctiles para que no puedan activarse al presionarlos.

NOTA: En los modelos de horno doble, esto activa dicha función en ambos hornos.

Para bloquear/desbloquear los controles:

Presione los botones 9 y 0 simultáneamente durante 3 segundos, hasta que en la pantalla aparezca LOC ON (bloqueo activado).


Para desbloquear el control, presione


los botones 9 y 0 simultáneamente


durante 3 segundos, hasta que en

8


la pantalla aparezca LOC OFF


(bloqueo desactivado).


Cuando esta función está activada y

se presionan los botones táctiles, el control emitirá un bip y aparecerá LOC ON (bloqueo activado) en la pantalla.

NOTAS:

El modo de bloqueo de controles afecta a todos los botones táctiles. Ningún botón táctil funcionará cuando esta función esté activada.

El ajuste permanecerá en la memoria luego de una interrupción de la energía.

Page 42
Image 42
GE PK916 owner manual Uso del reloj, el temporizador y el bloqueo de controles, Seguridad

PK916 specifications

The GE PK916 is a state-of-the-art refrigerator that embodies the modern consumer's demand for efficiency, style, and advanced technology. Designed for those who value both aesthetics and functionality, the GE PK916 stands out with its sleek finish and robust features tailored for contemporary kitchens.

One of the most notable features of the GE PK916 is its spacious interior. With a generous capacity, it offers ample room for groceries, beverages, and leftovers. The smart shelving system allows for flexible organization, enabling users to easily rearrange shelves to accommodate taller items or optimize space for party-sized quantities. Additionally, the adjustable humidity crisper drawers preserve fruits and vegetables longer by maintaining optimal moisture levels.

Incorporating cutting-edge technology, the GE PK916 is equipped with a sophisticated cooling system. This includes a multi-air flow feature that ensures consistent temperatures throughout the refrigerator and freezer compartments. As a result, food stays fresher for extended periods, reducing waste and enhancing user satisfaction.

Another standout characteristic of the GE PK916 is its energy efficiency. With an ENERGY STAR rating, this refrigerator not only helps reduce electricity bills but also minimizes environmental impact. It utilizes advanced insulation materials and technology to maintain temperature stability while consuming less power.

The GE PK916 also focuses on user convenience with features such as an external ice and water dispenser. This allows users to easily access chilled water and ice without opening the refrigerator door, promoting energy efficiency by reducing cold air loss. The dispenser is designed for ease of use, with an intuitive layout that accommodates various glass sizes.

Moreover, the refrigerator is equipped with smart technology. With Wi-Fi connectivity, users can monitor and control the appliance directly from their smartphones. This includes adjusting temperatures, receiving alerts about potential issues, and even tracking food expiration dates, ensuring that nothing goes to waste.

In terms of design, the GE PK916 is available in multiple finishes, including stainless steel and matte black, making it a perfect fit for any kitchen décor. The interior lighting is LED-based, providing clear visibility while also consuming less energy.

In summary, the GE PK916 refrigerator seamlessly blends advanced technology with thoughtful design, making it an ideal choice for discerning consumers who seek efficiency, convenience, and a touch of modern elegance in their kitchen appliances.