Installing the washer.
TroubleshootingTips Installation Instructions OperatingInstructions SafetyInstructions
1
2
3
4
5
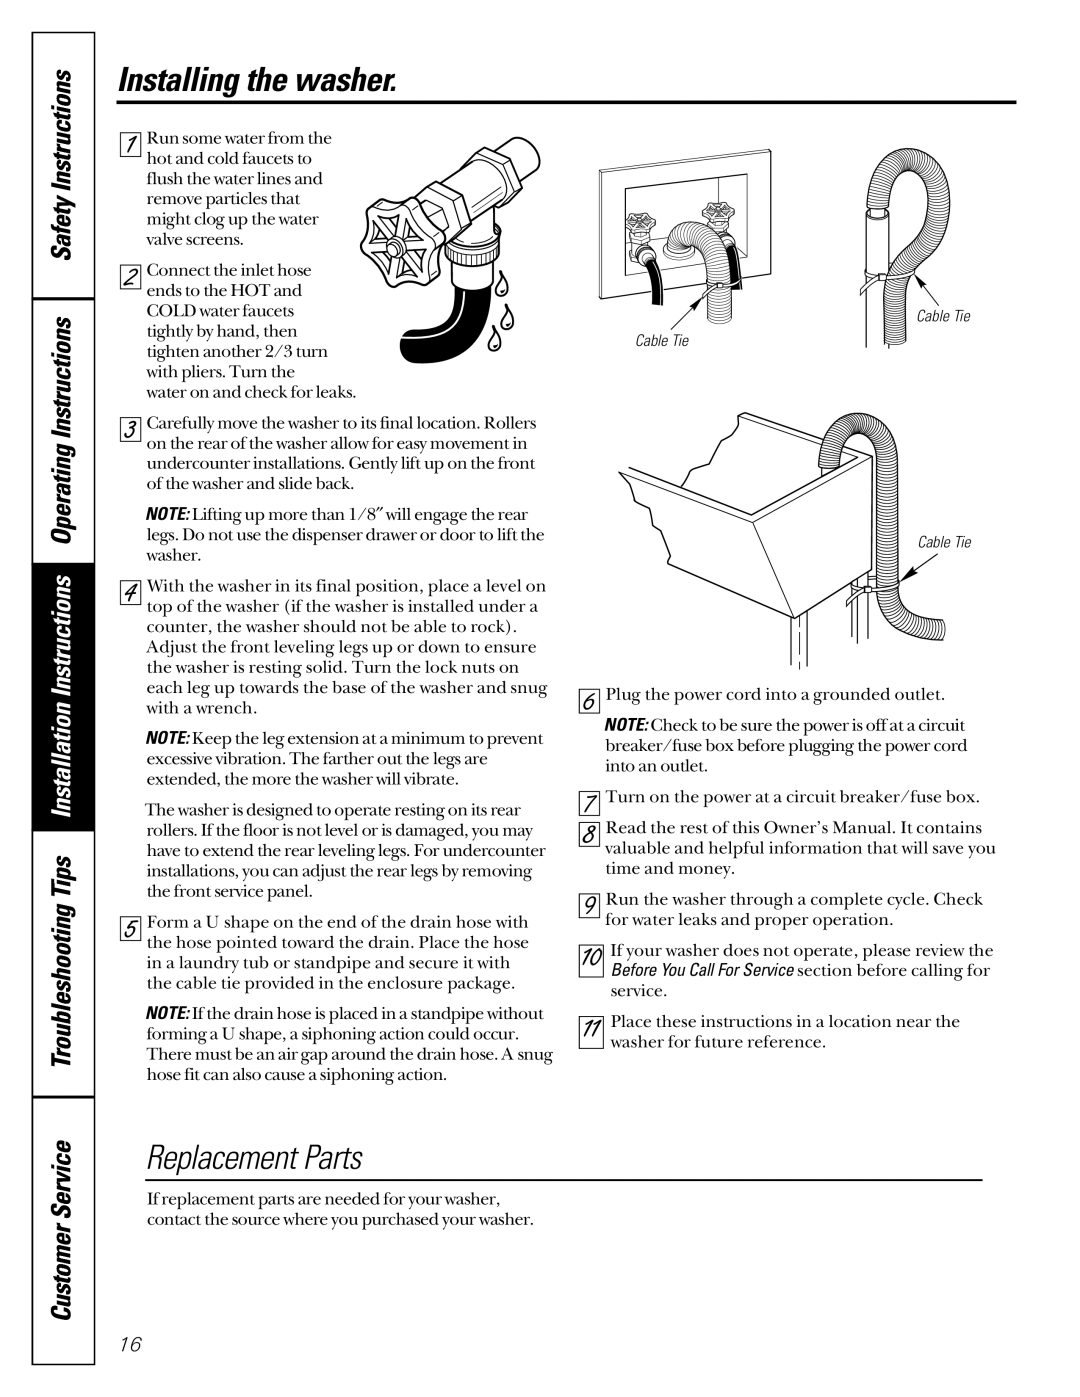
Run some water from the hot and cold faucets to flush the water lines and remove particles that might clog up the water valve screens.
Connect the inlet hose ends to the HOT and COLD water faucets tightly by hand, then tighten another 2/3 turn with pliers. Turn the water on and check for leaks.
Carefully move the washer to its final location. Rollers on the rear of the washer allow for easy movement in undercounter installations. Gently lift up on the front of the washer and slide back.
NOTE: Lifting up more than 1/8″ will engage the rear legs. Do not use the dispenser drawer or door to lift the washer.
With the washer in its final position, place a level on top of the washer (if the washer is installed under a counter, the washer should not be able to rock).
Adjust the front leveling legs up or down to ensure the washer is resting solid. Turn the lock nuts on each leg up towards the base of the washer and snug with a wrench.
NOTE: Keep the leg extension at a minimum to prevent excessive vibration. The farther out the legs are extended, the more the washer will vibrate.
The washer is designed to operate resting on its rear rollers. If the floor is not level or is damaged, you may have to extend the rear leveling legs. For undercounter installations, you can adjust the rear legs by removing the front service panel.
Form a U shape on the end of the drain hose with the hose pointed toward the drain. Place the hose in a laundry tub or standpipe and secure it with the cable tie provided in the enclosure package.
NOTE: If the drain hose is placed in a standpipe without forming a U shape, a siphoning action could occur. There must be an air gap around the drain hose. A snug hose fit can also cause a siphoning action.
Cable Tie
Cable Tie
Cable Tie
6 Plug the power cord into a grounded outlet. NOTE: Check to be sure the power is off at a circuit breaker/fuse box before plugging the power cord into an outlet.
7 Turn on the power at a circuit breaker/fuse box.
8 Read the rest of this Owner’s Manual. It contains valuable and helpful information that will save you time and money.
9 Run the washer through a complete cycle. Check for water leaks and proper operation.
10 If your washer does not operate, please review the Before You Call For Service section before calling for service.
11 Place these instructions in a location near the washer for future reference.
CustomerService
Replacement Parts
If replacement parts are needed for your washer, contact the source where you purchased your washer.
16