“A=: SheEves
:W.xw
(onmodelsso equipped).-
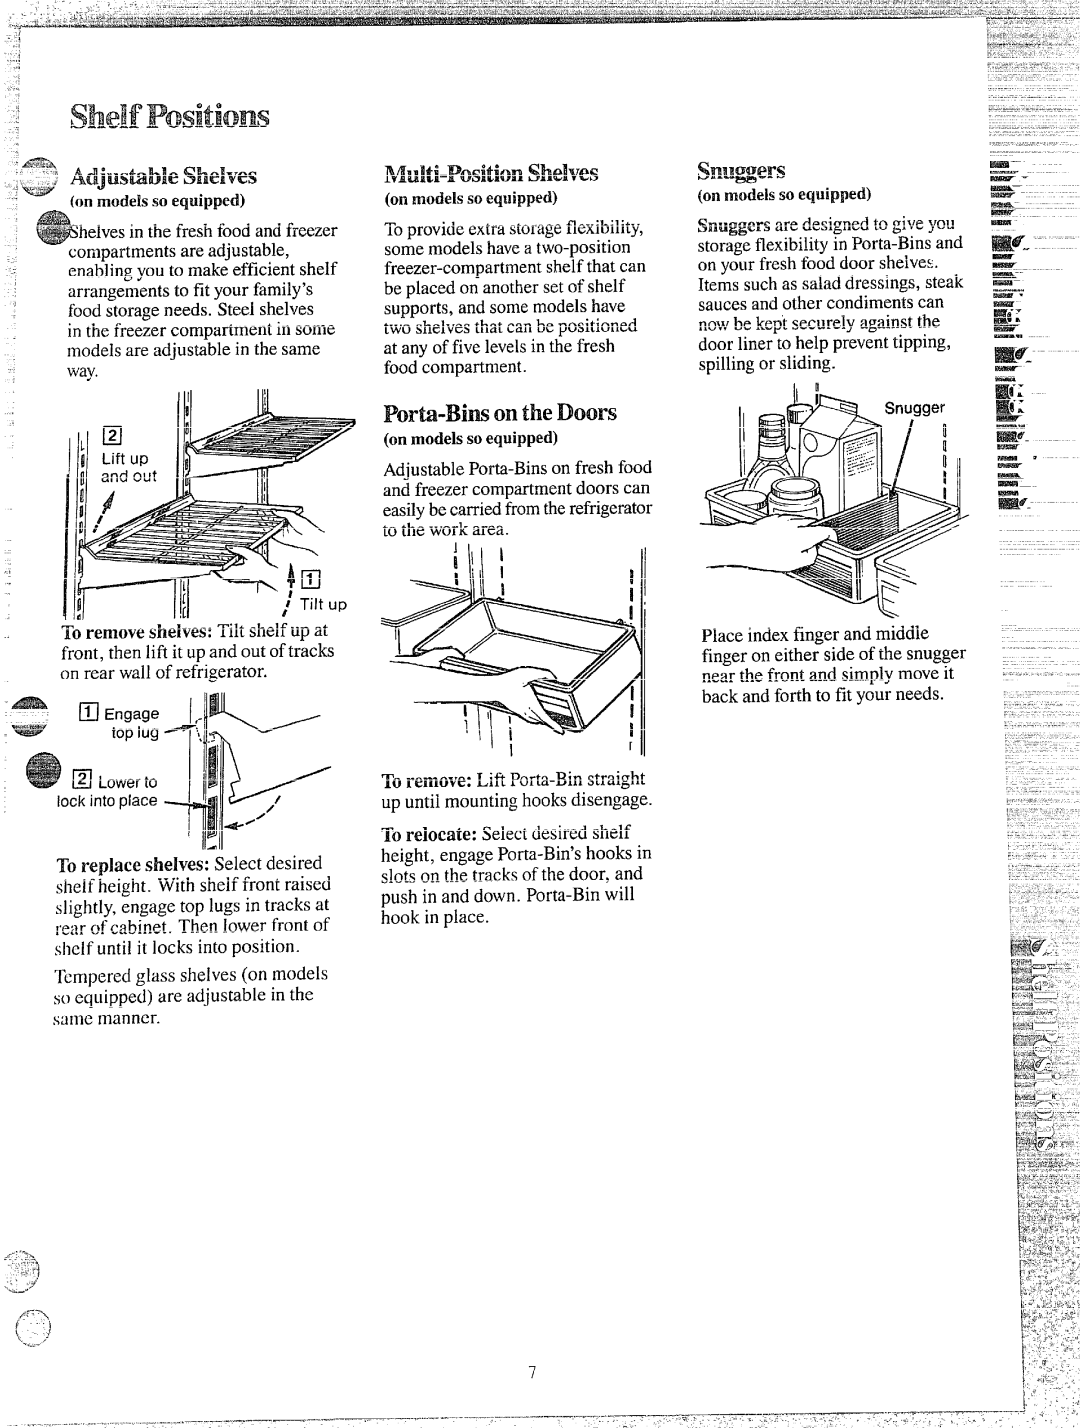
helvesin the fresh food and freezer compartmentsare adjustable, enablingyou to make efficientshelf arrangementsto fit your family’s food storageneeds. Steel shelves in the freezer compartment in some modelsare adjustablein the same way.
1’; removeshelves: Tilt shelf up at front, then lift it up and out oftracks on rear wall of refrigerator.
(.*-d ~
l intoplace
IIAII
To ~*eplaceshelves: Select desired shelf height. With shelf front raised slightly, engage top lugs in tracks at rear ofcabinet. Then lower front of shelf until it locks into position.
Tcrnpered glass shelves (on models so equipped) are adjustable in the smne rnanncr.
SMvw
Toprovide extrastorageflexibility, some models havea
‘1 | ‘ II |
To remove: Lifi
To relocate: Select desired shelf height, engage
modelssoequipped)
Smggers are designedto give you storageflexibilityin
Items such as salad dressings, steak saucesand other condimentscan nowbe kept securely againstthe door liner to help preventtipping, spillingor sliding.
b
Place indexfinger and middle finger on either side of the snugger near the front and simply move it back and forth to fit your needs.
i
7