(continued)-
. . E%2aseRead carefully.
use phlg
type applianceextensioncord having
Legs
_-
Becauseof’potentialsafetyhazards undercertainconditions,we strongly recommendagainstuseofan adapter plug. However,if you still elect
to use an adapter, where local codes permit, a TEIvHWRARY CONNECTION may be made to a properly grounded
outlet by use of a UL listed adapter (Fig. 2) availableat most IO~al
hardwarestores. |
|
|
| |
v | a | , | ||
l+~pt)F?ARYMETHOD |
| |||
(ADAPTERPLUGSNOT |
|
|
| |
PERMITTEDIN CANADA) |
| m |
| |
ALIGNLARGE |
|
|
| |
PRONGS/SLOTS~ | ~ <;: | e |
| |
~ 6, |
| \ |
| |
|
|
|
| |
| .; | INSUREPROPERGROUND | ||
Fig. 2 | Q=_ | ANO FIRMCONNECTION | ||
BEFOREUSE |
| |||
|
| |||
The larger slot in the adapter must be alignedwith the largerslotin the walloutletto provideproperpolarity in the connectionof the powercord.
CAUTION:Attaching an adapter ground terminal to the walloutlet cover screw does not ground the appliance unless the cover screw is metal, and not insulated, and the wall outlet is grounded through the house wiring. Youshould have circuit checked by a qualified electrician to make sure the outlet is properly grounded.
When disconnecting the power cord from the adapter, alwayshold the adapter with one hand. If this is not done, the adapter ground terminal is very likely to break with repeated use.
Should the adapter ground ‘terminalbreak, DO NOT USE the app!imm until a proper ground has again been established.
Use Ull”ds
Because of potential s:~fetyhazards under certain conditions. we strongly recommend against the USCof an extension cord. However, if you still elect to usc an extension ct}rd, it is absolutely
agroundingtype plug and outlet and that the electrical rating of the cord be 15amperes (minimum)and 120volts.
The refrigerator should always be plugged into its own individual electrical 43UBtkt— (115volt, 60 Hertz, singlephase AC). This is recommended for best performance and to prevent overloadinghouse wiring circuits, which could cause a fire hazard from overheatingwires.
Refrigerator location
Install the refrigeratoron a floor strong enough to support it when it is fully loaded.
Do not install refrigeratorwhere temperature will go beIow60°F. because it will not run often enough to maintain proper temperatures.
Also see
clearances
AHOWthe following clearances for ease of installation and proper air circulation:
Sides,3/4” Top,1“ Back, 1“
If Model TBX19is to be installed agai~lsta wall on the hinge side,
allow 1Yi”for door clearance.
water supply to Ieemaker (on modelsso equipped)
Youwill need to connect your icemaker to a cold water line. A water supply kit containing copper tubing,
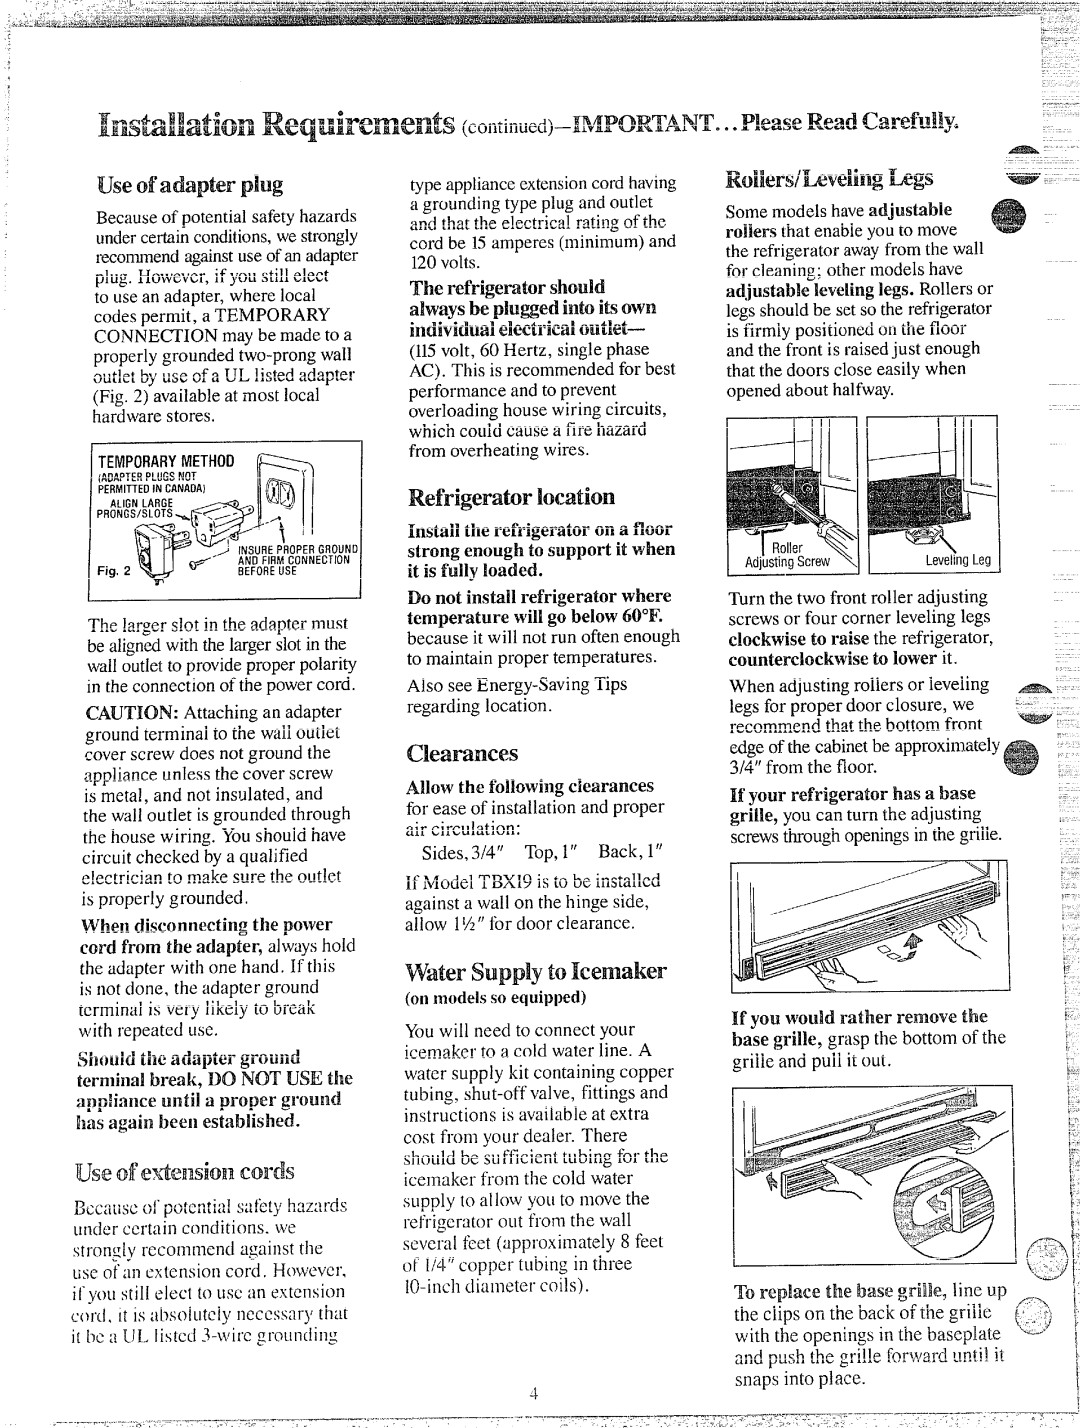
Some models haveadjustaide rollersthat enableyou to move the refrigeratorawayfrom the wall for cleaning; other models have adjustablewkvelinglegs. Rollersor legs shouldbe set so the refrigerator is firmly positionedon the floor and the front is raisedjust enough that the doors close easily when opened about halfway.
1 Ill I IIll
I | , | 11 |
|
Turn the two front roller adjusting |
| ||
screws or four corner levelinglegs |
| ||
clockwise to raise the refrigerator, |
| ||
counterclockwiseto lower it. |
| ||
When adjusting rollers or leveling | k?3@& | ||
legs for proper door closure, we | |||
recommend that the bottom front | |||
edgeof the cabinetbe approximately
If your refrigeratorhas a.base grille, you can turn the adjusting screwsthroughopeningsin the grille.
,, I
If you would rather remove the base grille, grasp the bottom of the grille and pull it out.
the cl;ps on the back ;f the grille ~ ~) | ~ | |
with the openings in the baseplate ‘G’; | 1! | |
and push the grille forward until it | ||
snaps into place. | i | |
\\ | ||
|