Care and Cleaning
Stainless Steel Range
Sealed burner assemblies
Slits |
Holes 
Use a sewing needle,
Turn all controls OFF before removing the burner parts.
The burner grates, burner caps and burner ring
CAUTION: DO NOT OPERATE THE BURNER WITHOUT ALL BURNER PARTS IN PLACE.
MISE EN CAUSE : N’UTILISEZ PAS DE BRÛLEUR QUI N’A PAS TOUTES SES PIÈCES EN PLACE.
For proper ignition, make sure the small holes in the burner rings are kept open. A sewing needle or wire
The slits in the burner heads of your cooktop must be kept clean at all times for an even, unhampered flame.
You should clean the surface burner routinely, especially after bad spillovers, which could clog these openings.
To remove
Clean the burner bases in place on the cooktop.
To remove the burner parts:
1Lift off the burner cap and burner head.
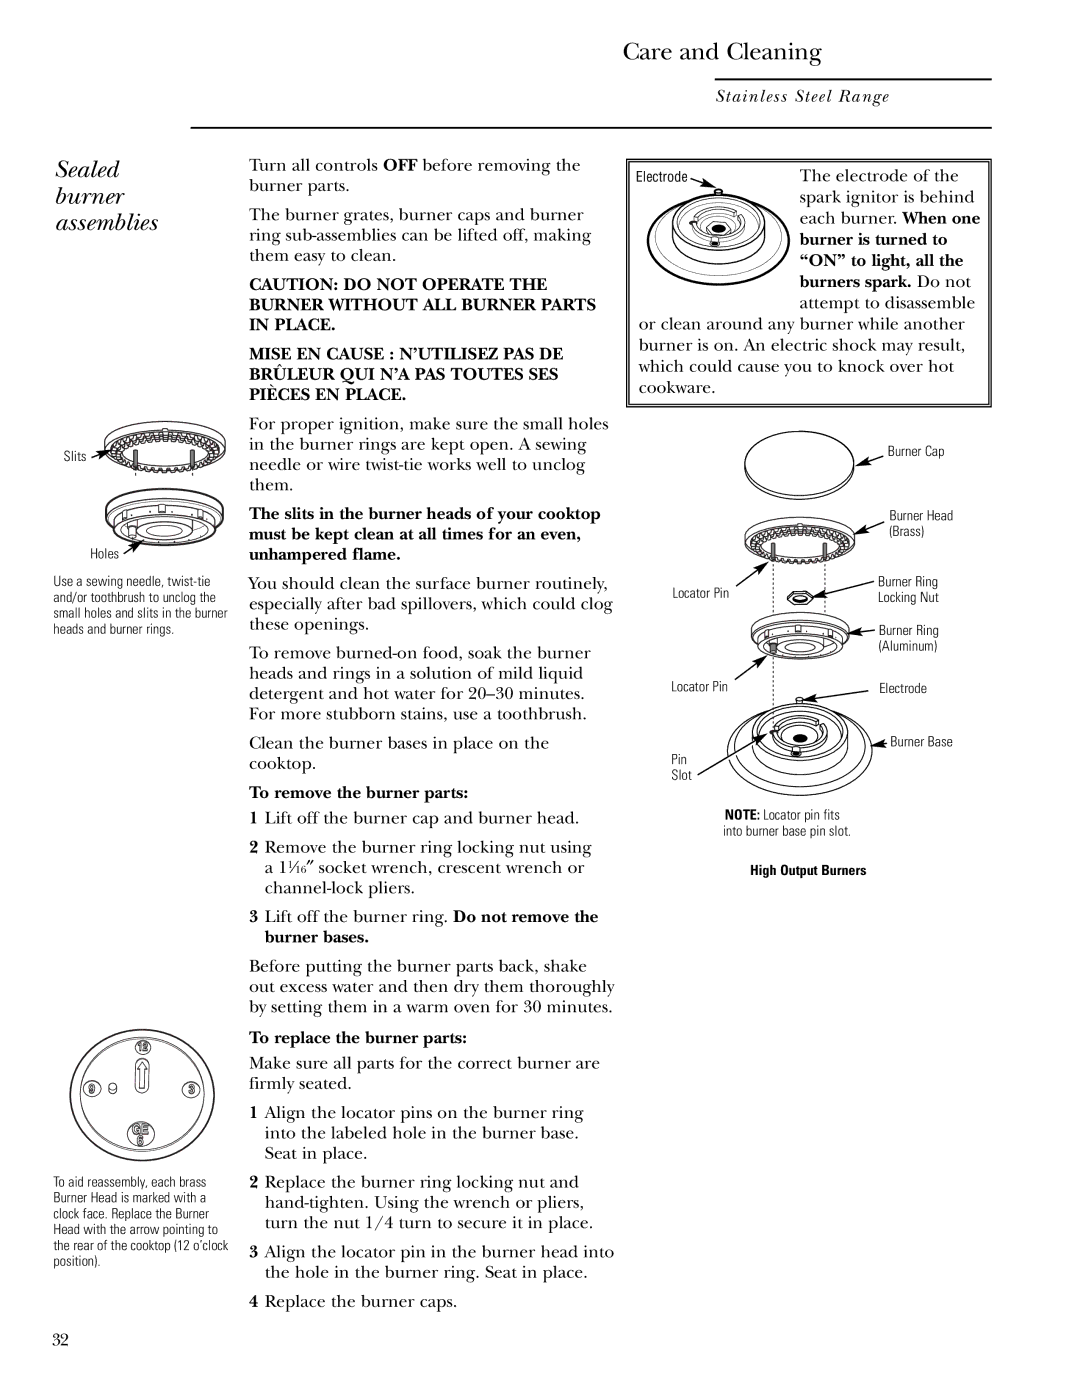
Electrode | The electrode of the |
| spark ignitor is behind |
| each burner. When one |
| burner is turned to |
| “ON” to light, all the |
burners spark. Do not attempt to disassemble
or clean around any burner while another burner is on. An electric shock may result, which could cause you to knock over hot cookware.
| Burner Cap |
| Burner Head |
| (Brass) |
Locator Pin | Burner Ring |
Locking Nut | |
| Burner Ring |
| (Aluminum) |
Locator Pin | Electrode |
| Burner Base |
Pin |
|
Slot |
|
NOTE: Locator pin fits |
|
into burner base pin slot. |
|
To aid reassembly, each brass Burner Head is marked with a clock face. Replace the Burner Head with the arrow pointing to the rear of the cooktop (12 o’clock position).
2Remove the burner ring locking nut using
a 11⁄16″ socket wrench, crescent wrench or | High Output Burners |
|
3Lift off the burner ring. Do not remove the burner bases.
Before putting the burner parts back, shake out excess water and then dry them thoroughly by setting them in a warm oven for 30 minutes.
To replace the burner parts:
Make sure all parts for the correct burner are firmly seated.
1Align the locator pins on the burner ring into the labeled hole in the burner base. Seat in place.
2Replace the burner ring locking nut and
3Align the locator pin in the burner head into the hole in the burner ring. Seat in place.
4Replace the burner caps.
32