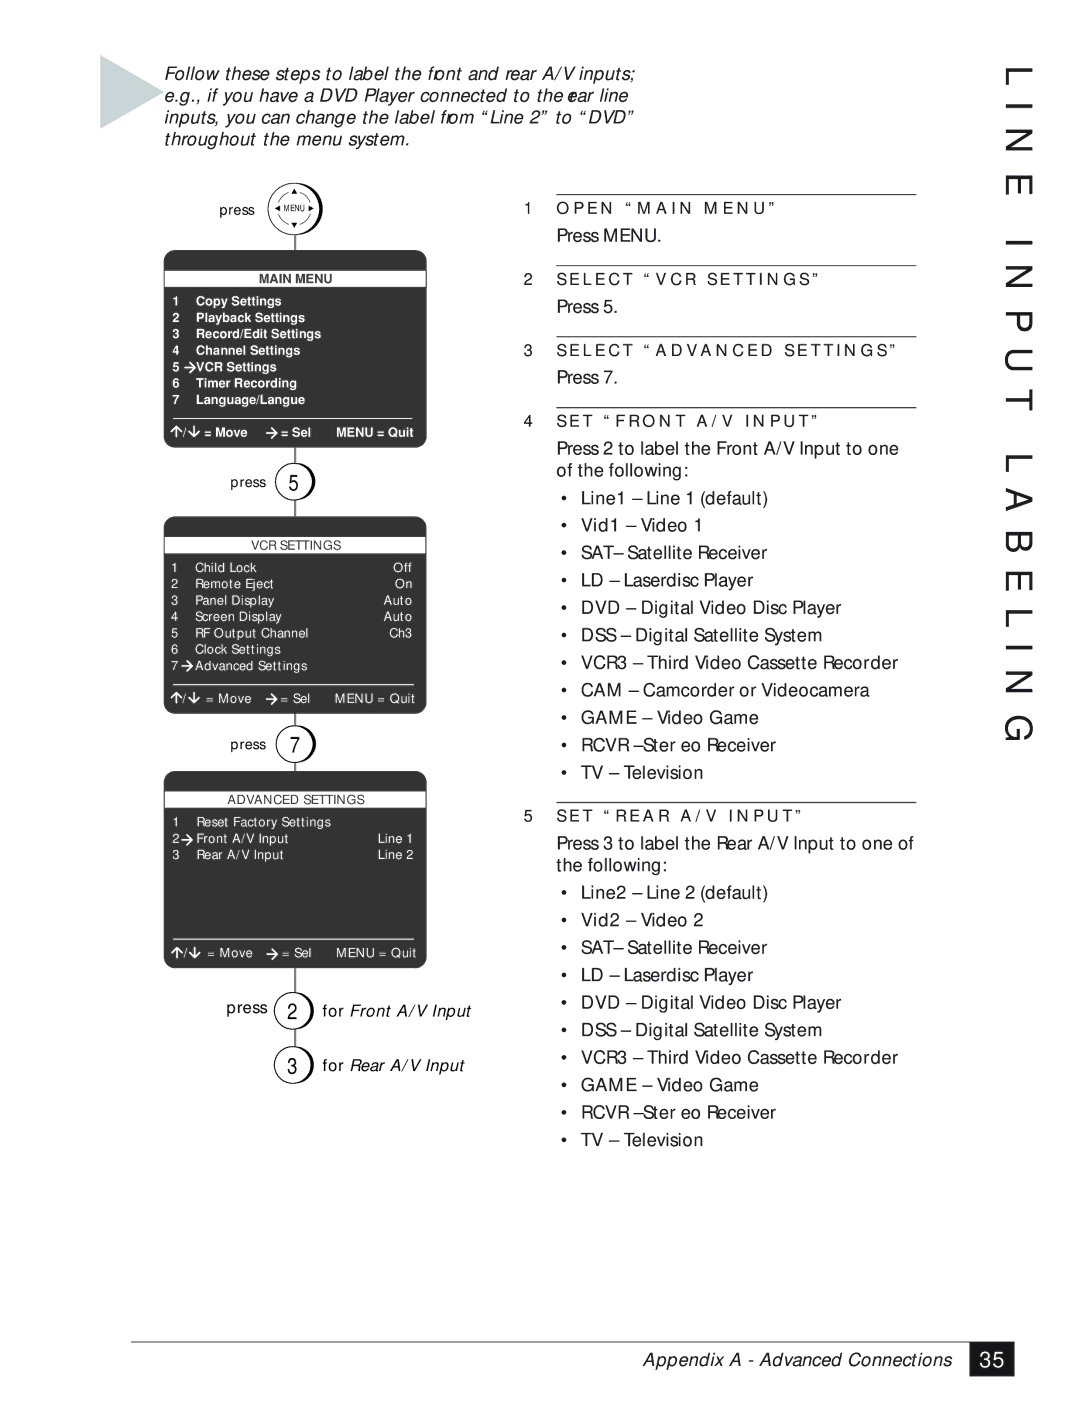
Follow these steps to label the front and rear A/V inputs; e.g., if you have a DVD Player connected to the ear line inputs, you can change the label from “Line 2” to “DVD” throughout the menu system.
press MENU | 1 O P E N “ M A I N M E N U ” |
L I N E
MAIN MENU
1Copy Settings
2Playback Settings
3Record/Edit Settings
4Channel Settings
5VCR Settings
6Timer Recording
7Language/Langue
/ | = Move | = Sel | MENU = Quit |
| press | 5 |
|
|
| ||
| VCR SETTINGS | ||
1 | Child Lock |
| Off |
2 | Remote Eject |
| On |
3 | Panel Display |
| Auto |
4 | Screen Display | Auto | |
5 | RF Output Channel | Ch3 | |
6Clock Settings
7Advanced Settings
/ | = Move | = Sel | MENU = Quit |
| press | 7 |
|
| ADVANCED SETTINGS | ||
1 | Reset Factory Settings |
| |
2 | Front A/V Input | Line 1 | |
3 | Rear A/V Input | Line 2 | |
/ = Move = Sel MENU = Quit
press 2 for Front A/V Input
3for Rear A/V Input
Press MENU.
2S E L E C T “ V C R S E T T I N G S ”
Press 5.
3S E L E C T “ A D VA N C E D S E T T I N G S ”
Press 7.
4S E T “ F R O N T A / V I N P U T ”
Press 2 to label the Front A/V Input to one of the following:
•Line1 – Line 1 (default)
•Vid1 – Video 1
•SAT– Satellite Receiver
•LD – Laserdisc Player
•DVD – Digital Video Disc Player
•DSS – Digital Satellite System
•VCR3 – Third Video Cassette Recorder
•CAM – Camcorder or Videocamera
•GAME – Video Game
•RCVR
•TV – Television
5S E T “ R E A R A / V I N P U T ”
Press 3 to label the Rear A/V Input to one of the following:
•Line2 – Line 2 (default)
•Vid2 – Video 2
•SAT– Satellite Receiver
•LD – Laserdisc Player
•DVD – Digital Video Disc Player
•DSS – Digital Satellite System
•VCR3 – Third Video Cassette Recorder
•GAME – Video Game
•RCVR
•TV – Television
I N P U T L A B E L I N G
Appendix A - Advanced Connections
35 |