Basic Connections/Auto Setup
You will need to connect the DVD+VCR to a TV and run Auto Setup. Auto Setup will automatically search for channels and then set your DVD+VCR's internal clock.
NOTES:
•See Appendix A for Advanced Connections.
•In order to view the DVD+VCR setup menu, you must use either the Standard RF or Line connection between your TV and
DVD+VCR, even if you use the
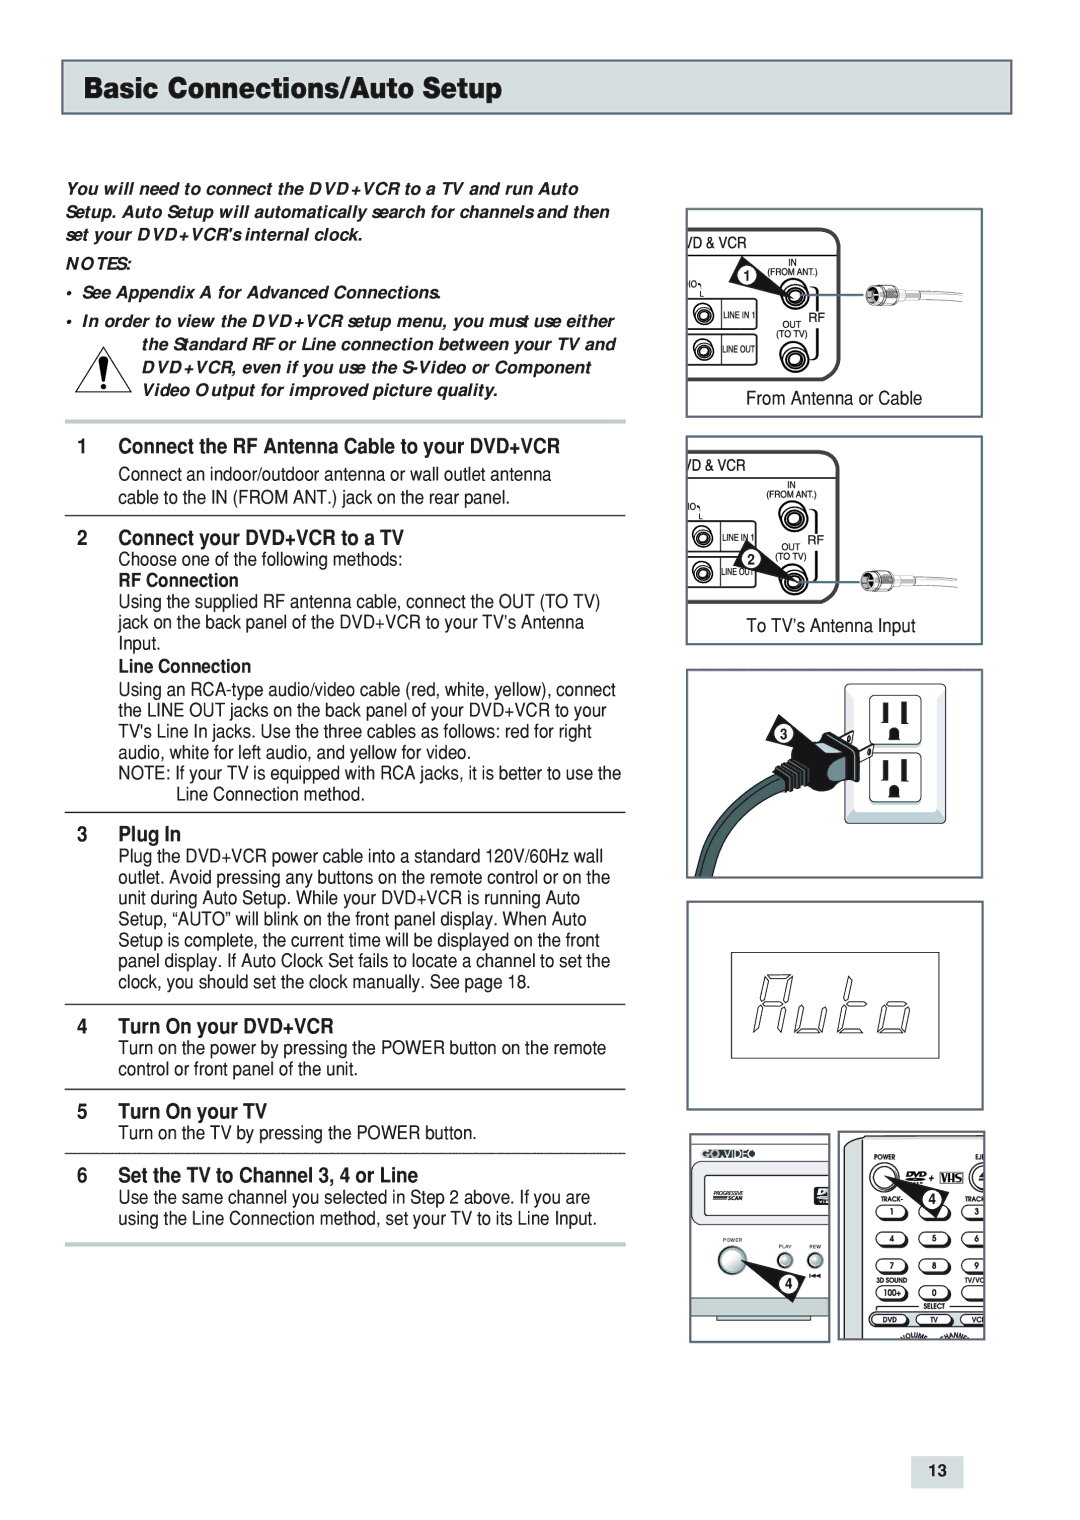
1Connect the RF Antenna Cable to your DVD+VCR
Connect an indoor/outdoor antenna or wall outlet antenna cable to the IN (FROM ANT.) jack on the rear panel.
2Connect your DVD+VCR to a TV
Choose one of the following methods:
RF Connection
Using the supplied RF antenna cable, connect the OUT (TO TV) jack on the back panel of the DVD+VCR to your TV’s Antenna Input.
Line Connection
Using an
NOTE: If your TV is equipped with RCA jacks, it is better to use the Line Connection method.
3Plug In
Plug the DVD+VCR power cable into a standard 120V/60Hz wall outlet. Avoid pressing any buttons on the remote control or on the unit during Auto Setup. While your DVD+VCR is running Auto Setup, “AUTO” will blink on the front panel display. When Auto Setup is complete, the current time will be displayed on the front panel display. If Auto Clock Set fails to locate a channel to set the clock, you should set the clock manually. See page 18.
4Turn On your DVD+VCR
Turn on the power by pressing the POWER button on the remote control or front panel of the unit.
5Turn On your TV
Turn on the TV by pressing the POWER button.
6Set the TV to Channel 3, 4 or Line
Use the same channel you selected in Step 2 above. If you are using the Line Connection method, set your TV to its Line Input.
1 |
From Antenna or Cable |
2 |
To TV’s Antenna Input |
3
| 4 |
POWER |
|
PLAY | REW |
4 |
|
13