Begin recording or playing a tape.
Press CLK/CTR repeatedly to display the real- time counter on the TV screen.
At the point that you want to locate later, reset the real-time counter to “M 0:00:00” by pressing
CLEAR.
Continue to play or record.
Press STOP (x) when recording or playback fin- ishes.

VCR Operation (Continued)

Tape Counter Memory Feature

Real-Time Counter

Press CLK/CTR to select the real-time counter display, which shows the length of the tape in hours, minutes, and seconds.

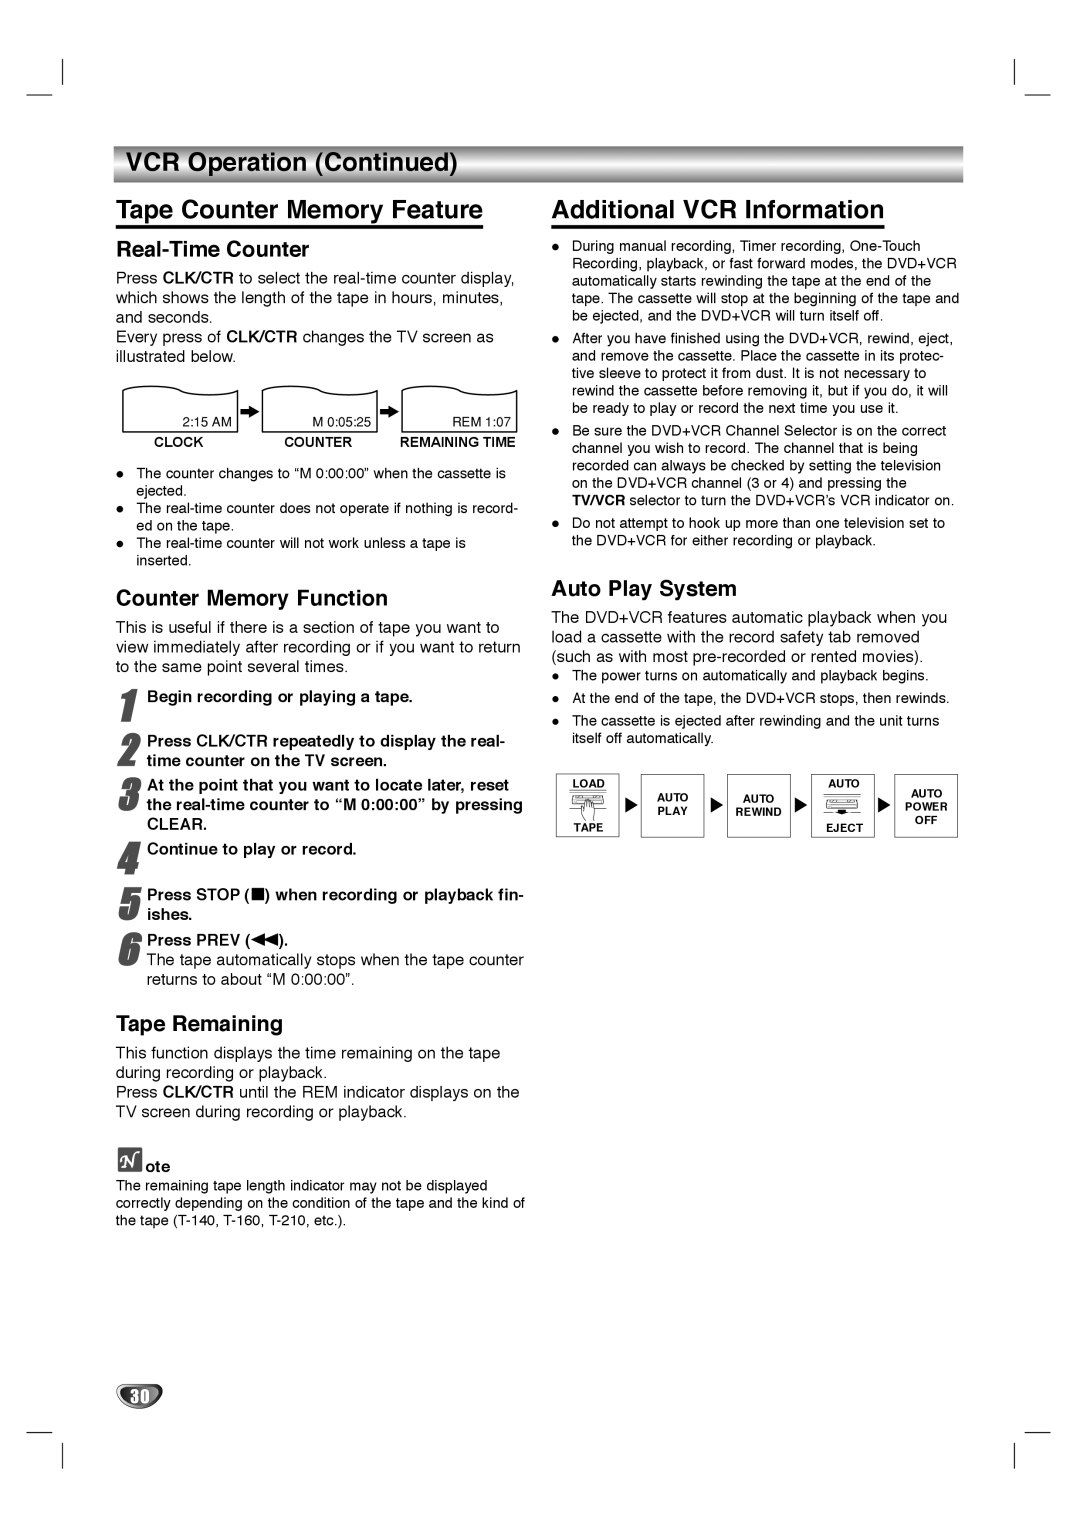
Every press of CLK/CTR changes the TV screen as illustrated below.

2:15 AM

M 0:05:25

REM 1:07

CLOCK

COUNTER

REMAINING TIME

The counter changes to “M 0:00:00” when the cassette is ejected.

The real-time counter does not operate if nothing is record- ed on the tape.

The real-time counter will not work unless a tape is inserted.

Counter Memory Function

This is useful if there is a section of tape you want to view immediately after recording or if you want to return to the same point several times.

1

2

3

4

5

6 Press PREV (m).

The tape automatically stops when the tape counter returns to about “M 0:00:00”.

Tape Remaining

This function displays the time remaining on the tape during recording or playback.

Press CLK/CTR until the REM indicator displays on the TV screen during recording or playback.

ote

The remaining tape length indicator may not be displayed correctly depending on the condition of the tape and the kind of the tape (T-140, T-160, T-210, etc.).

Additional VCR Information

During manual recording, Timer recording, One-Touch Recording, playback, or fast forward modes, the DVD+VCR automatically starts rewinding the tape at the end of the tape. The cassette will stop at the beginning of the tape and be ejected, and the DVD+VCR will turn itself off.

After you have finished using the DVD+VCR, rewind, eject, and remove the cassette. Place the cassette in its protec- tive sleeve to protect it from dust. It is not necessary to rewind the cassette before removing it, but if you do, it will be ready to play or record the next time you use it.

Be sure the DVD+VCR Channel Selector is on the correct channel you wish to record. The channel that is being recorded can always be checked by setting the television on the DVD+VCR channel (3 or 4) and pressing the TV/VCR selector to turn the DVD+VCR’s VCR indicator on.

Do not attempt to hook up more than one television set to the DVD+VCR for either recording or playback.

Auto Play System

The DVD+VCR features automatic playback when you load a cassette with the record safety tab removed (such as with most pre-recorded or rented movies).

The power turns on automatically and playback begins. At the end of the tape, the DVD+VCR stops, then rewinds.

The cassette is ejected after rewinding and the unit turns itself off automatically.

LOAD


AUTO

AUTO￿

AUTO￿

AUTO￿

POWER￿

PLAY

REWIND

OFF

TAPE


EJECT

30

Page 30
Image 30
GoVideo HT2010, HT2015 manual VCR Operation Tape Counter Memory Feature, Additional VCR Information

HT2015, HT2010 specifications

The GoVideo HT2010 and HT2015 are innovative products designed to deliver high-quality video playback and recording experiences for both personal and professional use. These models cater to varied needs, featuring advanced technologies that facilitate their ease of use and expand their applicability in different contexts.

The HT2010 is a versatile device that offers impressive playback capabilities with support for multiple video formats, ensuring users can enjoy their favorite movies and shows without the hassle of converting files. It is equipped with a vibrant display that renders sharp images and vivid colors, enhancing the viewing experience. The device also incorporates surround sound technology, which allows for an immersive audio environment, making it ideal for home theaters or on-the-go entertainment.

One of the main highlights of the HT2010 is its user-friendly interface. The intuitive controls allow users to navigate through menus effortlessly and access various features with ease. Additionally, the device supports USB connectivity, making it simple to transfer files or connect to external storage devices. This feature is particularly useful for users who wish to play content directly from their USB drives without the need for additional equipment.

On the other hand, the GoVideo HT2015 builds upon the strengths of the HT2010, introducing several upgraded features. Notably, it supports 4K Ultra HD resolution, providing stunning visuals that bring media content to life with higher clarity and detail. This model also incorporates a sleek design, making it an aesthetically pleasing addition to any entertainment setup.

The HT2015 further enhances usability with its built-in streaming capabilities. Users can access popular streaming services directly, eliminating the need for additional devices. The improved processing power ensures smooth playback even when streaming content in high definition.

Both models emphasize connectivity, featuring Wi-Fi and Bluetooth options that facilitate easy pairing with other devices. This makes it simple to share content wirelessly or connect to speakers for an upgraded audio experience.

In summary, the GoVideo HT2010 and HT2015 stand out for their impressive features, cutting-edge technology, and user-friendly design. While the HT2010 serves as a reliable option for standard video playback needs, the HT2015 takes it a step further with 4K capabilities and integrated streaming, making both products excellent choices for avid video enthusiasts.