Repair
Assemble Piston Rod Seal and Bearing
See FIG. 18 on page 20.
1.Lubricate
a.Install
b.Install new
c.Slide spring (302m) and end cap (302b) on pis- ton rod (302a).
2.Install retaining ring (303).
3.Remount mounting plate (331) and attach nuts (333) and lockwashers (332). Torque to 40
Disassemble Ram Piston
1.Complete steps
NOTICE
Do not tilt the piston rod to one side when removing it from the base or when installing it. Such movement can damage the piston or inside surface of the base cylinder.
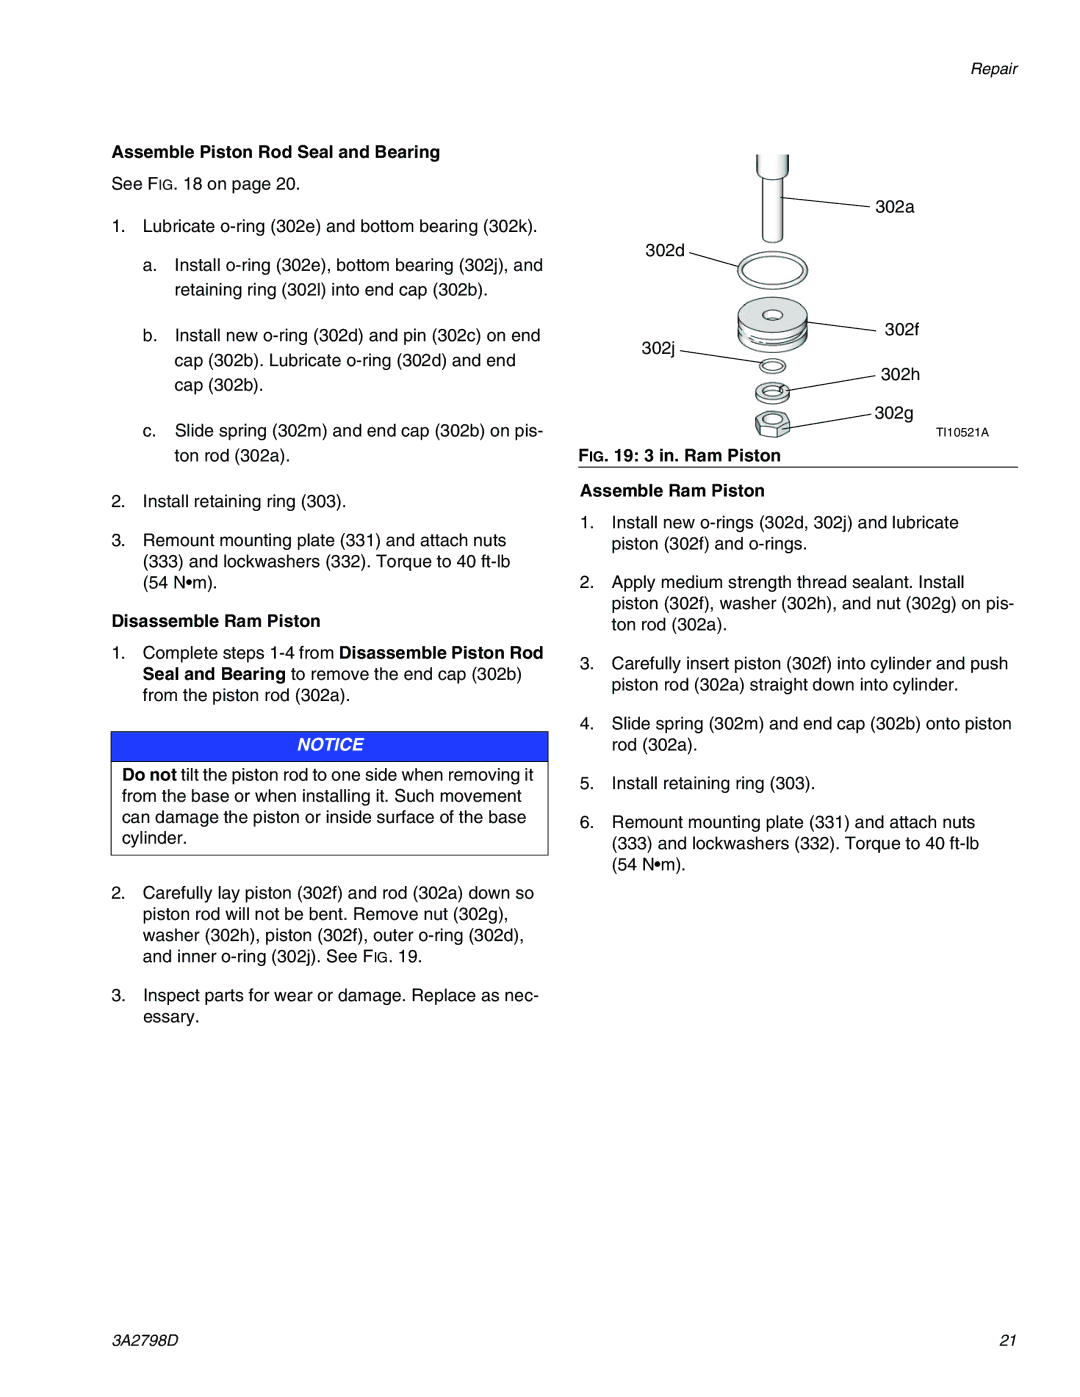
2.Carefully lay piston (302f) and rod (302a) down so piston rod will not be bent. Remove nut (302g), washer (302h), piston (302f), outer
3.Inspect parts for wear or damage. Replace as nec- essary.
![]() 302a
302a
302d
![]() 302f
302f
302j
302h
302g
TI10521A
FIG. 19: 3 in. Ram Piston
Assemble Ram Piston
1.Install new
2.Apply medium strength thread sealant. Install piston (302f), washer (302h), and nut (302g) on pis- ton rod (302a).
3.Carefully insert piston (302f) into cylinder and push piston rod (302a) straight down into cylinder.
4.Slide spring (302m) and end cap (302b) onto piston rod (302a).
5.Install retaining ring (303).
6.Remount mounting plate (331) and attach nuts
(333)and lockwashers (332). Torque to 40
3A2798D | 21 |