Installation
Grounding
WARNING
This pump must be grounded. The steps for grounding may differ from the way you ground other pumps. Carefully read and follow these grounding instructions. See FIRE AND EXPLO- SION HAZARD on page 5 before you operate the pump.
Static electricity is created by the
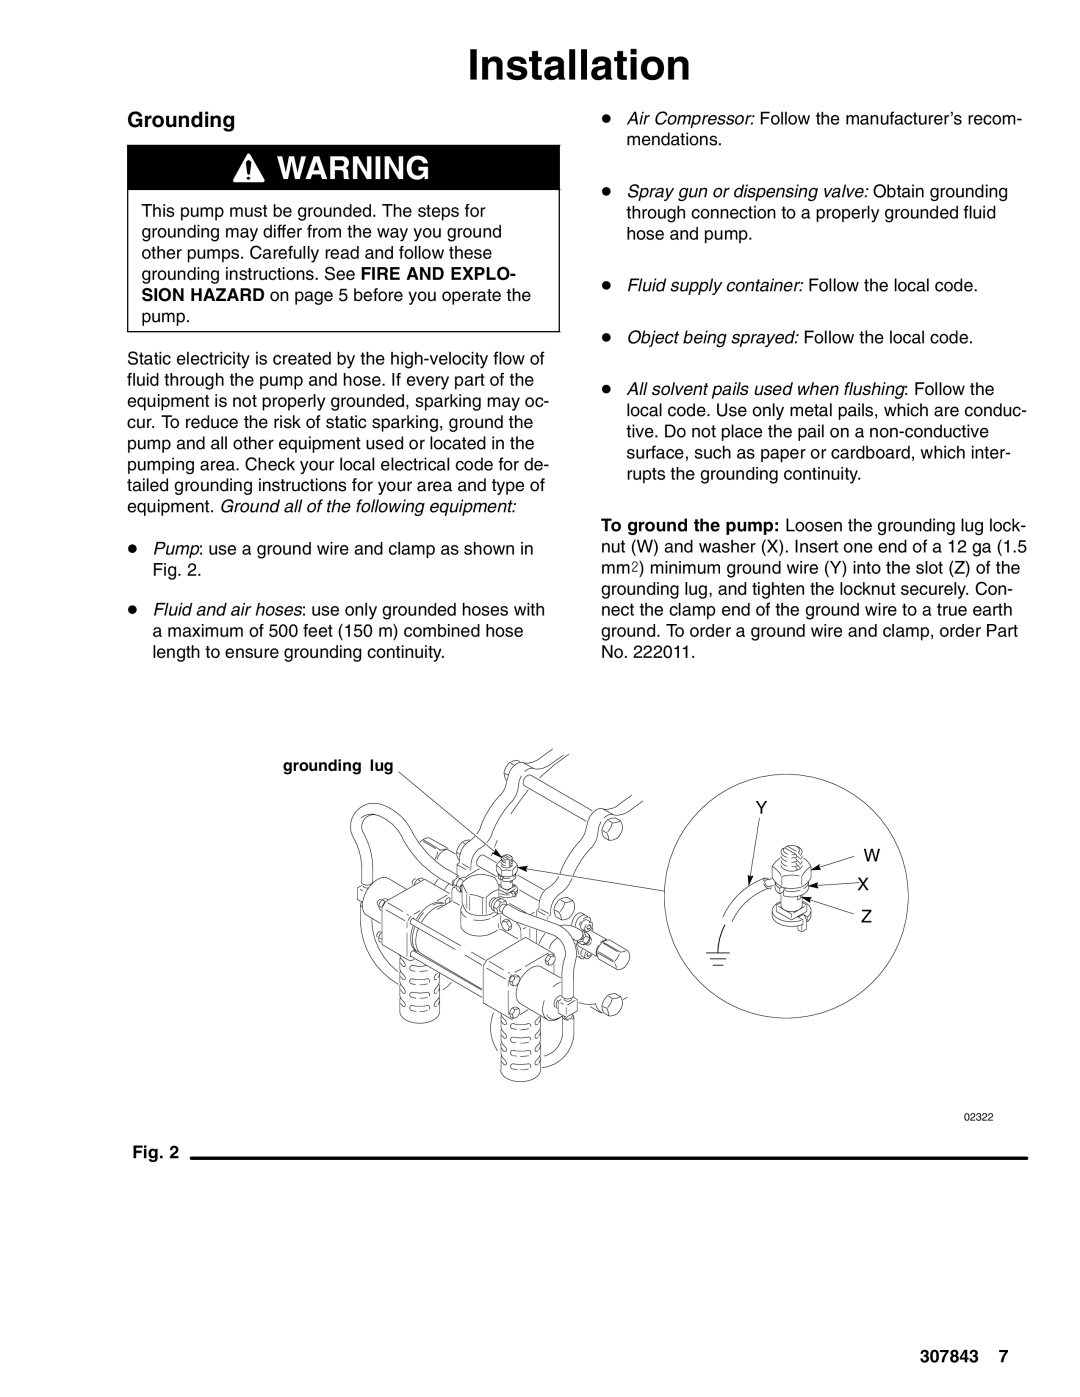
DPump: use a ground wire and clamp as shown in Fig. 2.
DFluid and air hoses: use only grounded hoses with a maximum of 500 feet (150 m) combined hose length to ensure grounding continuity.
DAir Compressor: Follow the manufacturer’s recom- mendations.
DSpray gun or dispensing valve: Obtain grounding through connection to a properly grounded fluid hose and pump.
DFluid supply container: Follow the local code.
DObject being sprayed: Follow the local code.
DAll solvent pails used when flushing: Follow the local code. Use only metal pails, which are conduc- tive. Do not place the pail on a
To ground the pump: Loosen the grounding lug lock- nut (W) and washer (X). Insert one end of a 12 ga (1.5 mm@) minimum ground wire (Y) into the slot (Z) of the grounding lug, and tighten the locknut securely. Con- nect the clamp end of the ground wire to a true earth ground. To order a ground wire and clamp, order Part No. 222011.
grounding lug
Y
W
X
Z
02322
Fig. 2
307843 7
