Repair
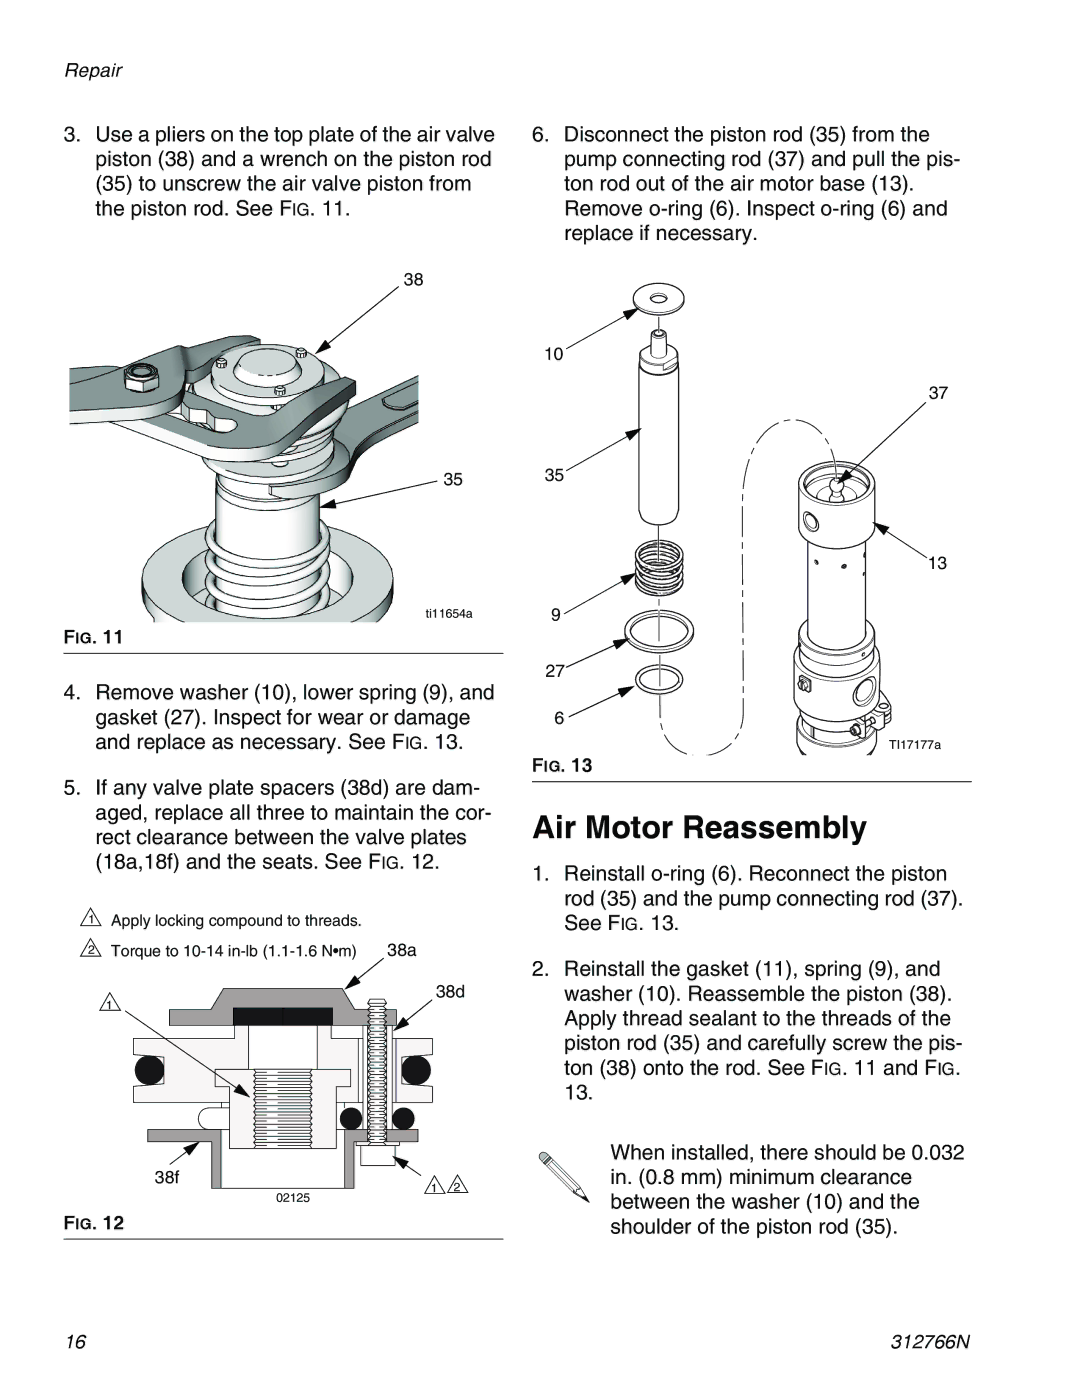
3.Use a pliers on the top plate of the air valve piston (38) and a wrench on the piston rod (35) to unscrew the air valve piston from the piston rod. See FIG. 11.
38
35
ti11654a
FIG. 11
4.Remove washer (10), lower spring (9), and gasket (27). Inspect for wear or damage and replace as necessary. See FIG. 13.
5.If any valve plate spacers (38d) are dam- aged, replace all three to maintain the cor- rect clearance between the valve plates (18a,18f) and the seats. See FIG. 12.
1Apply locking compound to threads.
2 Torque to | 38a |
38d
1
38f | 2 |
1 | |
02125 |
|
FIG. 12
6.Disconnect the piston rod (35) from the pump connecting rod (37) and pull the pis- ton rod out of the air motor base (13). Remove
10
37
35
13
9 ![]()
![]()
27
6 ![]()
TI17177a
FIG. 13
Air Motor Reassembly
1.Reinstall
2.Reinstall the gasket (11), spring (9), and washer (10). Reassemble the piston (38). Apply thread sealant to the threads of the piston rod (35) and carefully screw the pis- ton (38) onto the rod. See FIG. 11 and FIG. 13.
When installed, there should be 0.032 in. (0.8 mm) minimum clearance between the washer (10) and the shoulder of the piston rod (35).
16 | 312766N |