Pump Lower Reassembly
1.Lubricate packing (17) and bearing (18) with no. 2
2.Install the bearing (18), and cup packing
(17)with the lips facing down on the pump connecting rod (37). See FIG. 18.
3.Lubricate the piston seals (21) and bearing
(22)with no. 2
(21)with lips facing up on the piston (23). Install the backup washer (20) with the grooves facing down. See FIG. 17 on page 18.
4.Place the ball (3) on top of the piston body
(23)and screw the piston body and the fluid piston rod (19) together. Torque to
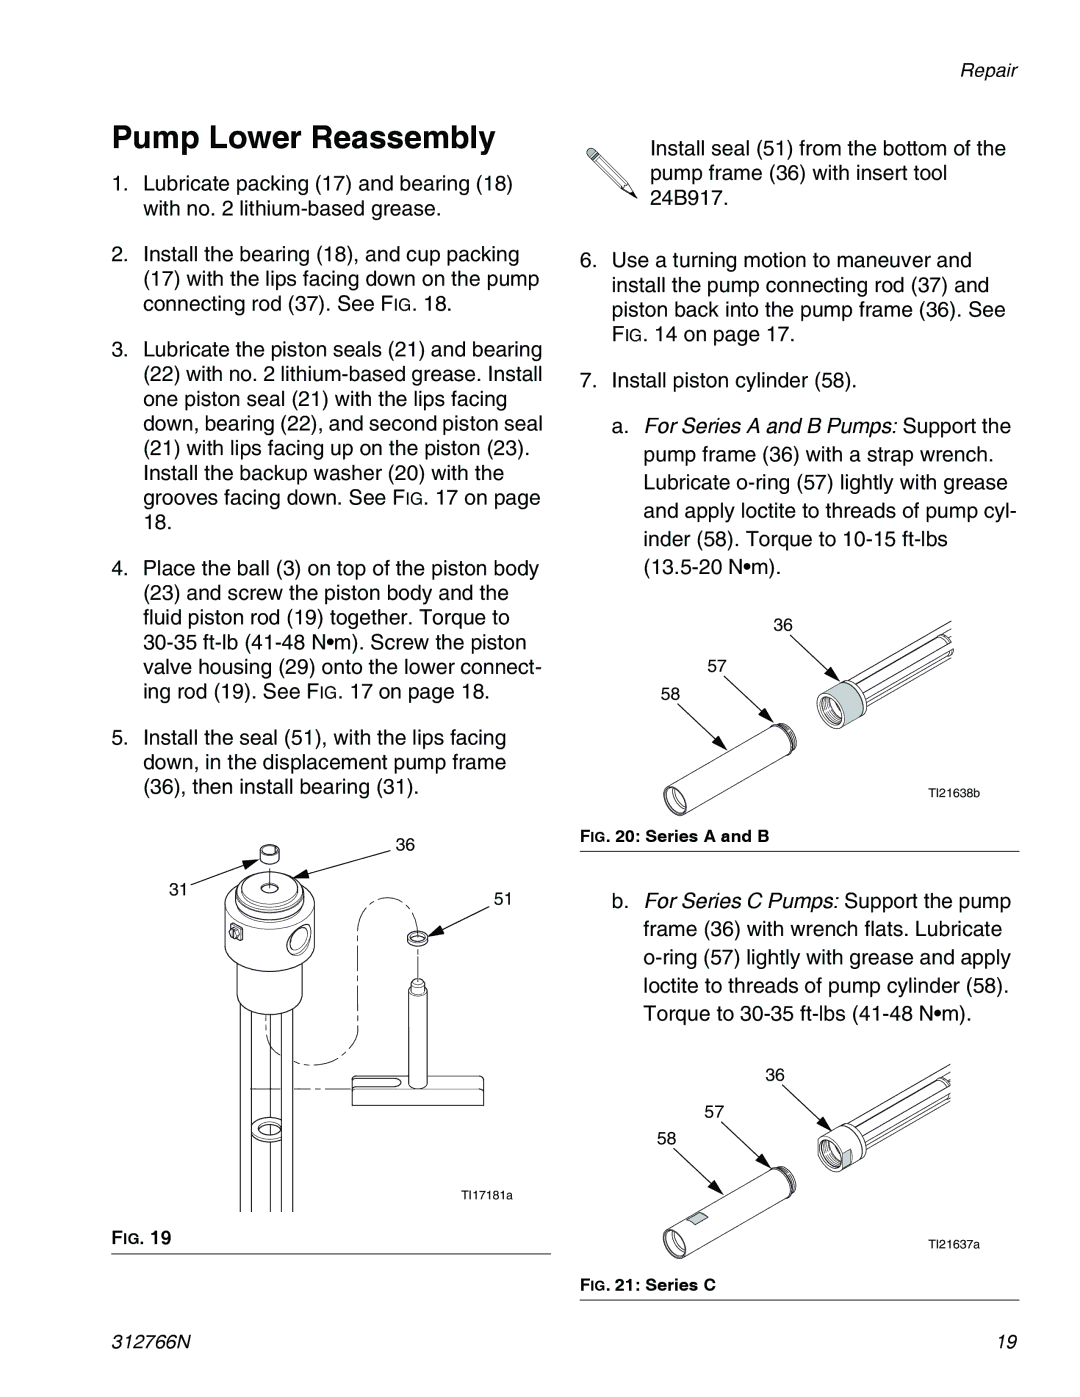
5.Install the seal (51), with the lips facing down, in the displacement pump frame (36), then install bearing (31).
| 36 |
31 | 51 |
|
TI17181a
FIG. 19
Repair
Install seal (51) from the bottom of the pump frame (36) with insert tool 24B917.
6.Use a turning motion to maneuver and install the pump connecting rod (37) and piston back into the pump frame (36). See FIG. 14 on page 17.
7.Install piston cylinder (58).
a.For Series A and B Pumps: Support the pump frame (36) with a strap wrench. Lubricate
36
57
58
TI21638b
FIG. 20: Series A and B
b.For Series C Pumps: Support the pump frame (36) with wrench flats. Lubricate
36
57
58
TI21637a
FIG. 21: Series C
312766N | 19 |