Contents
Instructions - Parts List
CARBON STEEL
Part No. 222828 Pump, Series A
Part No. 246935 Pump, Series A
Table of Contents
Symbols
Warning Symbol
Caution Symbol
EQUIPMENT MISUSE HAZARD
SKIN INJECTION HAZARD
MOVING PARTS HAZARD
FIRE AND EXPLOSION HAZARD
TOXIC FLUID HAZARD
Page
Installation
Grounding
AIR-POWEREDPUMPS
Installation
SYSTEM ACCESSORIES
Mounting Accessories
Air Line Accessories
Fluid Line Accessories
HYDRAULIC-POWEREDPUMPS
Installation
Filters
Hydraulic Lines
Hydraulic Motor Drip Pan
Fluid Supply Hoses
ALL MODELS Pressure Relief Procedure
AIR-POWEREDMODELS Starting and Adjusting the Pump
Operation
Packing Nut/Wet-Cup
AIR-POWEREDMODELS
Shutdown and Care of the Pump
Model 222835 Shown
Operation
HYDRAULIC-POWEREDMODELS
Starting and Adjusting the Pump
Operation
Shutdown and Care of the Pump
Troubleshooting
SOLUTION
CAUSE
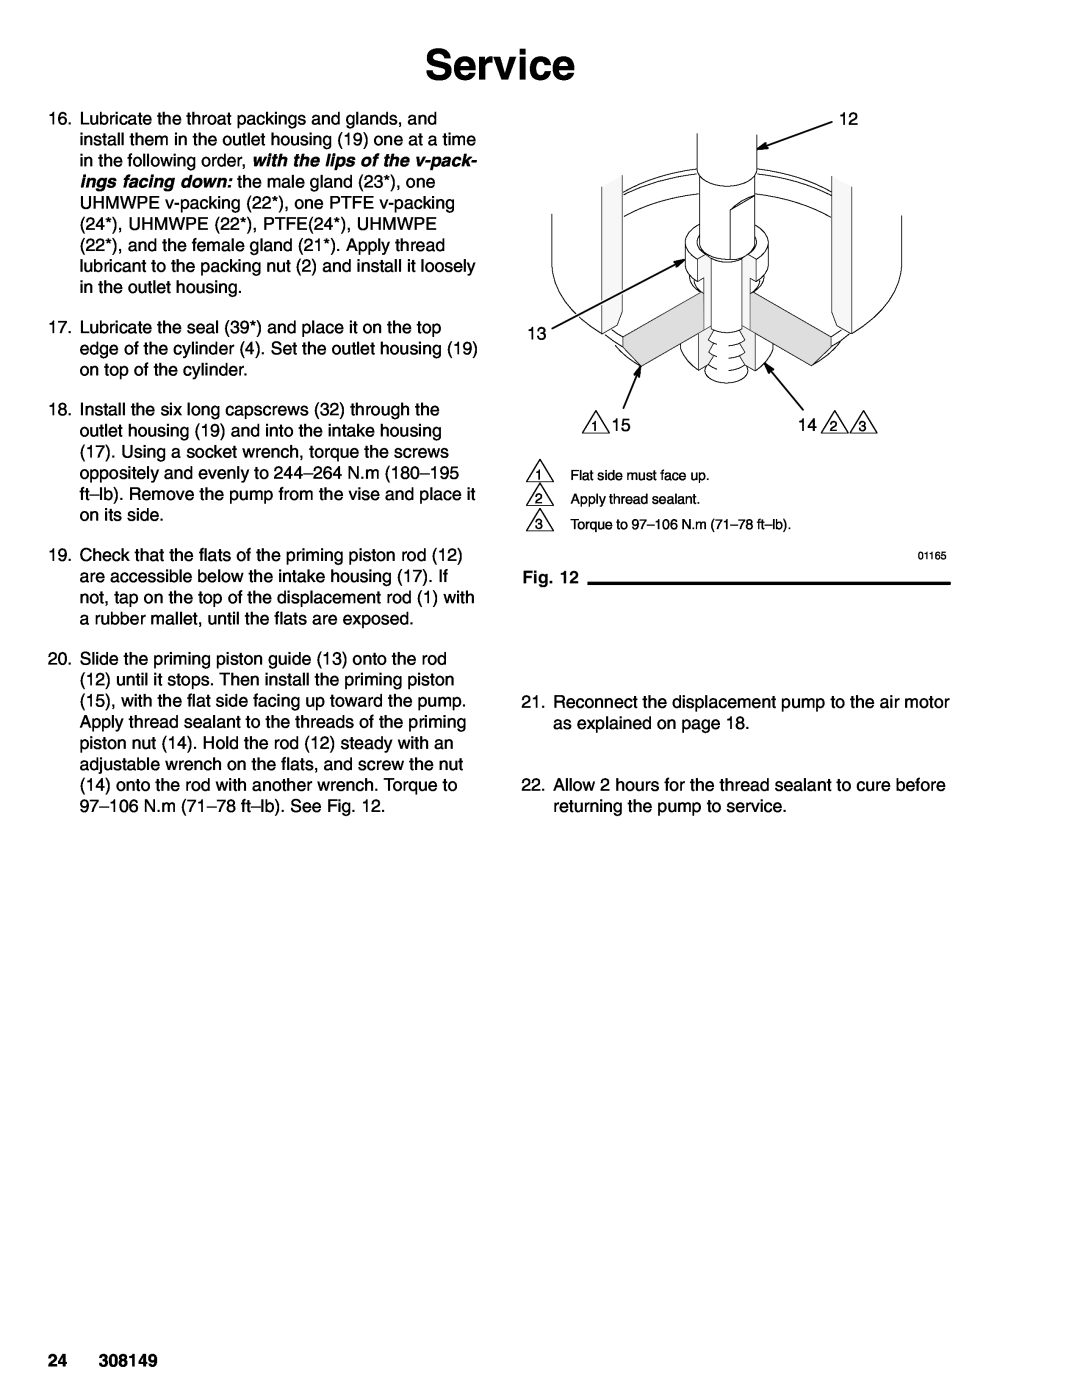
Service
Disconnecting the Displacement Pump
Required Tools
Service
King, Bulldog, and
Premier Pumps
Viscount Pumps
Reconnecting the Displacement Pump
Service
Displacement Pump Disassembly
Service
INTAKE CHECK VALVE
308149
Service
Service
4Remove and clean plug
THROAT PACKING DETAIL
DETAIL OF PISTON CHECK VALVE
Reassembly
Service
Service
THROAT PACKING DETAIL
DETAIL OF
PISTON CHECK VALVE
Service
Parts
Model 222828 Pump, Series A
Model 222829 Pump, Series A
Model 246935 Pump, Series A
Model 222835 Pump, Series B
Model 222901 Pump, Series B
Model 246936 Pump, Series A
24 1 Ratio, with Quiet King Air Motor
Parts
222800
Displacement Pump
Model 222810, Series B Model 246934, Series A
Parts
0919A
PTFE Packing Conversion Kit
Leather Packing Conversion Kit
Ink Pump Conversion Kit
Displacement Pump
Technical Data
Model 222828 and 246935 Bulldog Pump
Model 222829 Quiet Bulldog Pump
Technical Data
Model 222835 and 246936 King Pump
Technical Data
Model 222901 Quiet King Pump
Technical Data
Model 222940 Premier Pump
Technical Data
Model 222902 and 246937 Viscount Pump
Technical Data
liters/min
liters/min
Dimensions
Model 222835 Shown
B A E C D
Pump Model
Mounting Hole Layouts
Bulldog, King, and Viscount Pumps
Premier Pumps
Graco Standard Warranty
Graco Information
FOR GRACO CANADA CUSTOMERS
Graco Headquarters Minneapolis