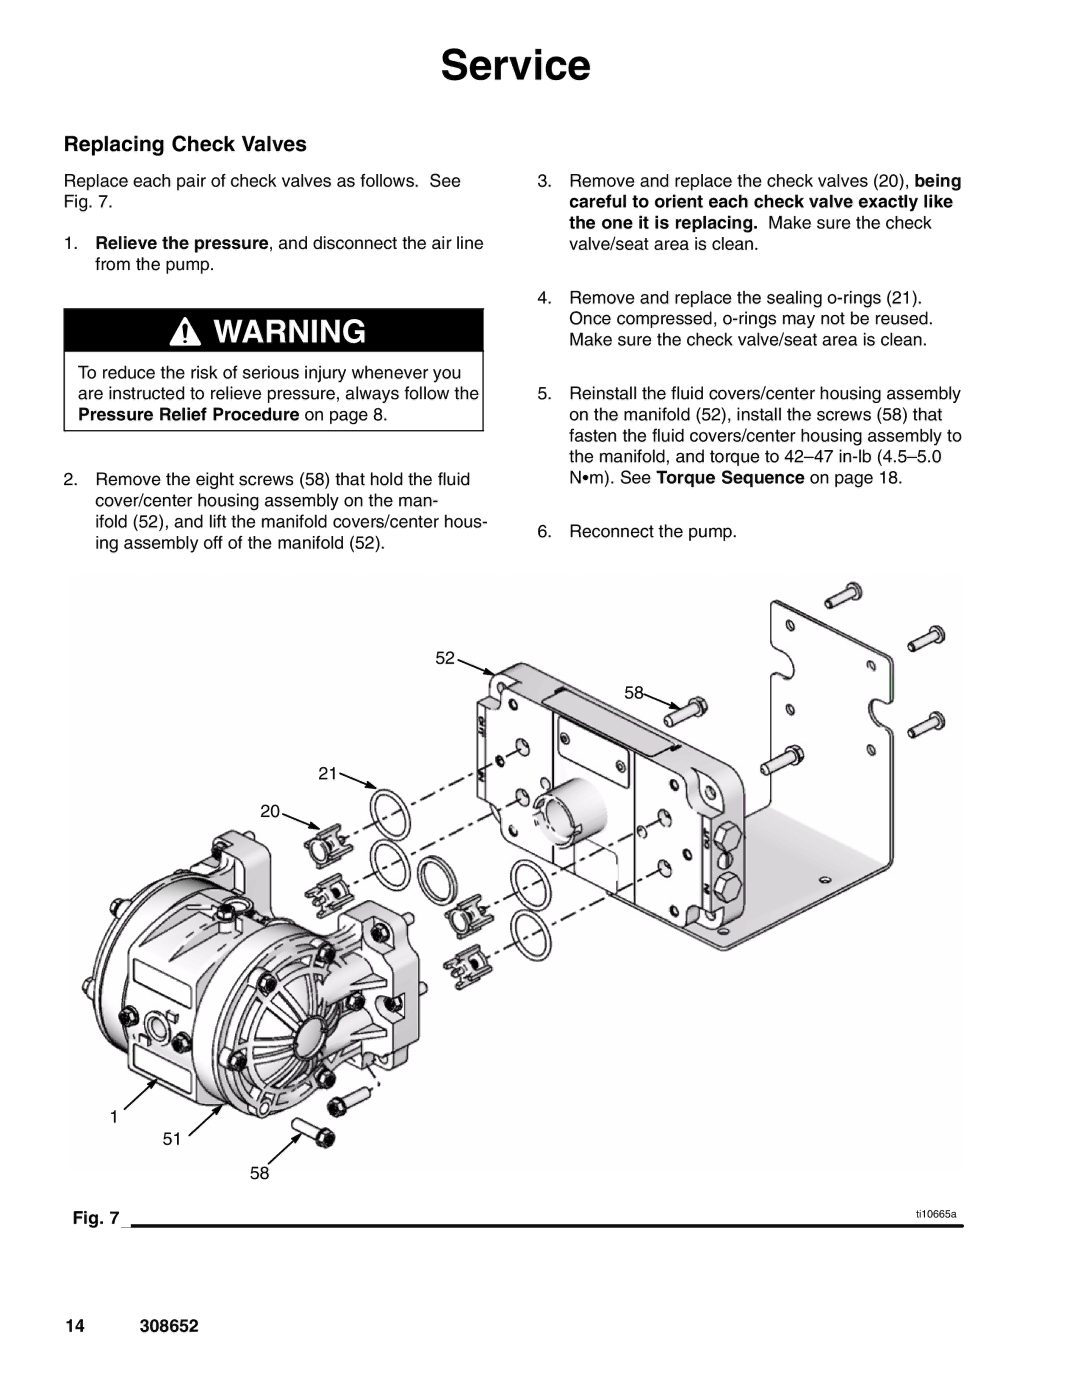
308652Y specifications
The Graco 308652Y is an advanced paint sprayer designed to deliver professional-quality results for both DIY enthusiasts and professional contractors. Engineered with cutting-edge technology, this model stands out for its efficiency, ease of use, and versatility, making it a popular choice in the market.One of the main features of the Graco 308652Y is its TrueAirless Technology. This innovative system allows users to spray unthinned paint, providing a flawless finish without the need for additional thinning agents that can compromise the paint’s integrity or performance. The ability to spray a wide variety of materials, from water-based and oil-based paints to stains and sealers, makes it exceptionally versatile.
Another remarkable characteristic of this sprayer is its high-output design. The Graco 308652Y is equipped with a powerful motor that delivers consistent pressure, ensuring a smooth and even spray pattern. It features a maximum pressure rating of up to 3,000 PSI, allowing users to tackle larger jobs quickly and efficiently, saving both time and effort.
Additionally, the Graco 308652Y comes with a stainless steel piston pump that is not only durable but also minimizes the risk of clogs during operation. This enhanced durability means that users can rely on the sprayer for extended use, even with heavy-duty applications.
The model is designed for ease of use, featuring an adjustable pressure control that enables users to customize the flow based on their project requirements and the surface material being painted. This flexibility allows for greater control during application, helping reduce overspray and ensuring precise coatings.
Portability also makes the Graco 308652Y a standout in the industry. It includes a lightweight structure with a comfortable handle, making it easy to transport between job sites. The unit is designed for quick setup and breakdown, allowing users to get to work with minimal hassle.
Lastly, the Graco 308652Y prioritizes user safety with an integrated cleaning system, making it easier to maintain and ensuring longevity. By combining exceptional features with user-friendly technology, the Graco 308652Y stands out as a top choice for anyone seeking efficiency, quality, and reliability in their painting projects.

