Repair
Attach Front End
WARNING
Read warnings, page 7. Proper attachment of front end is critical. Do not operate gun if front end is loose or lock ring is not snug against handle.
1. Engage piston safety lock, page 10.
TI2409A
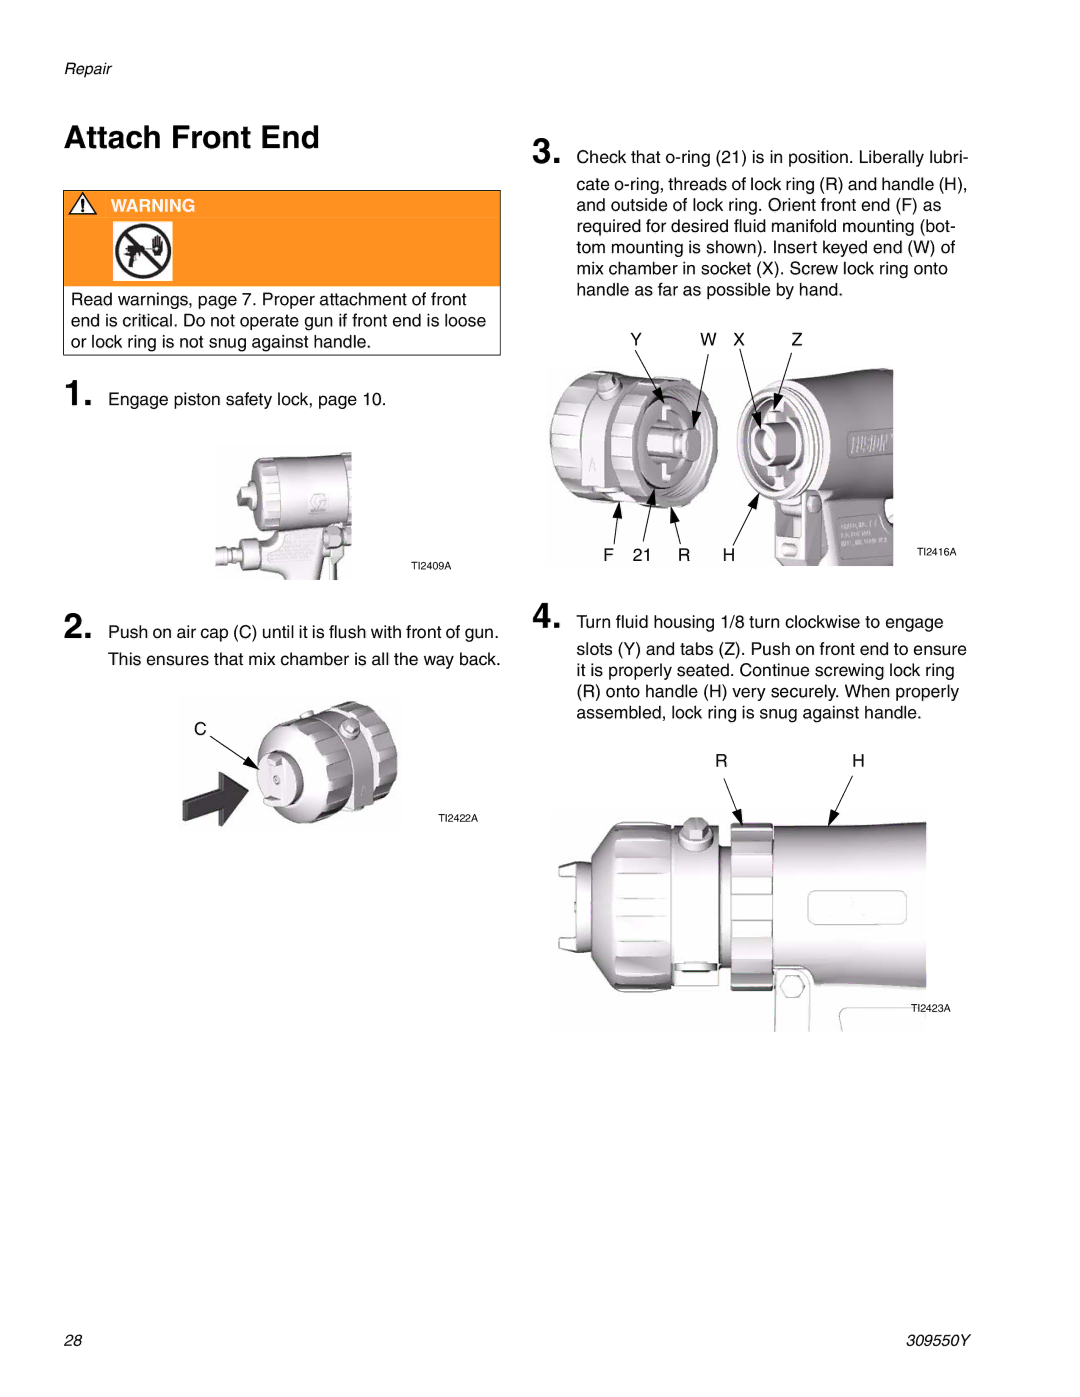
2. Push on air cap (C) until it is flush with front of gun.
This ensures that mix chamber is all the way back.
C
TI2422A
3. Check that
cate
Y W X Z
F 21 R H | TI2416A |
|
4. Turn fluid housing 1/8 turn clockwise to engage
slots (Y) and tabs (Z). Push on front end to ensure it is properly seated. Continue screwing lock ring
(R)onto handle (H) very securely. When properly assembled, lock ring is snug against handle.
RH
TI2423A
28 | 309550Y |
