Repair
8. Pull mix chamber (19) out rear of fluid housing.
Inspect for damage and clean ports, page 21. Inspect
CAUTION
To prevent
(N)on back edge. Be sure the A side of mix chamber is on the A side of gun.
9.Apply thin coat of lubricant to mix chamber (19).
Install mix chamber. Etched A and notch (N) must be on same side as A on fluid housing. Mix cham- ber is keyed to fit in fluid housing.
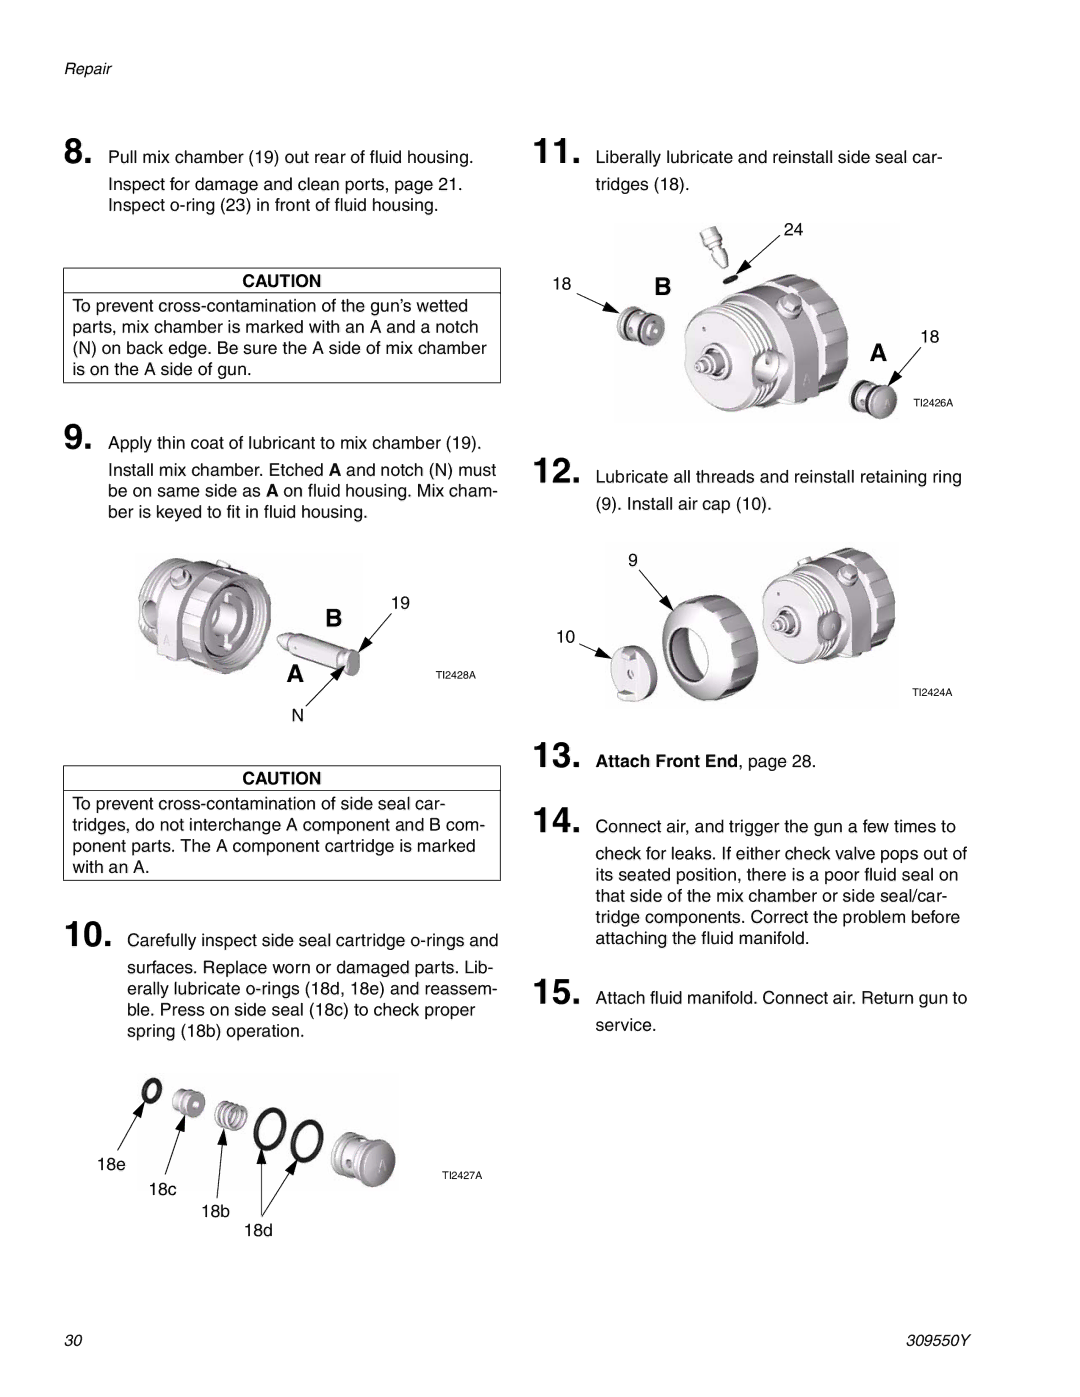
11. Liberally lubricate and reinstall side seal car-
tridges (18).
24
18B
18
A
TI2426A
12. Lubricate all threads and reinstall retaining ring
(9). Install air cap (10).
9
B
19
10
A | TI2428A |
|
N
CAUTION
To prevent
10. Carefully inspect side seal cartridge
surfaces. Replace worn or damaged parts. Lib- erally lubricate
18e
TI2427A
18c
18b
18d
TI2424A
13. Attach Front End, page 28.
14. Connect air, and trigger the gun a few times to
check for leaks. If either check valve pops out of its seated position, there is a poor fluid seal on that side of the mix chamber or side seal/car- tridge components. Correct the problem before attaching the fluid manifold.
15. Attach fluid manifold. Connect air. Return gun to
service.
30 | 309550Y |