Check Valves
![]() Before disassembling, press on ball (26c) to test check valve for proper movement and spring action.
Before disassembling, press on ball (26c) to test check valve for proper movement and spring action.
1. Follow Pressure Relief Procedure, page 15.
2. Remove fluid manifold (M). Leave air connected.
Clean Fluid Manifold, page 20.
M
TI2543A
3. Flush gun to remove residual A and B compo-
nents, page 20. Follow Pressure Relief Proce- dure, page 15.
4. Disconnect air.
TI2540A
CAUTION
To prevent
Repair
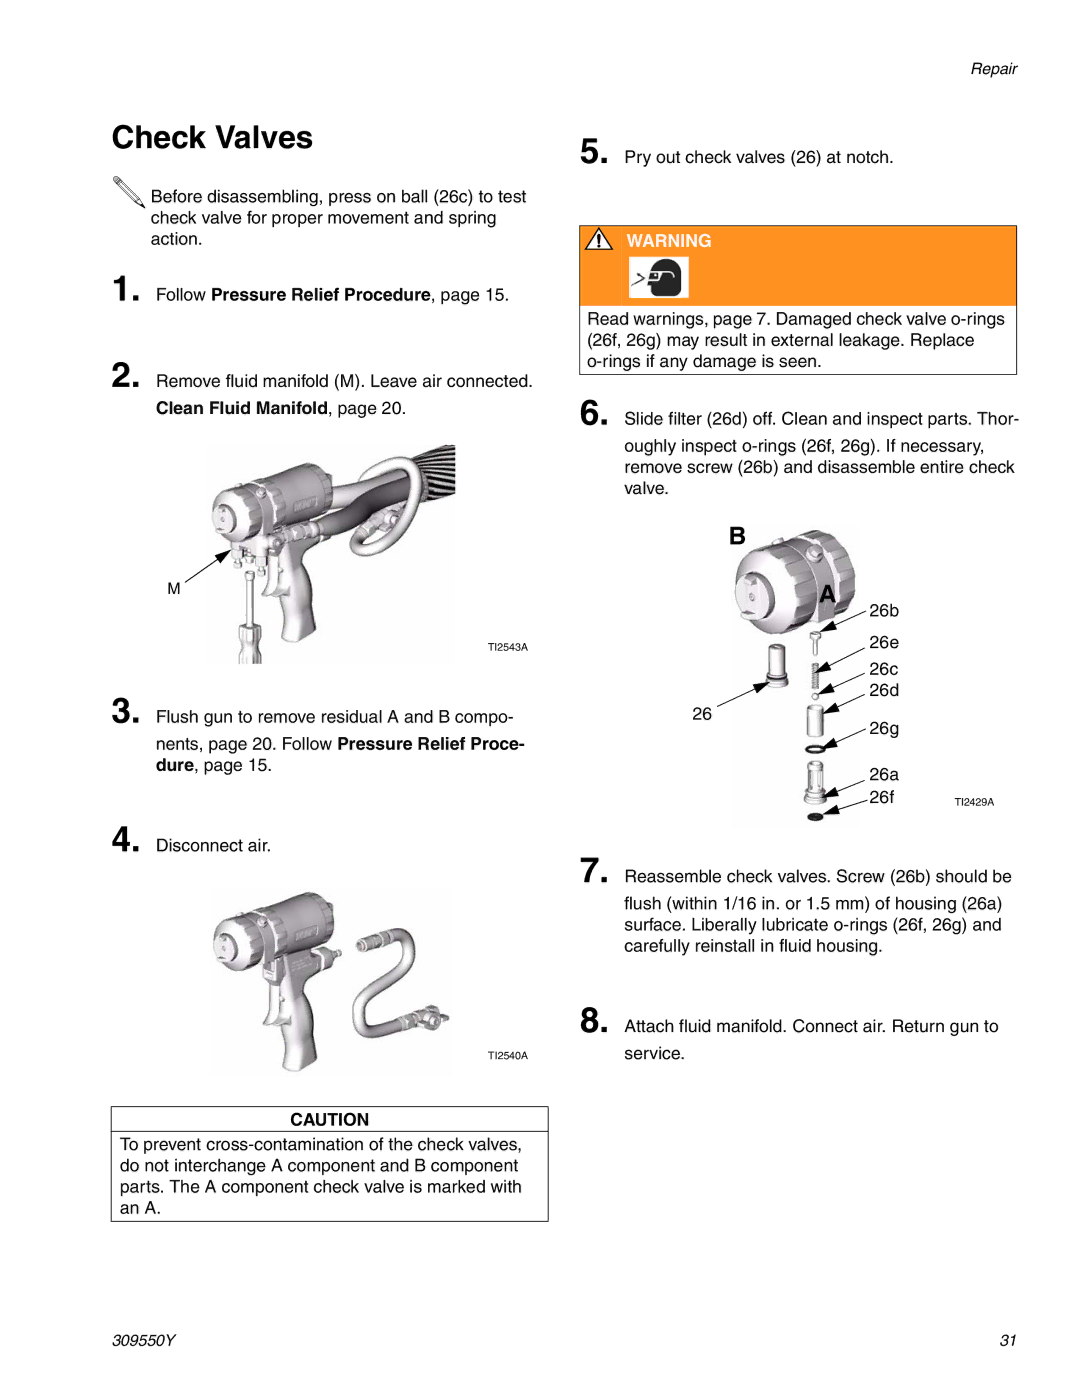
5. Pry out check valves (26) at notch.
![]() WARNING
WARNING
Read warnings, page 7. Damaged check valve
6. Slide filter (26d) off. Clean and inspect parts. Thor-
oughly inspect
B
A
26b
26e
26c
26d
26
26g
26a
26f TI2429A
7. Reassemble check valves. Screw (26b) should be
flush (within 1/16 in. or 1.5 mm) of housing (26a) surface. Liberally lubricate
8. Attach fluid manifold. Connect air. Return gun to
service.
309550Y | 31 |