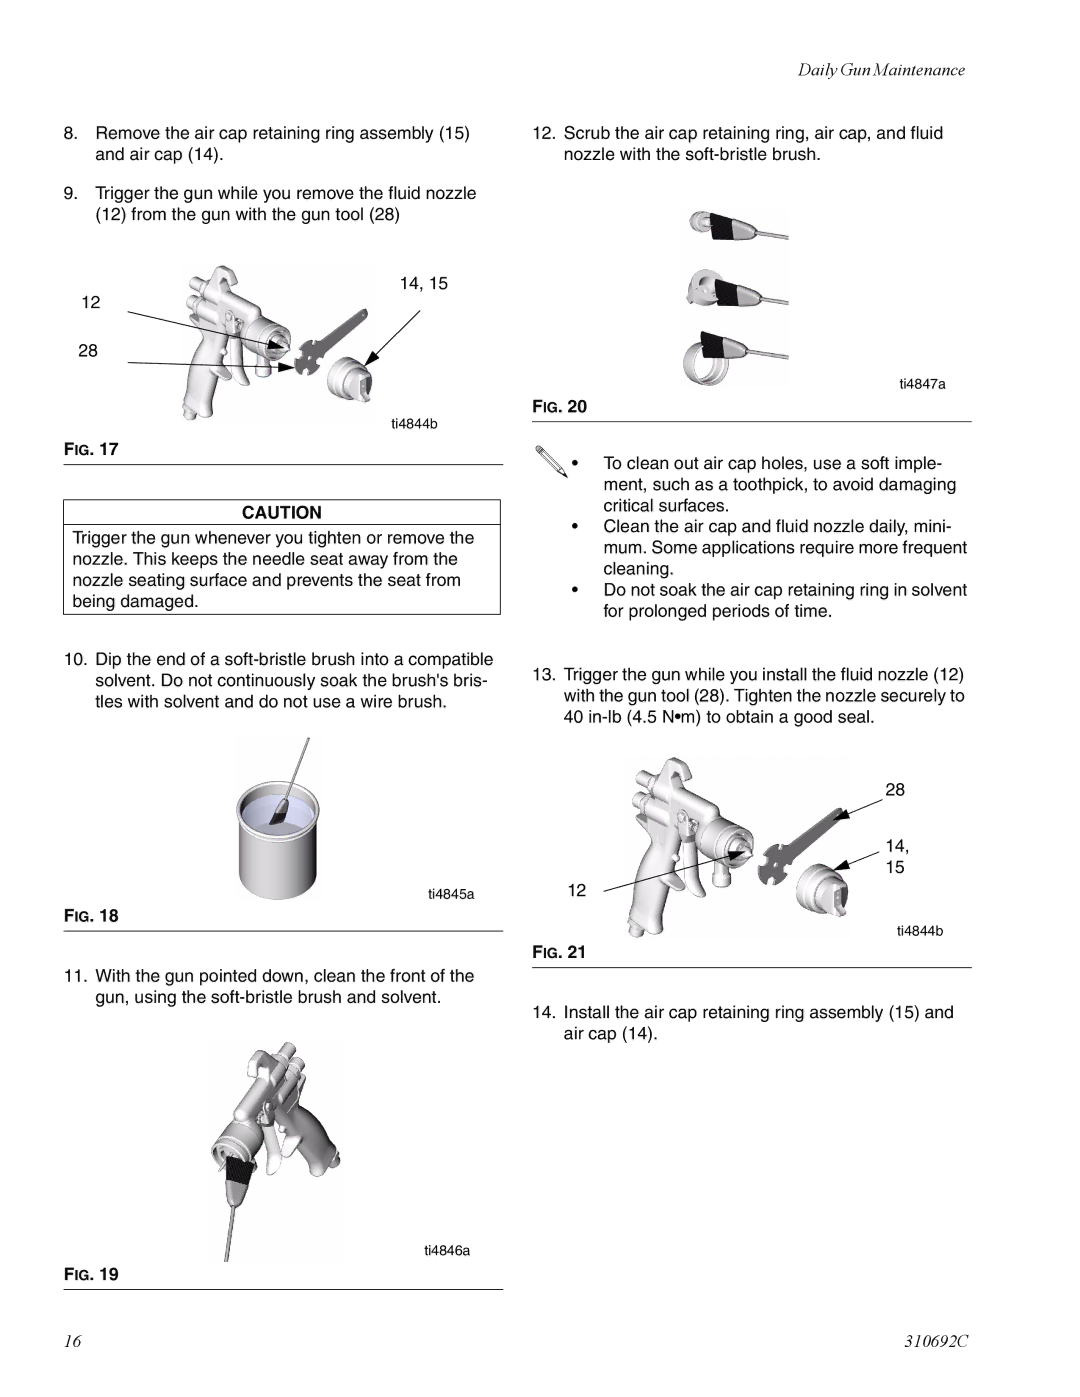
8.Remove the air cap retaining ring assembly (15) and air cap (14).
9.Trigger the gun while you remove the fluid nozzle (12) from the gun with the gun tool (28)
14, 15
12
28
ti4844b
FIG. 17
CAUTION
Trigger the gun whenever you tighten or remove the nozzle. This keeps the needle seat away from the nozzle seating surface and prevents the seat from being damaged.
10.Dip the end of a
Daily Gun Maintenance
12.Scrub the air cap retaining ring, air cap, and fluid nozzle with the
ti4847a
FIG. 20
![]() • To clean out air cap holes, use a soft imple- ment, such as a toothpick, to avoid damaging critical surfaces.
• To clean out air cap holes, use a soft imple- ment, such as a toothpick, to avoid damaging critical surfaces.
•Clean the air cap and fluid nozzle daily, mini- mum. Some applications require more frequent cleaning.
•Do not soak the air cap retaining ring in solvent for prolonged periods of time.
13.Trigger the gun while you install the fluid nozzle (12) with the gun tool (28). Tighten the nozzle securely to 40
ti4845a
FIG. 18
11.With the gun pointed down, clean the front of the gun, using the
ti4846a
FIG. 19
28
14, 15
12
ti4844b
FIG. 21
14.Install the air cap retaining ring assembly (15) and air cap (14).
16 | 310692C |
