Repair
Centerline Component Installation
![]()
![]() All gun block parts must be clean and free
All gun block parts must be clean and free ![]() of damage before installation.
of damage before installation.
1.Remove felt wiper assembly from rear of mixing chamber.
2.Ensure internal mixing chamber parts are in place.
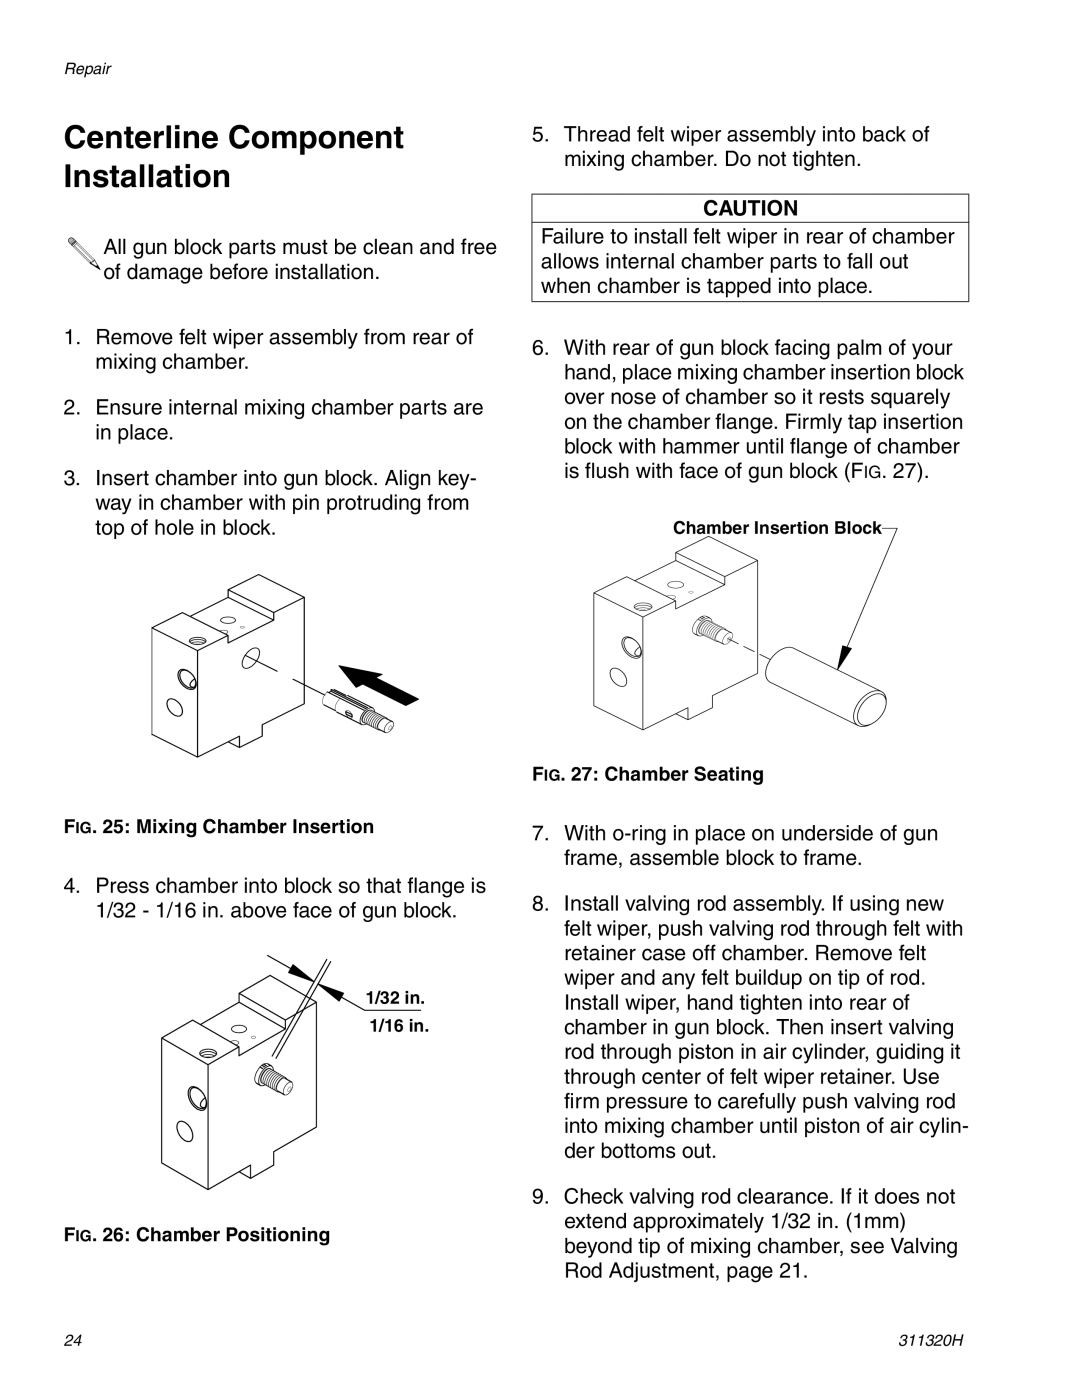
3.Insert chamber into gun block. Align key- way in chamber with pin protruding from top of hole in block.
5.Thread felt wiper assembly into back of mixing chamber. Do not tighten.
CAUTION
Failure to install felt wiper in rear of chamber allows internal chamber parts to fall out when chamber is tapped into place.
6.With rear of gun block facing palm of your hand, place mixing chamber insertion block over nose of chamber so it rests squarely on the chamber flange. Firmly tap insertion block with hammer until flange of chamber is flush with face of gun block (FIG. 27).
Chamber Insertion Block
FIG. 27: Chamber Seating
FIG. 25: Mixing Chamber Insertion
4.Press chamber into block so that flange is 1/32 - 1/16 in. above face of gun block.
1/32 in.
1/16 in.
FIG. 26: Chamber Positioning
7.With
8.Install valving rod assembly. If using new felt wiper, push valving rod through felt with retainer case off chamber. Remove felt wiper and any felt buildup on tip of rod. Install wiper, hand tighten into rear of chamber in gun block. Then insert valving rod through piston in air cylinder, guiding it through center of felt wiper retainer. Use firm pressure to carefully push valving rod into mixing chamber until piston of air cylin- der bottoms out.
9.Check valving rod clearance. If it does not extend approximately 1/32 in. (1mm) beyond tip of mixing chamber, see Valving Rod Adjustment, page 21.
24 | 311320H |