Hydraulic Cylinder
For repairs, order Hydraulic Cylinder Repair ![]()
![]() Kit 296785.
Kit 296785.
Disassembly
Tools Required
•Two - 1 in.
•Two - 1/2 in.
•
1.Relieve pressure, page 3.
2.Turn OFF the main disconnect and lock out power at the source.
CAUTION
In the following step, attach the clamps to the port blocks of the assembly. Attaching clamps to any other part of the assembly may result in significant damage when breaking loose the baffle jam nut and clevis.
3.Clamp the hydraulic cylinder to a flat surface using
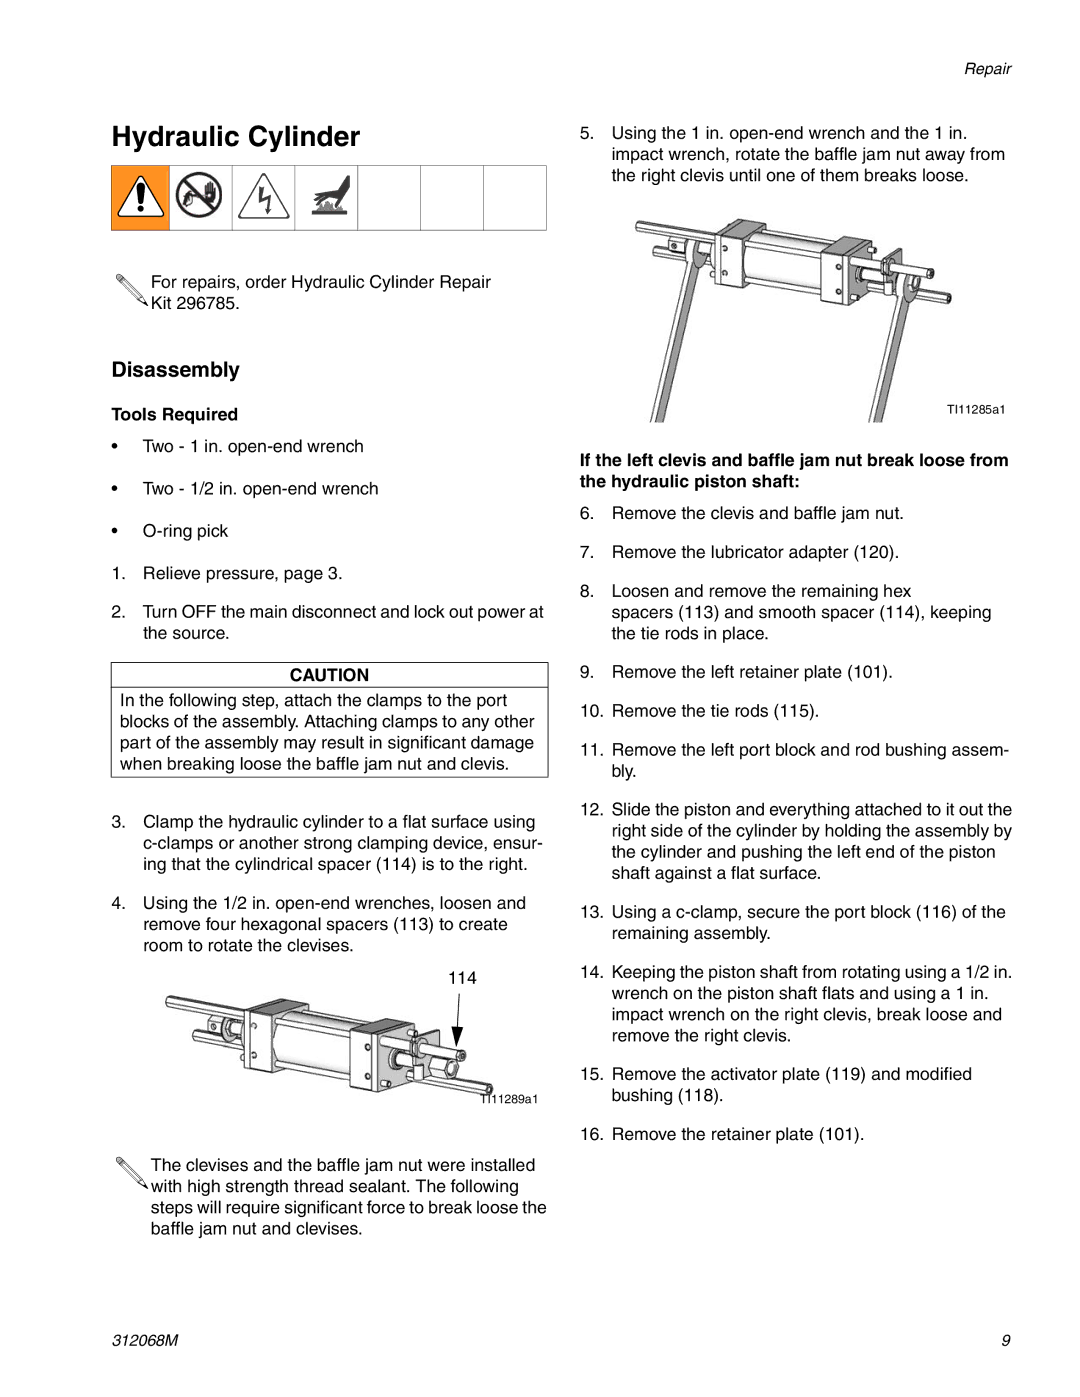
4.Using the 1/2 in.
114
TI11289a1
The clevises and the baffle jam nut were installed ![]()
![]() with high strength thread sealant. The following steps will require significant force to break loose the baffle jam nut and clevises.
with high strength thread sealant. The following steps will require significant force to break loose the baffle jam nut and clevises.
Repair
5.Using the 1 in.
TI11285a1
If the left clevis and baffle jam nut break loose from the hydraulic piston shaft:
6.Remove the clevis and baffle jam nut.
7.Remove the lubricator adapter (120).
8.Loosen and remove the remaining hex
spacers (113) and smooth spacer (114), keeping the tie rods in place.
9.Remove the left retainer plate (101).
10.Remove the tie rods (115).
11.Remove the left port block and rod bushing assem- bly.
12.Slide the piston and everything attached to it out the right side of the cylinder by holding the assembly by the cylinder and pushing the left end of the piston shaft against a flat surface.
13.Using a
14.Keeping the piston shaft from rotating using a 1/2 in. wrench on the piston shaft flats and using a 1 in. impact wrench on the right clevis, break loose and remove the right clevis.
15.Remove the activator plate (119) and modified bushing (118).
16.Remove the retainer plate (101).
312068M | 9 |
