Repair
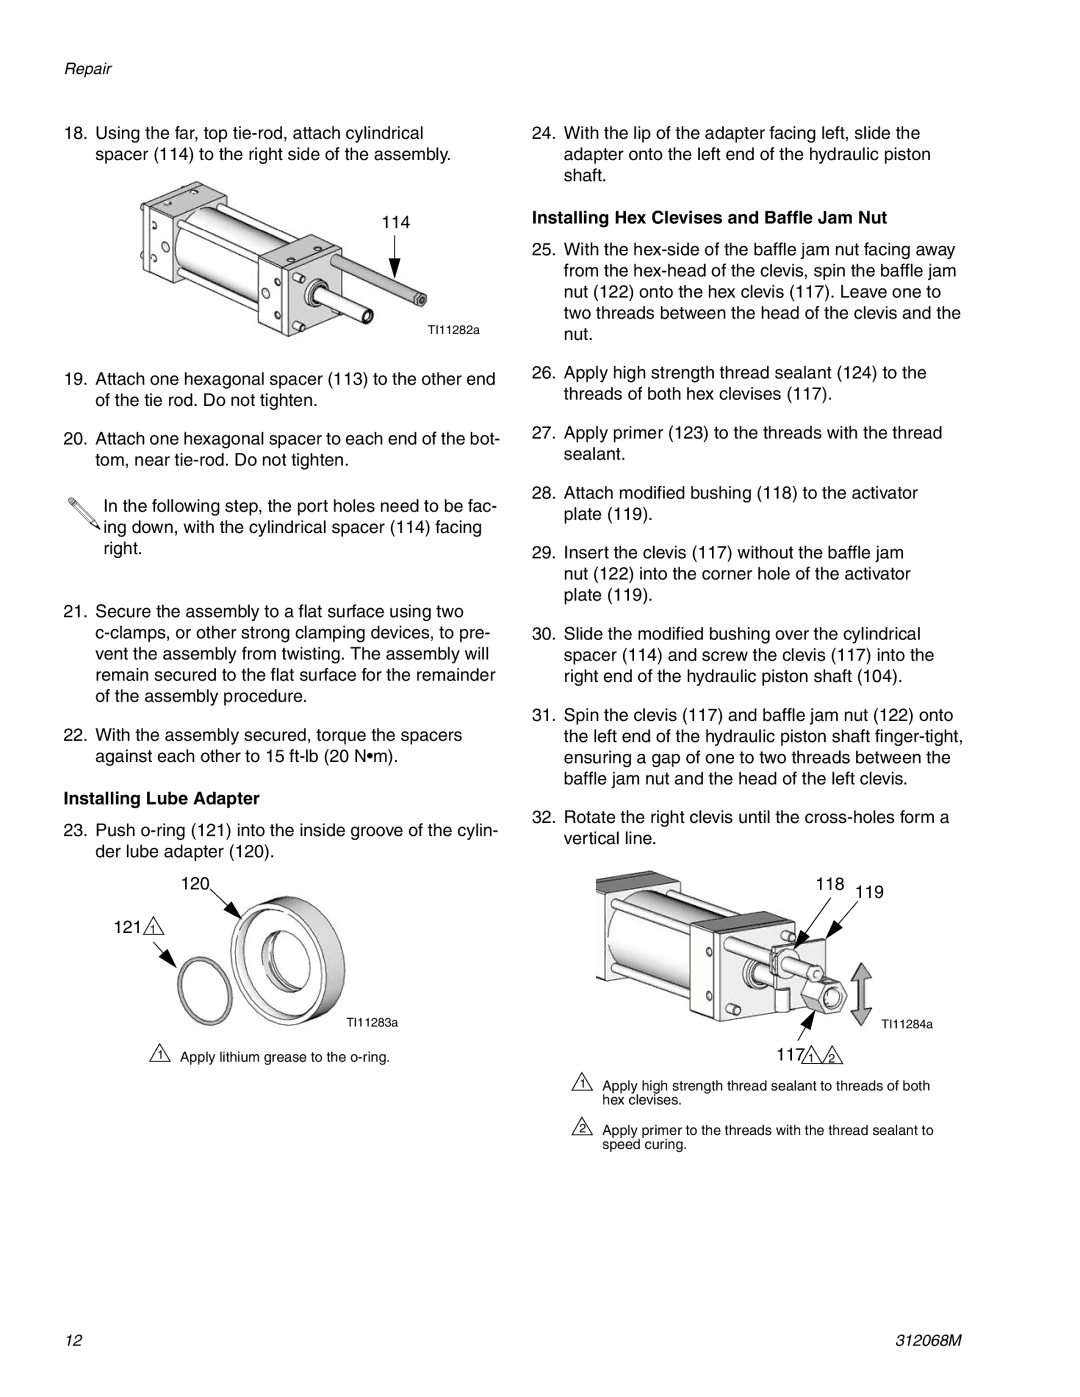
18.Using the far, top
114
TI11282a
19.Attach one hexagonal spacer (113) to the other end of the tie rod. Do not tighten.
20.Attach one hexagonal spacer to each end of the bot- tom, near
In the following step, the port holes need to be fac- ![]()
![]() ing down, with the cylindrical spacer (114) facing right.
ing down, with the cylindrical spacer (114) facing right.
21.Secure the assembly to a flat surface using two
22.With the assembly secured, torque the spacers against each other to 15
Installing Lube Adapter
23.Push
120
121 1
TI11283a
![]() 1 Apply lithium grease to the
1 Apply lithium grease to the
24.With the lip of the adapter facing left, slide the adapter onto the left end of the hydraulic piston shaft.
Installing Hex Clevises and Baffle Jam Nut
25.With the
26.Apply high strength thread sealant (124) to the threads of both hex clevises (117).
27.Apply primer (123) to the threads with the thread sealant.
28.Attach modified bushing (118) to the activator plate (119).
29.Insert the clevis (117) without the baffle jam nut (122) into the corner hole of the activator plate (119).
30.Slide the modified bushing over the cylindrical spacer (114) and screw the clevis (117) into the right end of the hydraulic piston shaft (104).
31.Spin the clevis (117) and baffle jam nut (122) onto the left end of the hydraulic piston shaft
32.Rotate the right clevis until the
118 119
|
| TI11284a |
| 117 1 | 2 |
1 | Apply high strength thread sealant to threads of both | |
| hex clevises. |
|
2 | Apply primer to the threads with the thread sealant to | |
| speed curing. |
|
12 | 312068M |