Piston and Cylinder Seals
Piston Seal and Cylinder Seal Repair Kits are avail- ![]()
![]() able. See Table 1 on page 17 to order the correct kits for your pump. Also see kit manual 312071.
able. See Table 1 on page 17 to order the correct kits for your pump. Also see kit manual 312071.
Repair
Reassembly
CAUTION
To prevent
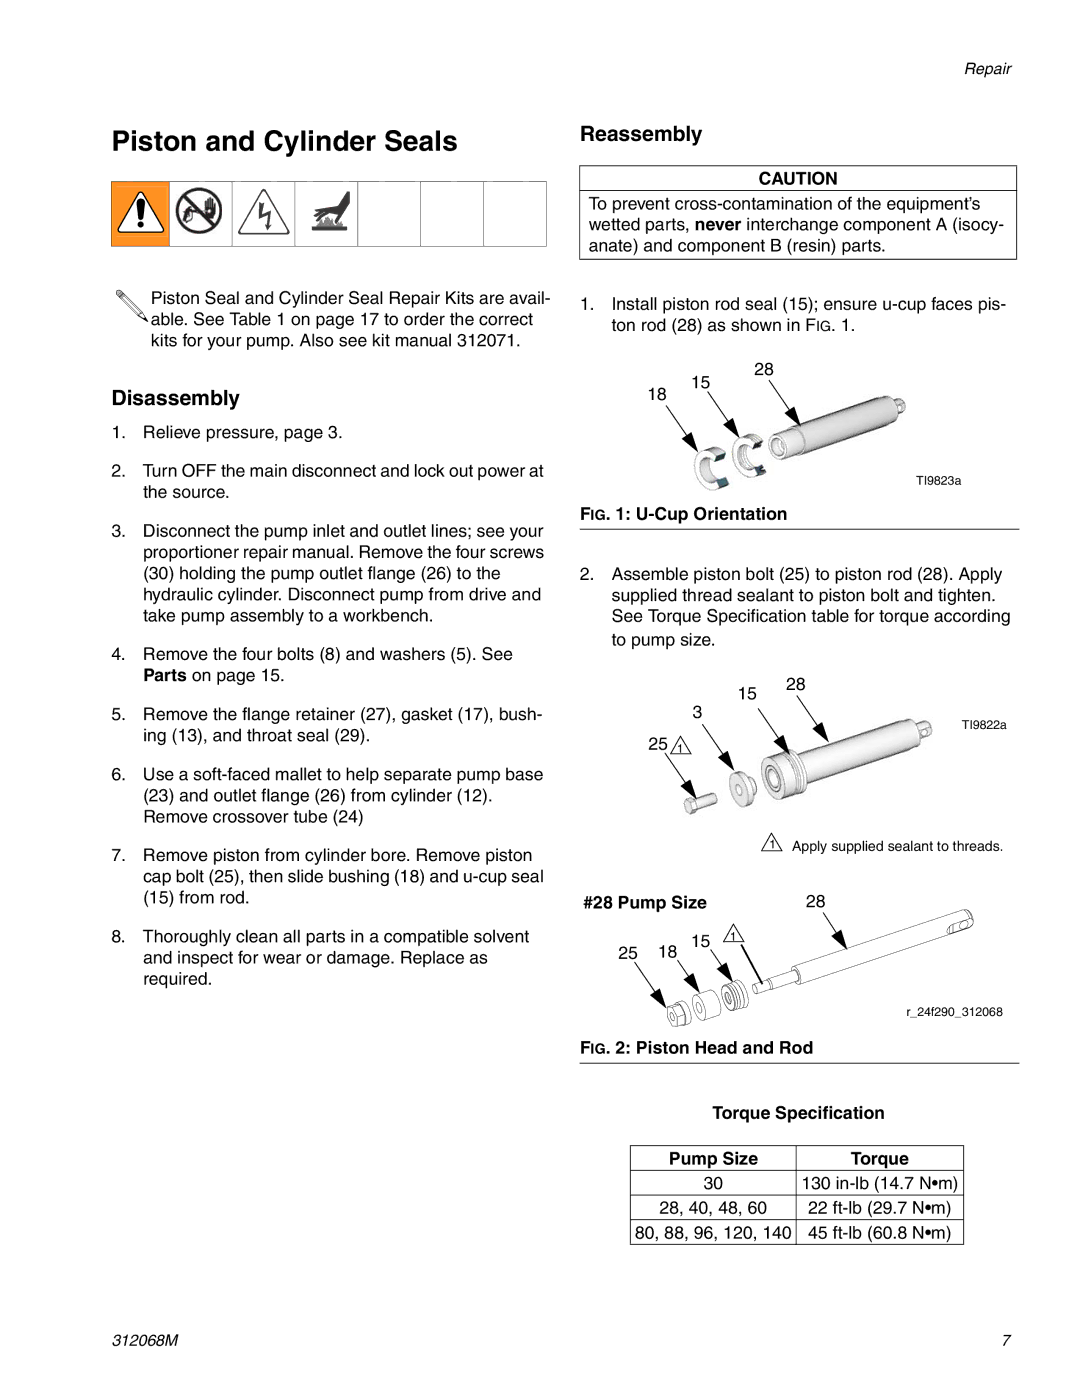
1.Install piston rod seal (15); ensure
Disassembly
1. | Relieve pressure, page 3. |
2. | Turn OFF the main disconnect and lock out power at |
| the source. |
18
28
15
TI9823a
3. | Disconnect the pump inlet and outlet lines; see your |
| proportioner repair manual. Remove the four screws |
| (30) holding the pump outlet flange (26) to the |
| hydraulic cylinder. Disconnect pump from drive and |
| take pump assembly to a workbench. |
4. | Remove the four bolts (8) and washers (5). See |
| Parts on page 15. |
5. | Remove the flange retainer (27), gasket (17), bush- |
| ing (13), and throat seal (29). |
6. | Use a |
| (23) and outlet flange (26) from cylinder (12). |
| Remove crossover tube (24) |
7. | Remove piston from cylinder bore. Remove piston |
| cap bolt (25), then slide bushing (18) and |
| (15) from rod. |
FIG. 1: U-Cup Orientation
2.Assemble piston bolt (25) to piston rod (28). Apply supplied thread sealant to piston bolt and tighten. See Torque Specification table for torque according to pump size.
15 | 28 |
| |
3 | TI9822a |
| |
25 1 |
|
![]() 1 Apply supplied sealant to threads.
1 Apply supplied sealant to threads.
#28 Pump Size | 28 |
8. Thoroughly clean all parts in a compatible solvent |
and inspect for wear or damage. Replace as |
required. |
25 18
15 1
r_24f290_312068
FIG. 2: Piston Head and Rod
Torque Specification
Pump Size | Torque |
30 | 130 |
28, 40, 48, 60 | 22 |
80, 88, 96, 120, 140 | 45 |
312068M | 7 |