Repair
Reassembly
NOTE: See Repair Kits, page 20.
1.Install the tube gasket (22*) in the gun. Handtighten the fluid tube connector (C) into the gun’s fluid inlet. Handtighten the air inlet fitting (17) and screw (20). Torque the fluid tube connector to
2.Install the inline fluid filter (12) into the base of the fluid tube. Screw the fluid inlet fitting (18) into the base of the tube. Torque to
3.Place the new
3 | Lubricate lightly. |
8 | Lips face out of gun body. |
83 7*
![]() 28*
28*
TI6578A
FIG. 41
4.Lubricate the front end of the air valve assembly (8*). Gently slide the air valve assembly into the back of the gun, passing through the
5.Carefully insert the thinner end of the shaft (9) into the air valve (8*).
6.Install the two springs (15 and 19). Screw the spring cap (11) into the back of the gun body. Torque to
7.Lightly lubricate the needle assembly
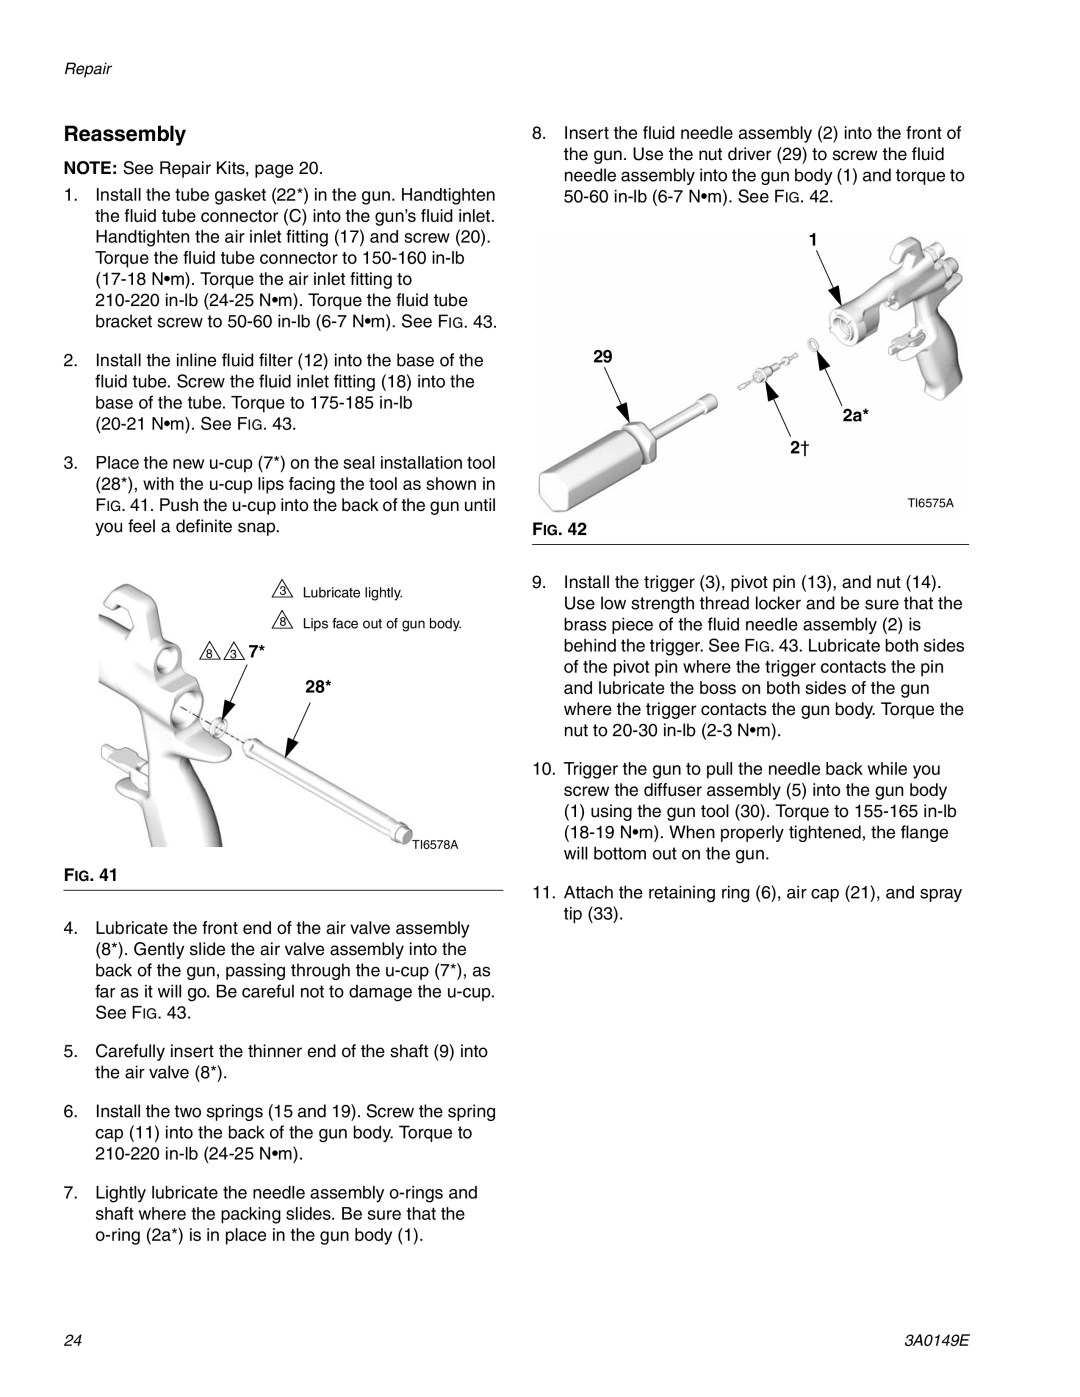
8.Insert the fluid needle assembly (2) into the front of the gun. Use the nut driver (29) to screw the fluid needle assembly into the gun body (1) and torque to
1
29
2a*
2†
TI6575A
FIG. 42
9.Install the trigger (3), pivot pin (13), and nut (14). Use low strength thread locker and be sure that the brass piece of the fluid needle assembly (2) is behind the trigger. See FIG. 43. Lubricate both sides of the pivot pin where the trigger contacts the pin and lubricate the boss on both sides of the gun where the trigger contacts the gun body. Torque the nut to
10.Trigger the gun to pull the needle back while you screw the diffuser assembly (5) into the gun body
(1) using the gun tool (30). Torque to
11.Attach the retaining ring (6), air cap (21), and spray tip (33).
24 | 3A0149E |
