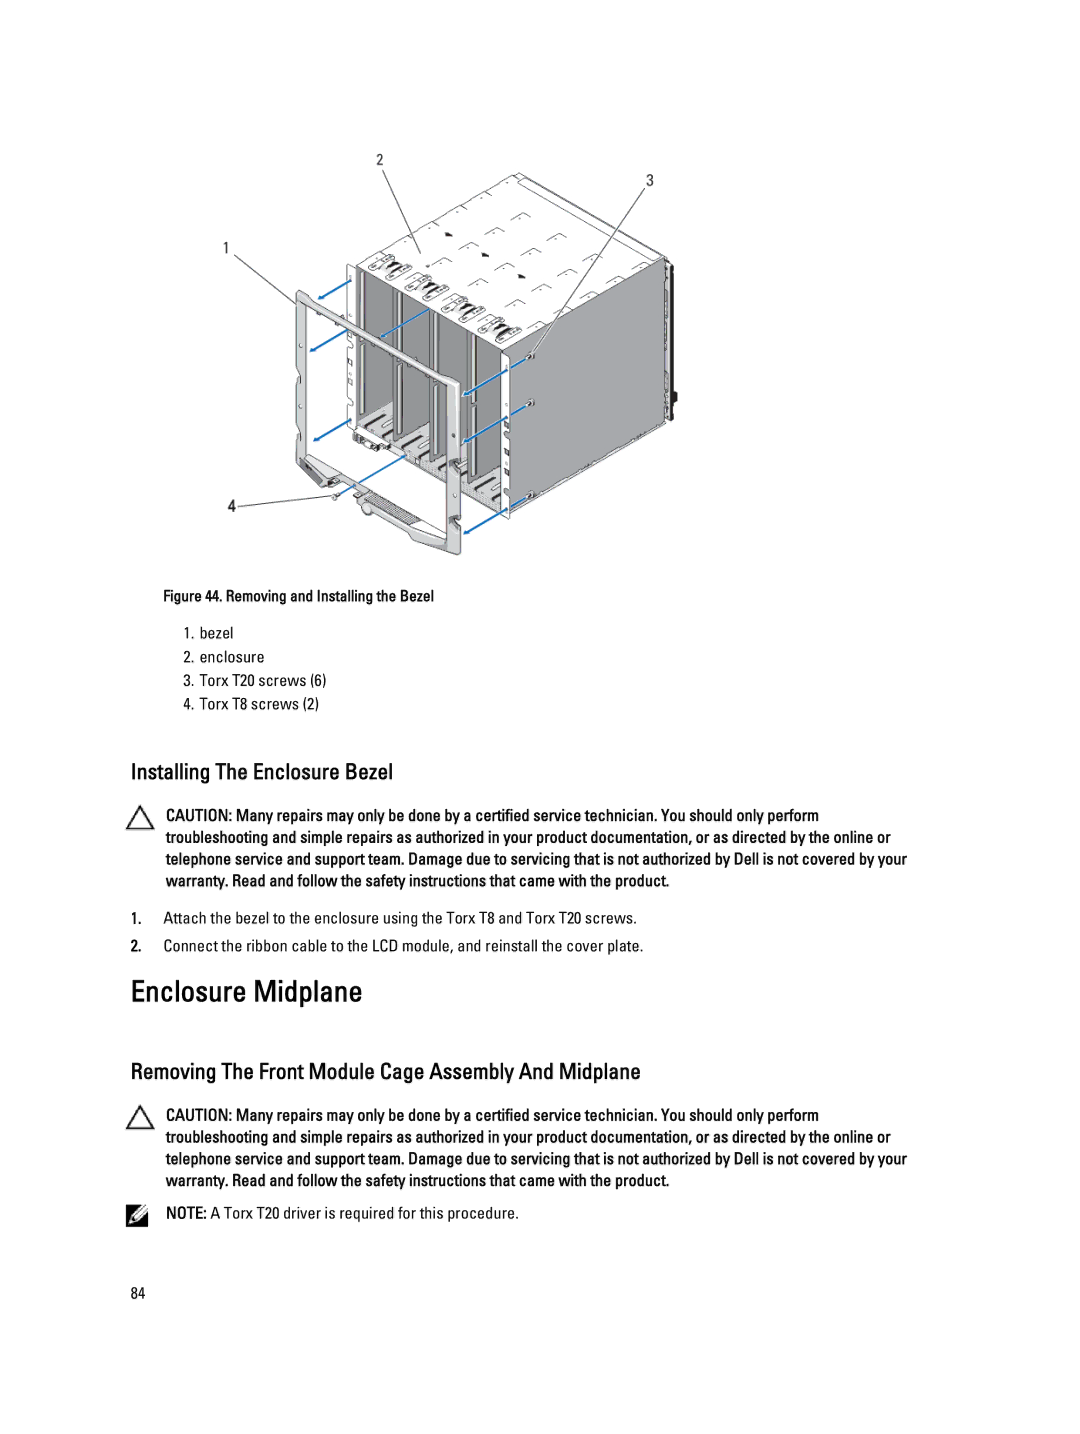
Figure 44. Removing and Installing the Bezel
1.bezel
2.enclosure
3.Torx T20 screws (6)
4.Torx T8 screws (2)
Installing The Enclosure Bezel
CAUTION: Many repairs may only be done by a certified service technician. You should only perform troubleshooting and simple repairs as authorized in your product documentation, or as directed by the online or telephone service and support team. Damage due to servicing that is not authorized by Dell is not covered by your warranty. Read and follow the safety instructions that came with the product.
1.Attach the bezel to the enclosure using the Torx T8 and Torx T20 screws.
2.Connect the ribbon cable to the LCD module, and reinstall the cover plate.
Enclosure Midplane
Removing The Front Module Cage Assembly And Midplane
CAUTION: Many repairs may only be done by a certified service technician. You should only perform troubleshooting and simple repairs as authorized in your product documentation, or as directed by the online or telephone service and support team. Damage due to servicing that is not authorized by Dell is not covered by your warranty. Read and follow the safety instructions that came with the product.
NOTE: A Torx T20 driver is required for this procedure.
84
