3.Slide the module into the enclosure until the handle contacts the enclosure.
4.To fully seat the module, close the handle until the release latch snaps into place.
5.If applicable, connect the keyboard, monitor, and mouse to the module.
I/O Modules
CAUTION: If you remove an I/O module, you must either replace it with another I/O module or with a filler blank to maintain cooling airflow through the system enclosure.
Removing An I/O Module
CAUTION: Many repairs may only be done by a certified service technician. You should only perform troubleshooting and simple repairs as authorized in your product documentation, or as directed by the online or telephone service and support team. Damage due to servicing that is not authorized by Dell is not covered by your warranty. Read and follow the safety instructions that came with the product.
1.If you have not already installed the cable enumerators to make removal and replacement of the I/O modules easier and faster, install them now.
For more information, see the Rack Installation Guide at support.dell.com/manuals.
2.Disconnect the cables attached to the I/O module.
3.Lift the latch on the end of the module’s handle and rotate the handle away from the module.
4.Slide the I/O module out of the enclosure.
5.Install the I/O connector cover.
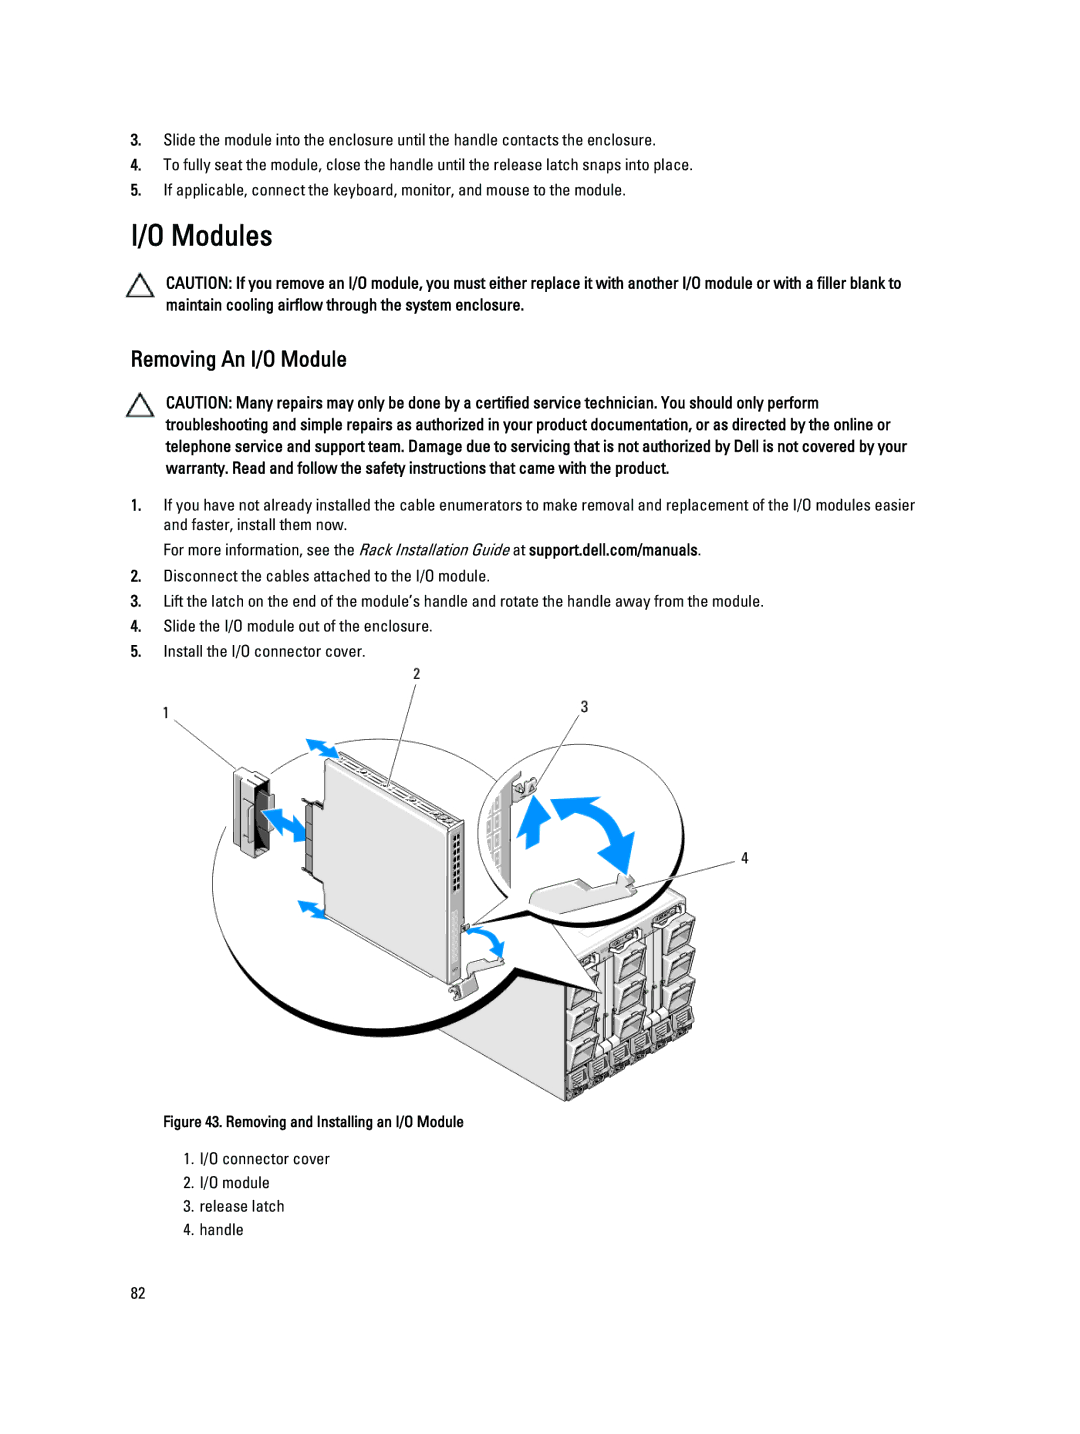
Figure 43. Removing and Installing an I/O Module
1.I/O connector cover
2.I/O module
3.release latch
4.handle
82