5 | Interface Controls | |
|
|
|
|
|
|
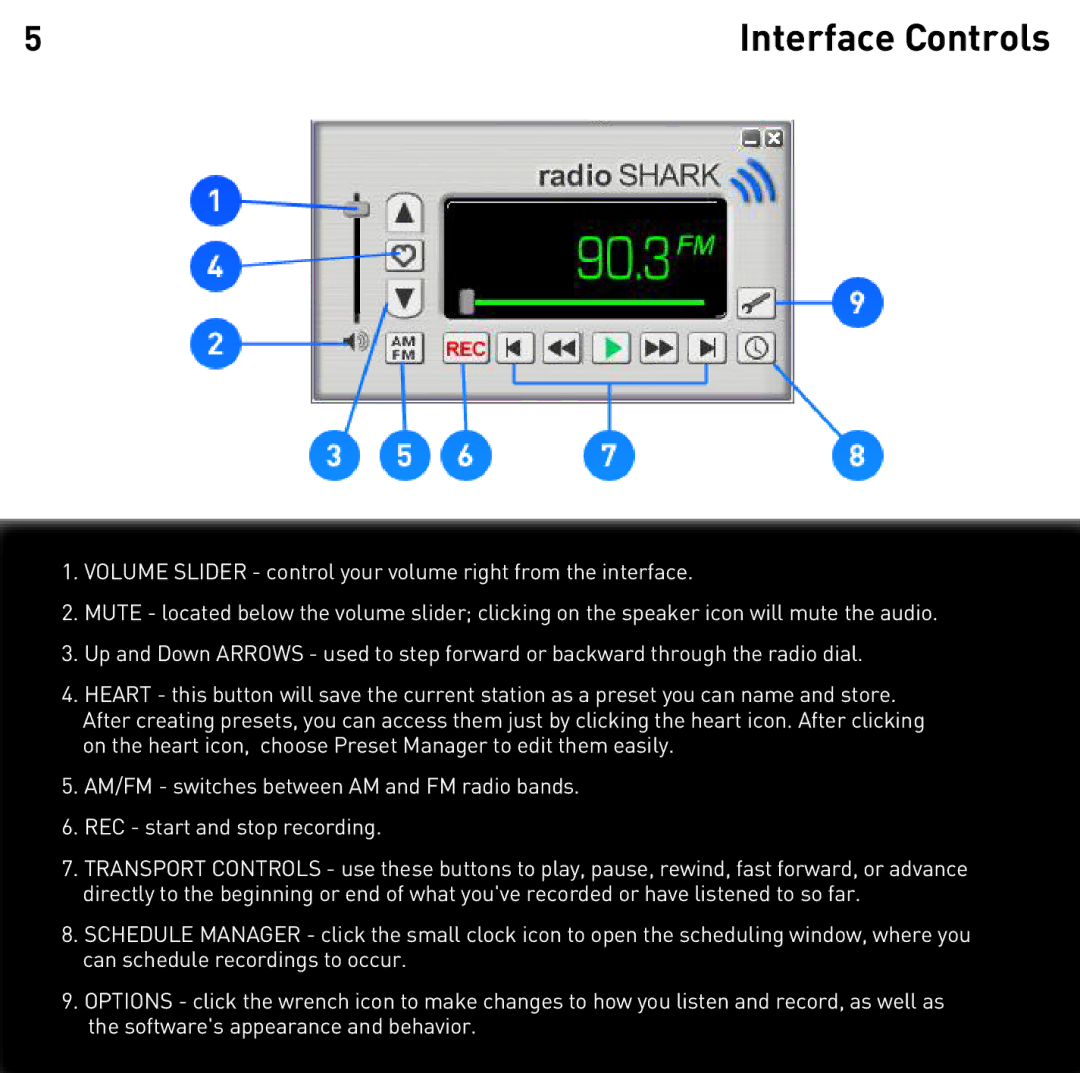
1.VOLUME SLIDER - control your volume right from the interface.
2.MUTE - located below the volume slider; clicking on the speaker icon will mute the audio.
3.Up and Down ARROWS - used to step forward or backward through the radio dial.
4.HEART - this button will save the current station as a preset you can name and store. After creating presets, you can access them just by clicking the heart icon. After clicking on the heart icon, choose Preset Manager to edit them easily.
5.AM/FM - switches between AM and FM radio bands.
6.REC - start and stop recording.
7.TRANSPORT CONTROLS - use these buttons to play, pause, rewind, fast forward, or advance directly to the beginning or end of what you've recorded or have listened to so far.
8.SCHEDULE MANAGER - click the small clock icon to open the scheduling window, where you can schedule recordings to occur.
9.OPTIONS - click the wrench icon to make changes to how you listen and record, as well as the software's appearance and behavior.