To set the 45° fence stop:
1.Loosen the fence tilt knob and position the fence against the 45° stop bolt.
2.Loosen the lock nut on the 45˚ fence stop screw (see Figure 10).
45° Stop Screw
Lock Nut
Figure 10. Adjusting fence 45˚ outward.
3.Adjust the 45˚ stop screw until the fence is exactly 45° outward while resting on the bolt (check the angle with a sliding bevel set to 135° or with a 45° square).
4.Re-tighten the lock nut loosened in Step 2.
Model G0634XP (Mfg. 4/11+)
Replacing Carbide
Inserts
Tools Needed: | Qty |
.................... 1 |
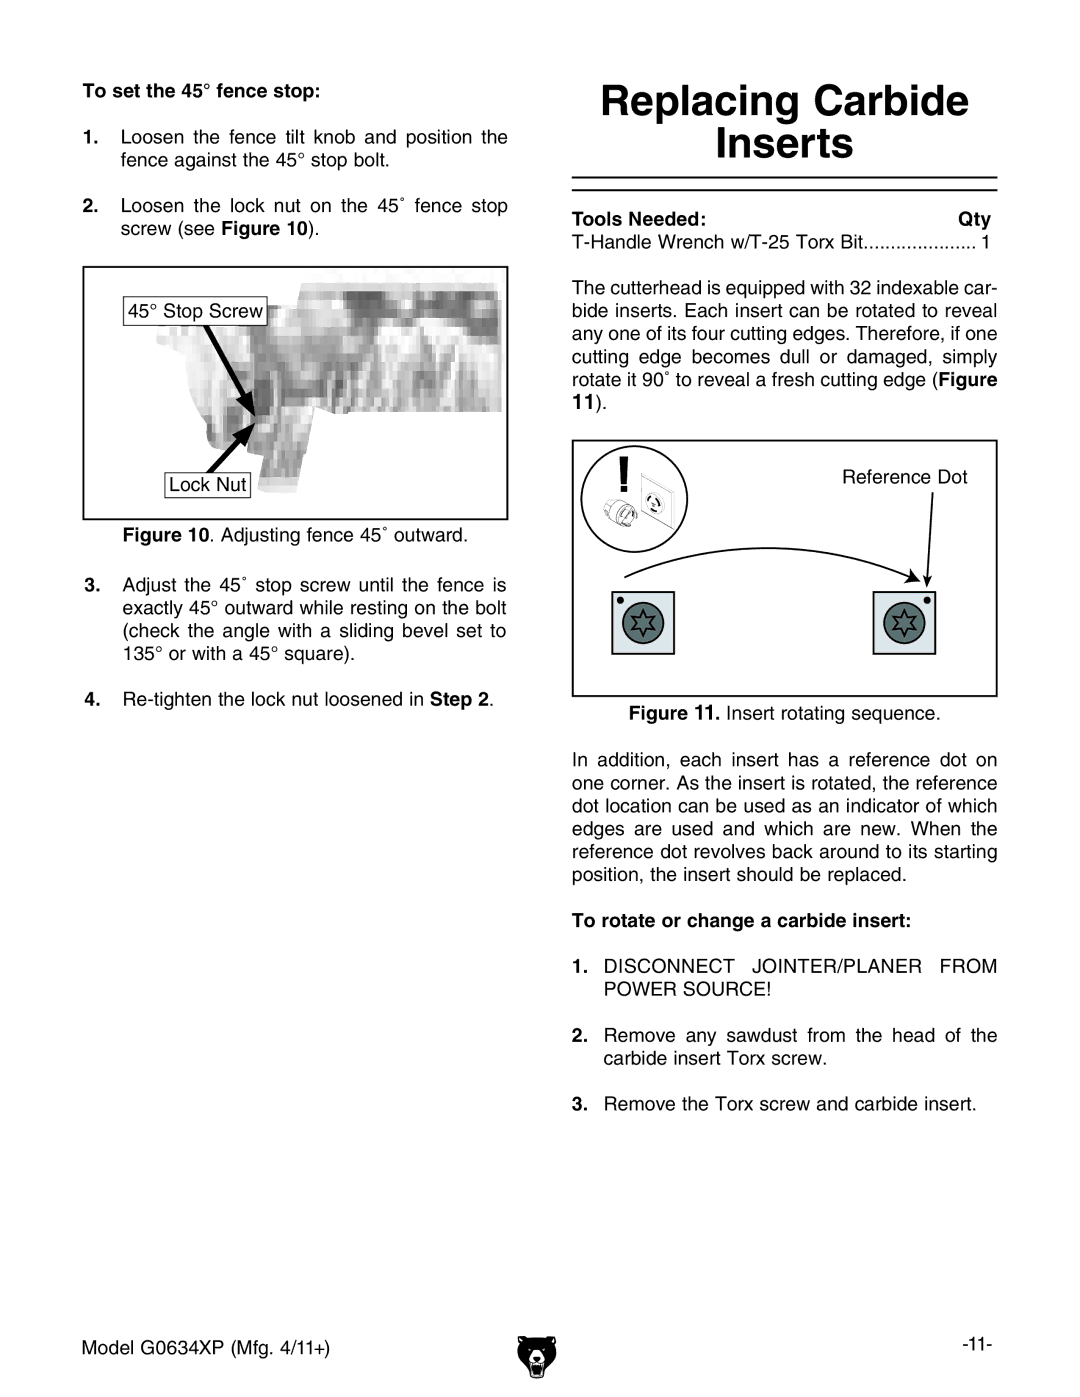
The cutterhead is equipped with 32 indexable car- bide inserts. Each insert can be rotated to reveal any one of its four cutting edges. Therefore, if one cutting edge becomes dull or damaged, simply rotate it 90˚ to reveal a fresh cutting edge (Figure
11).
Reference Dot
Figure 11. Insert rotating sequence.
In addition, each insert has a reference dot on one corner. As the insert is rotated, the reference dot location can be used as an indicator of which edges are used and which are new. When the reference dot revolves back around to its starting position, the insert should be replaced.
To rotate or change a carbide insert:
1.Disconnect JOINTER/planer from power source!
2.Remove any sawdust from the head of the carbide insert Torx screw.
3.Remove the Torx screw and carbide insert.