Rails and Fence
When installing the fence, notice that the front and back edges of the table have two threaded holes. These holes accept the round spacers and socket head cap screws that attach the fence rails to the table. To install the rails and fence:
1.Place the two spacers in the table, similar to Figure 6.
Figure 6. Spacer in table recess.
2.Slide one of the rails into the circular cast- ing at the front of the fence.
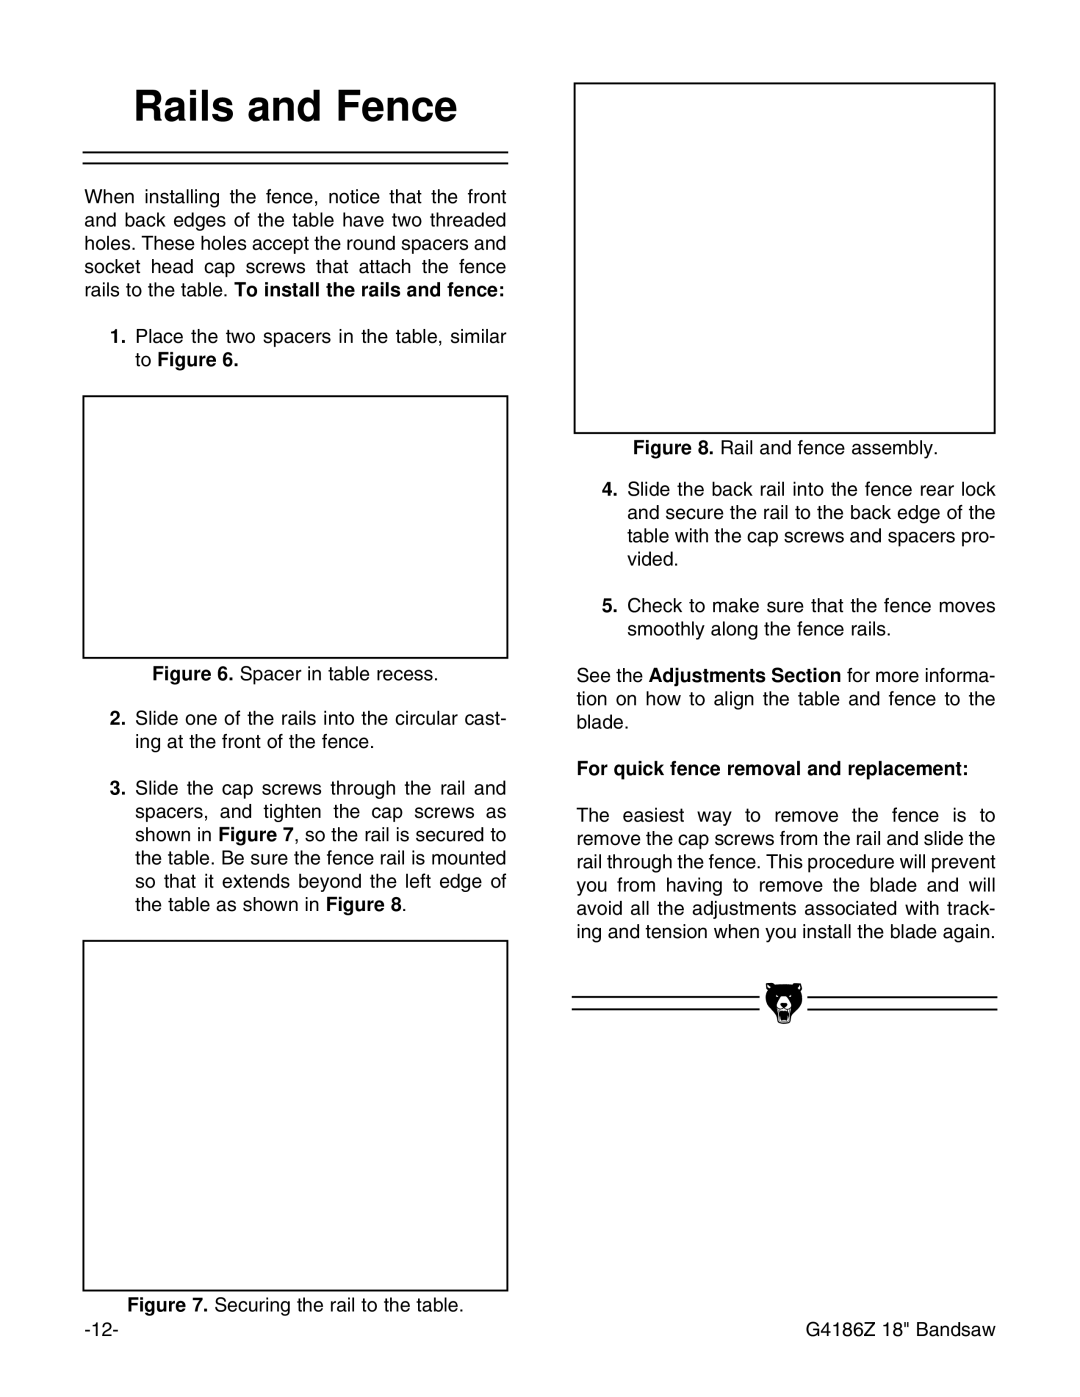
3.Slide the cap screws through the rail and spacers, and tighten the cap screws as shown in Figure 7, so the rail is secured to the table. Be sure the fence rail is mounted so that it extends beyond the left edge of the table as shown in Figure 8.
Figure 7. Securing the rail to the table.
Figure 8. Rail and fence assembly.
4.Slide the back rail into the fence rear lock and secure the rail to the back edge of the table with the cap screws and spacers pro- vided.
5.Check to make sure that the fence moves smoothly along the fence rails.
See the Adjustments Section for more informa- tion on how to align the table and fence to the blade.
For quick fence removal and replacement:
The easiest way to remove the fence is to remove the cap screws from the rail and slide the rail through the fence. This procedure will prevent you from having to remove the blade and will avoid all the adjustments associated with track- ing and tension when you install the blade again.
G4186Z 18" Bandsaw