F ![]()
G
I
![]() H
H
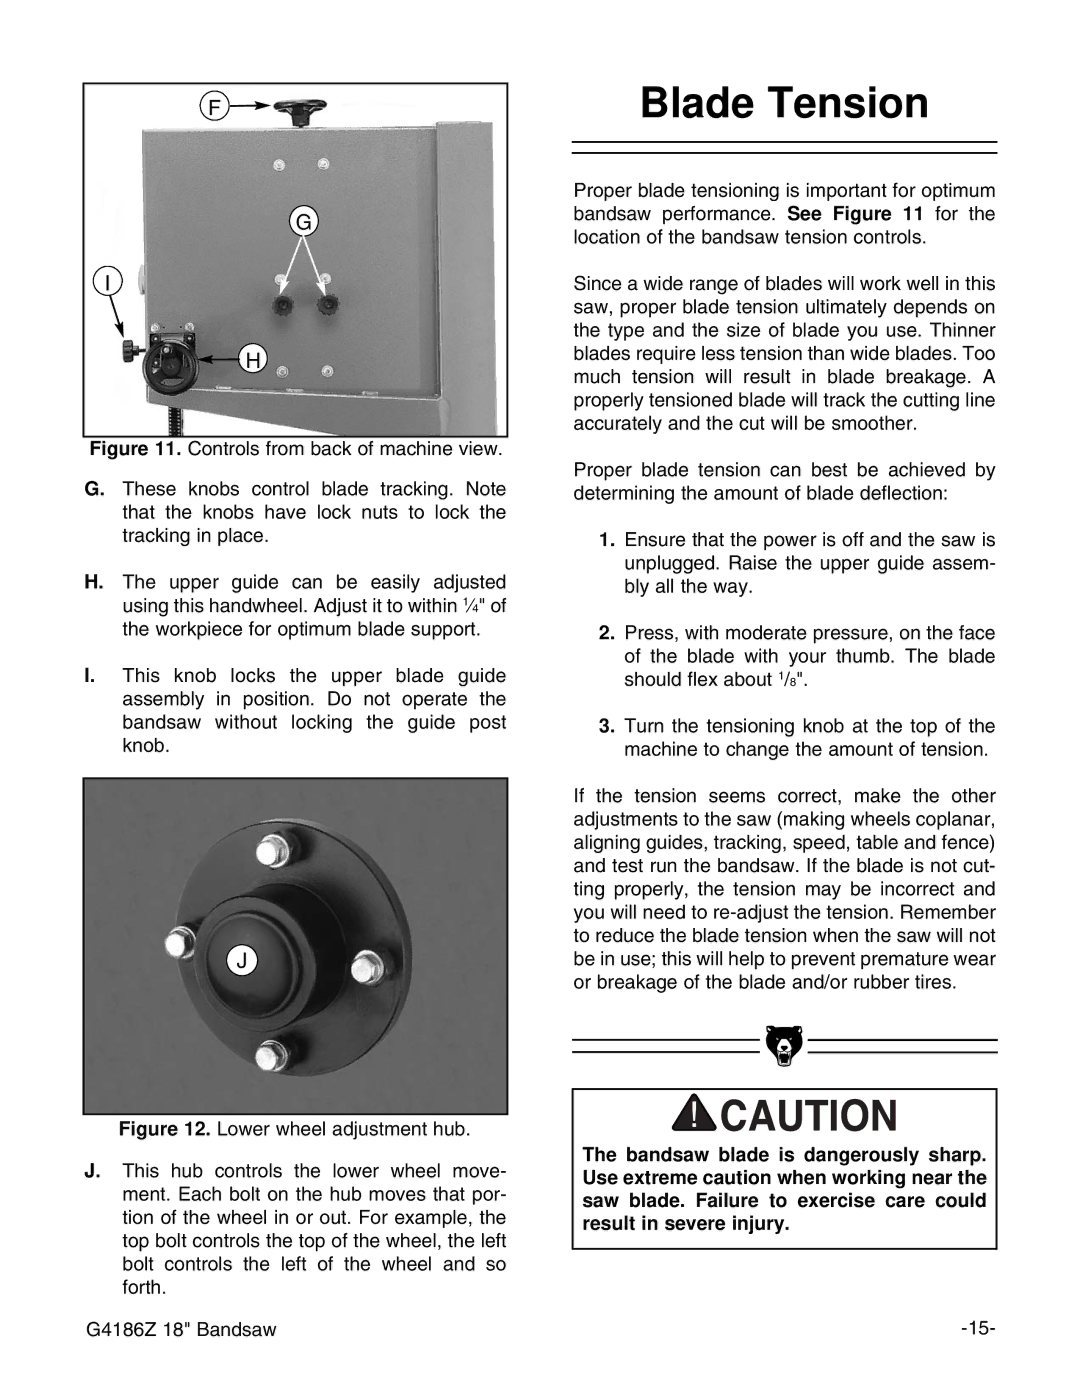
Figure 11. Controls from back of machine view.
G.These knobs control blade tracking. Note that the knobs have lock nuts to lock the tracking in place.
H.The upper guide can be easily adjusted using this handwheel. Adjust it to within 1Ú4" of the workpiece for optimum blade support.
I.This knob locks the upper blade guide assembly in position. Do not operate the bandsaw without locking the guide post knob.
J
Figure 12. Lower wheel adjustment hub.
J.This hub controls the lower wheel move- ment. Each bolt on the hub moves that por- tion of the wheel in or out. For example, the top bolt controls the top of the wheel, the left bolt controls the left of the wheel and so forth.
G4186Z 18" Bandsaw
Blade Tension
Proper blade tensioning is important for optimum bandsaw performance. See Figure 11 for the location of the bandsaw tension controls.
Since a wide range of blades will work well in this saw, proper blade tension ultimately depends on the type and the size of blade you use. Thinner blades require less tension than wide blades. Too much tension will result in blade breakage. A properly tensioned blade will track the cutting line accurately and the cut will be smoother.
Proper blade tension can best be achieved by determining the amount of blade deflection:
1.Ensure that the power is off and the saw is unplugged. Raise the upper guide assem- bly all the way.
2.Press, with moderate pressure, on the face of the blade with your thumb. The blade should flex about 1/8".
3.Turn the tensioning knob at the top of the machine to change the amount of tension.
If the tension seems correct, make the other adjustments to the saw (making wheels coplanar, aligning guides, tracking, speed, table and fence) and test run the bandsaw. If the blade is not cut- ting properly, the tension may be incorrect and you will need to
The bandsaw blade is dangerously sharp. Use extreme caution when working near the saw blade. Failure to exercise care could result in severe injury.
