SECTION 6: ADJUSTMENTS
General
This section will cover the basic adjustment instructions needed to begin operation. Complete the adjustments provided in this manual and then read the remaining portion of the manual before attempting any type of operation.
Your safety is important! Please follow the warnings below during this entire section:
Loose hair and clothing could get caught in machinery and cause serious personal injury. Keep loose clothing rolled up and long hair tied up and away from machinery.
Serious personal injury could occur if you con- nect your machine to the power source before you have completed the assembly process. DO
NOT connect the machine to the power source until instructed to do so.
Sharp edges on metal parts may cause person- al injury. Examine the edges of all metal parts before handling.
Table Tilt
When the table tilt is set to 0˚, the table should be adjusted perpendicular to the sanding disc face.
To adjust table tilt:
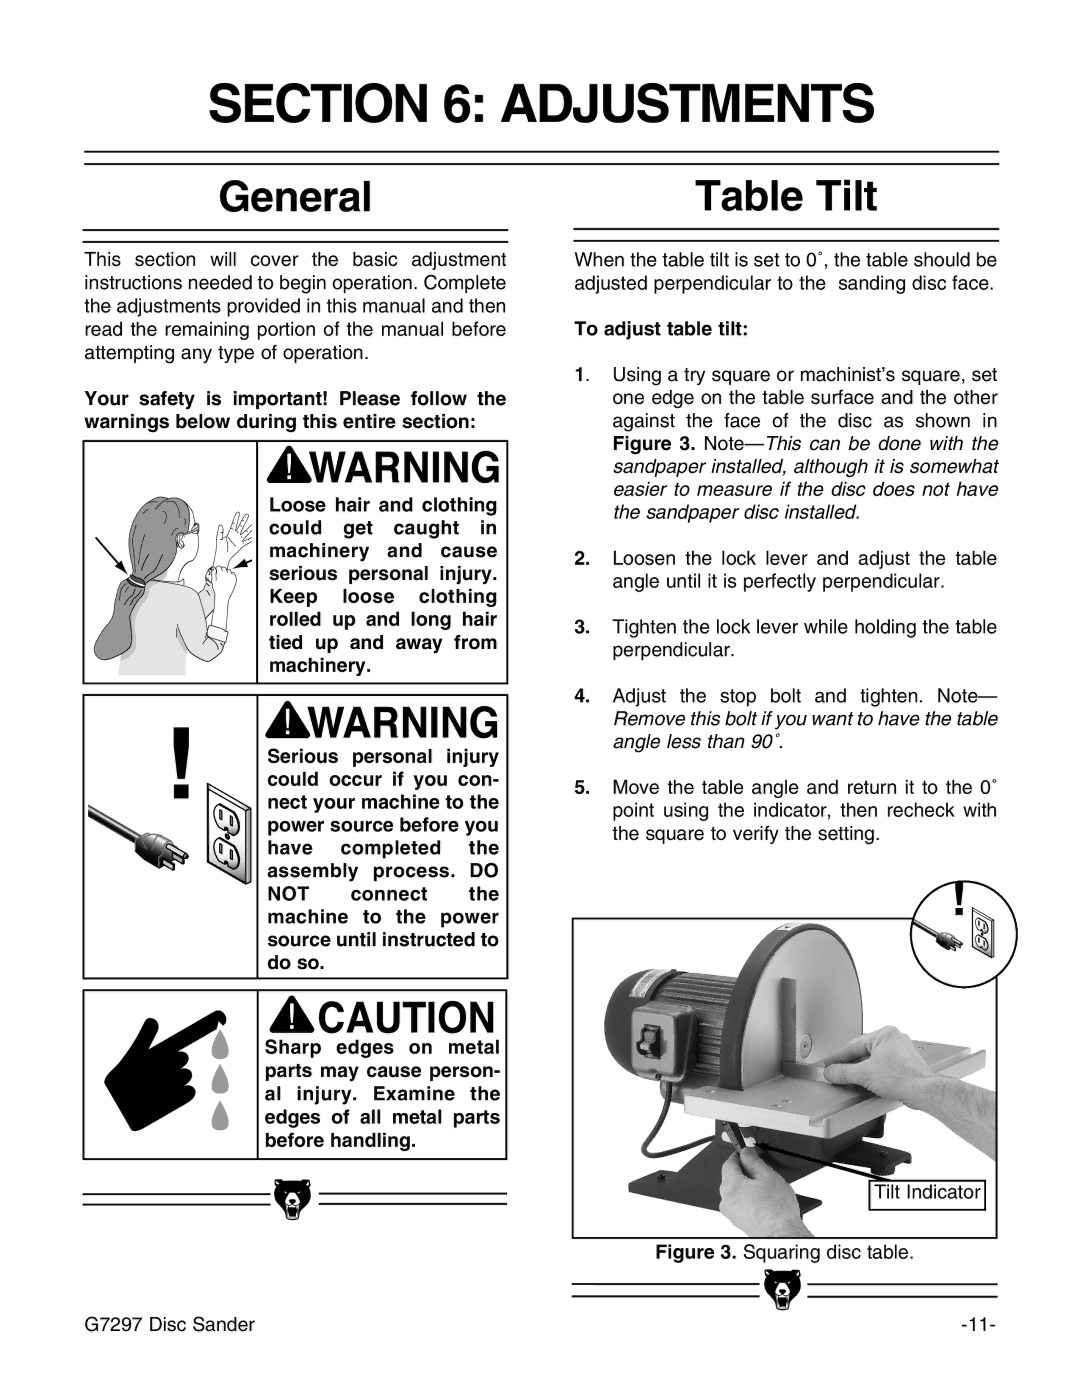
1. Using a try square or machinist’s square, set one edge on the table surface and the other against the face of the disc as shown in Figure 3.
2.Loosen the lock lever and adjust the table angle until it is perfectly perpendicular.
3.Tighten the lock lever while holding the table perpendicular.
4.Adjust the stop bolt and tighten. Note— Remove this bolt if you want to have the table angle less than 90˚.
5.Move the table angle and return it to the 0˚ point using the indicator, then recheck with the square to verify the setting.
Tilt Indicator
Figure 3. Squaring disc table.
|
|
|
|
|
|
|
|
|
|
|
|
G7297 Disc Sander | |||
