7.Slide the blade slot in the table around the blade (Figure 12) and position the table trun- nion against the back of the bandsaw.
!
Blade Slot
Figure 12. Attaching the table to the bandsaw.
8.Secure the table/trunnion assembly to the bandsaw with the two knob bolts that were removed in step 5, (Figure 13).
Table
Trunnion
Figure 13. View of the table/trunnion assembly
attached to the body of the bandsaw.
9.Re-insert the phillips screw that was removed in step 3.
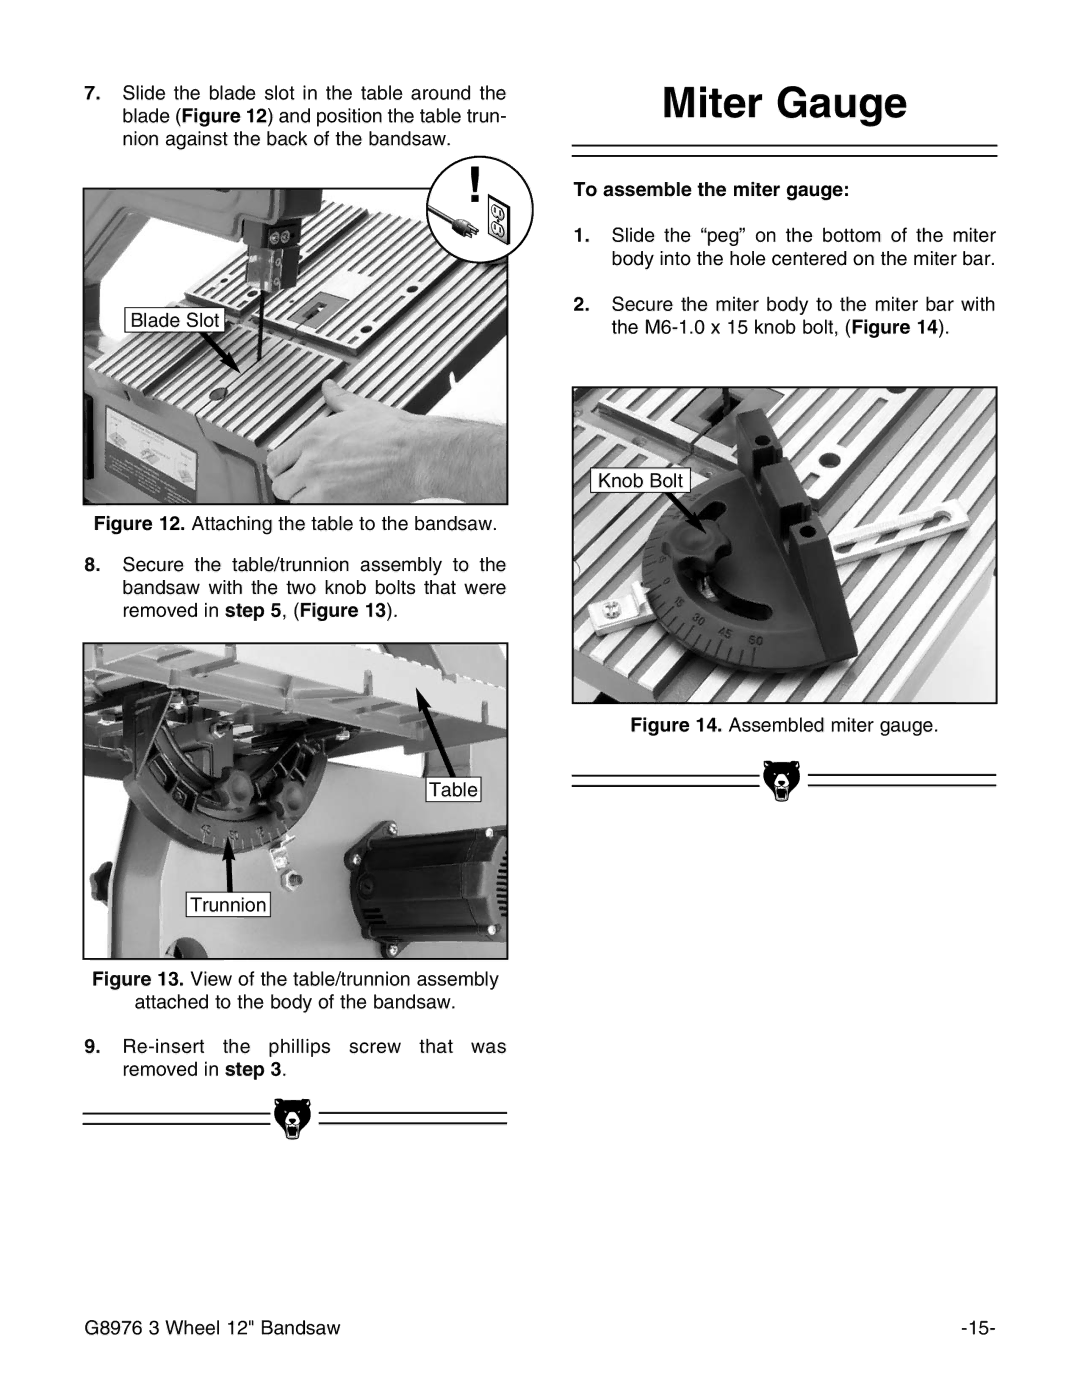
Miter Gauge
To assemble the miter gauge:
1.Slide the “peg” on the bottom of the miter body into the hole centered on the miter bar.
2.Secure the miter body to the miter bar with the
Knob Bolt
Figure 14. Assembled miter gauge.
|
|
|
|
|
|
|
|
|
|
|
|
G8976 3 Wheel 12" Bandsaw | |||