Starting the machine:
1.Wear safety glasses at all times when run- ning the machine!
2.Plug the machine into the power source.
3.Flip the power switch shown in Figure 20 to the ON position. Make sure your finger is poised to flip the switch to the OFF position, just in case of an emergency. The machine should run smoothly, with little or no vibration or rubbing noises. Strange or unnatural nois- es should be investigated and corrected before operating the machine further.
Figure 20. Power switch.
If the machine seems to be running correctly, let it run for a short time to ensure that the moving parts are working properly with no excessive vibration. DO NOT operate the machine if prob- lems cannot be corrected.
If you cannot locate the source of unusual noises, feel free to contact our service department at (570) 546-9663.
Tensioning Blade
NOTICE
Final blade tensioning requires the machine to be started.
A properly tensioned blade is essential for mak- ing accurate cuts and is a prerequisite for many other adjustments.
To tension the bandsaw blade:
1.Make sure the blade is tracking correctly as described on page 17.
2.Make sure you have followed the instructions in the “Start Up”
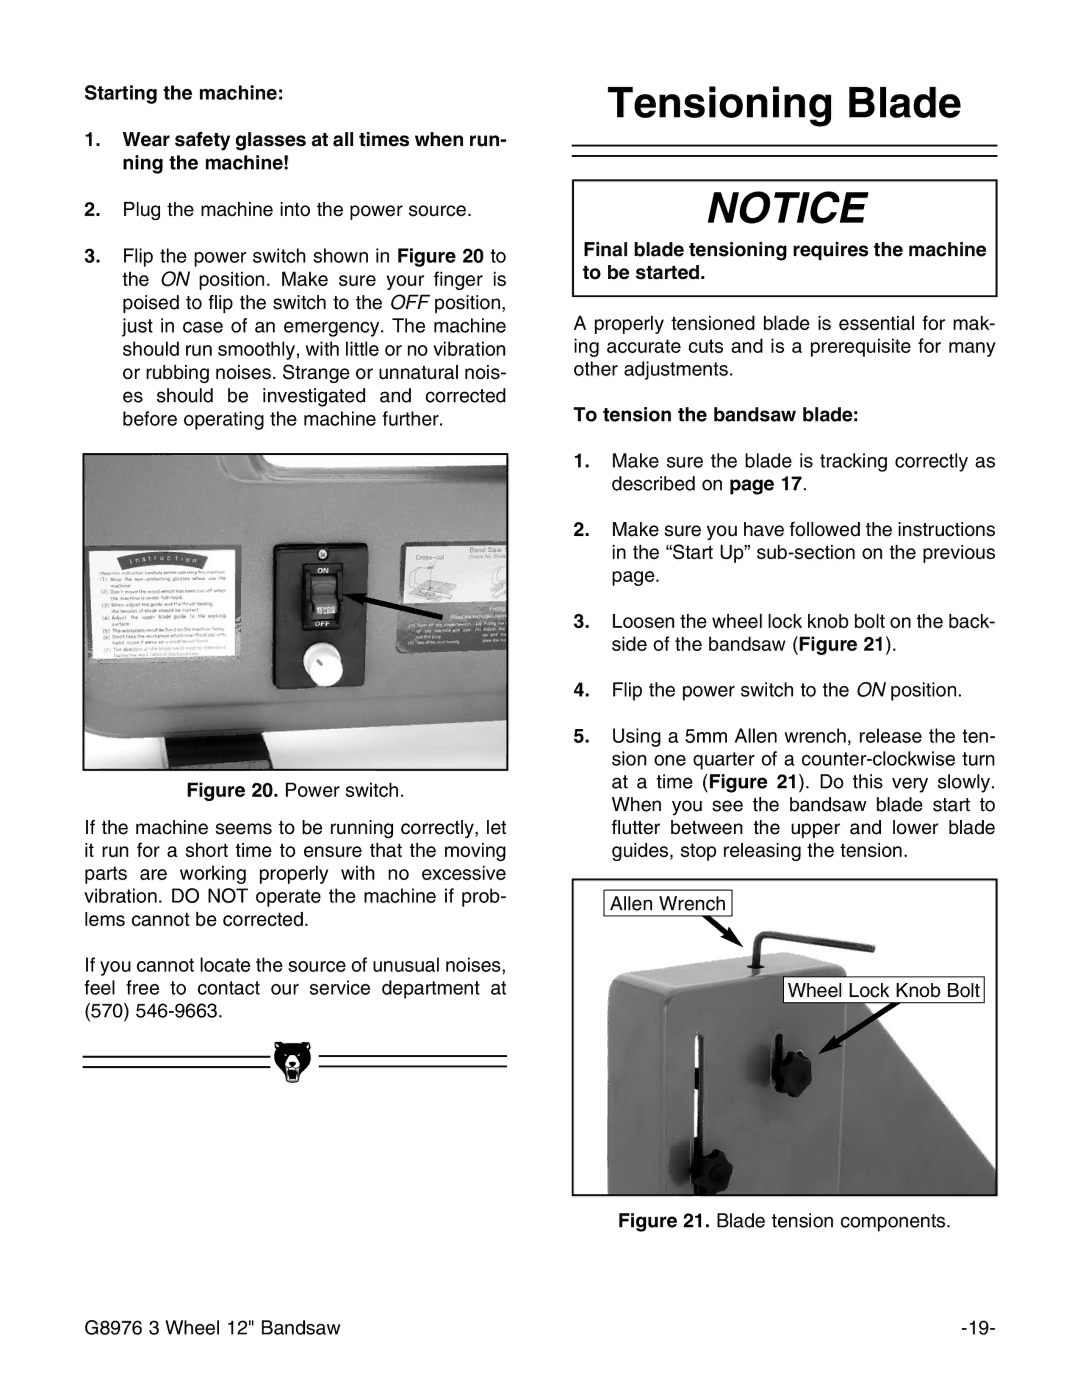
3.Loosen the wheel lock knob bolt on the back- side of the bandsaw (Figure 21).
4.Flip the power switch to the ON position.
5.Using a 5mm Allen wrench, release the ten- sion one quarter of a
Allen Wrench |
Wheel Lock Knob Bolt |
Figure 21. Blade tension components.
G8976 3 Wheel 12" Bandsaw |