SECTION 4: ASSEMBLY
Beginning Assembly |
| Trunnions |
|
|
|
|
|
|
|
|
|
|
|
|
Most of your Model H2801 4" Jointer has been assembled at the factory, but some parts must be assembled or installed after delivery. We have organized the assembly process into steps. Please follow along in the order presented in this section.
Keep loose clothing out of the way of machinery and keep hair pulled back.
Do not connect this machine to the power source until all assembly and adjustments have been performed!
Wear safety glasses dur- ing the entire assembly process. Failure to com- ply may result in serious personal injury.
Some metal parts may have sharp edges on them after they are formed. Please examine the edges of all metal parts before handling them. Failure to do so could result in injury.
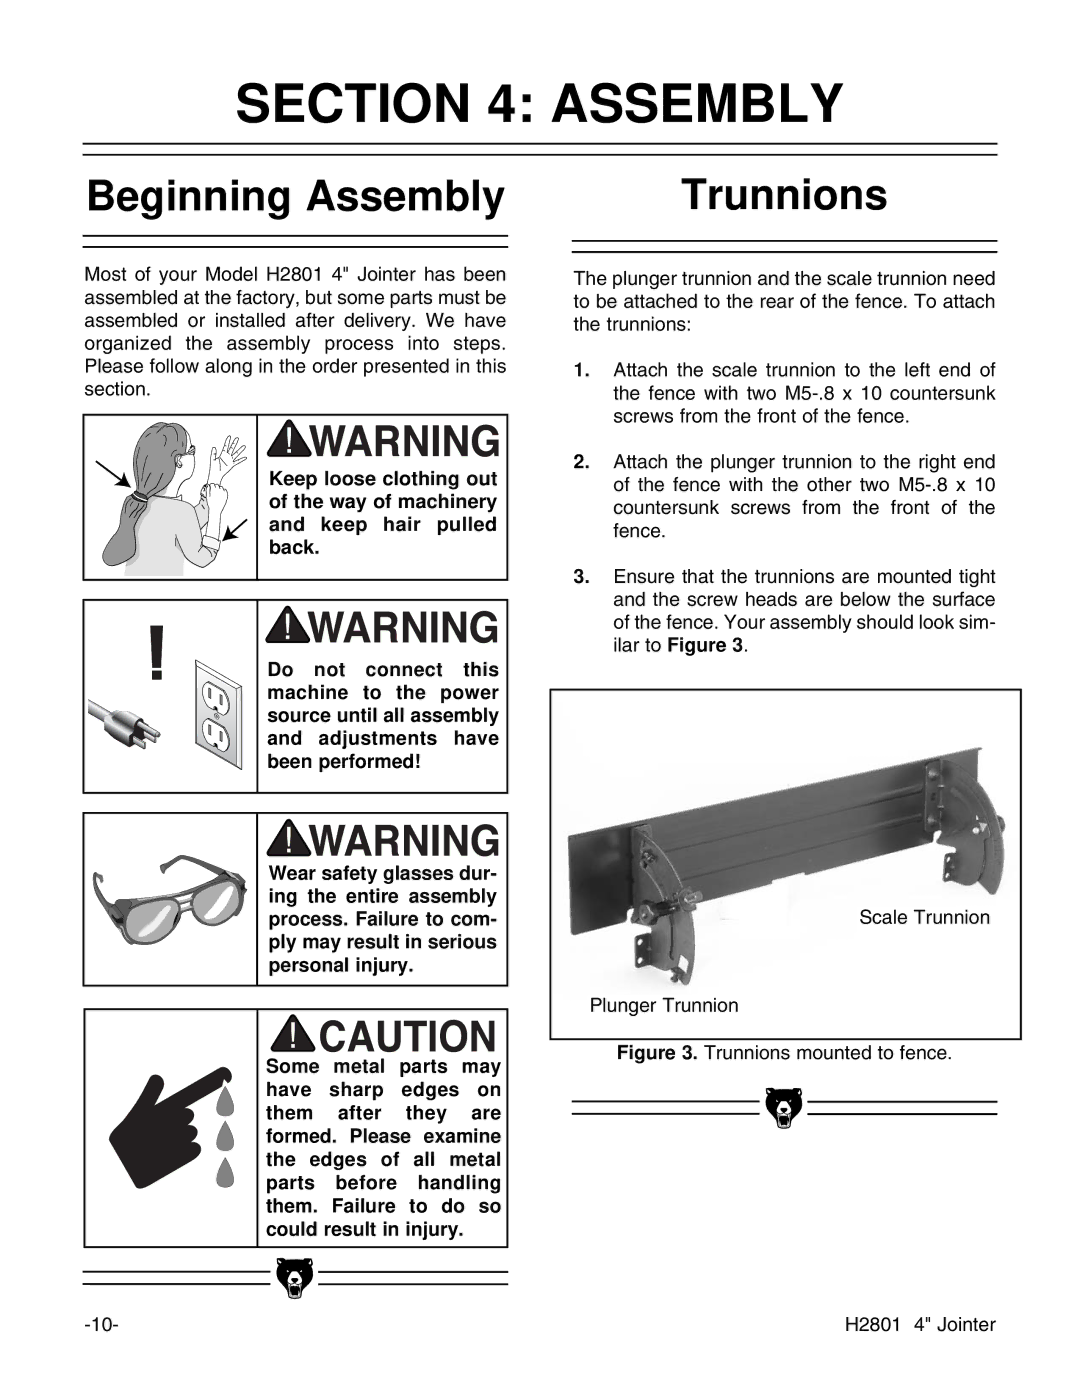
The plunger trunnion and the scale trunnion need to be attached to the rear of the fence. To attach the trunnions:
1.Attach the scale trunnion to the left end of the fence with two
2.Attach the plunger trunnion to the right end of the fence with the other two
3.Ensure that the trunnions are mounted tight and the screw heads are below the surface of the fence. Your assembly should look sim- ilar to Figure 3.
Scale Trunnion
Plunger Trunnion
Figure 3. Trunnions mounted to fence.
|
|
|
|
|
|
|
|
|
| H2801 4" Jointer | |
|
|