3.Place the saddle in the bridge saddle slot and place the nut at the upper end of the fingerboard.
String Height
4. | Route the string to the inside of the corre- | Correct string height is crucial for maximizing the | |||||||||
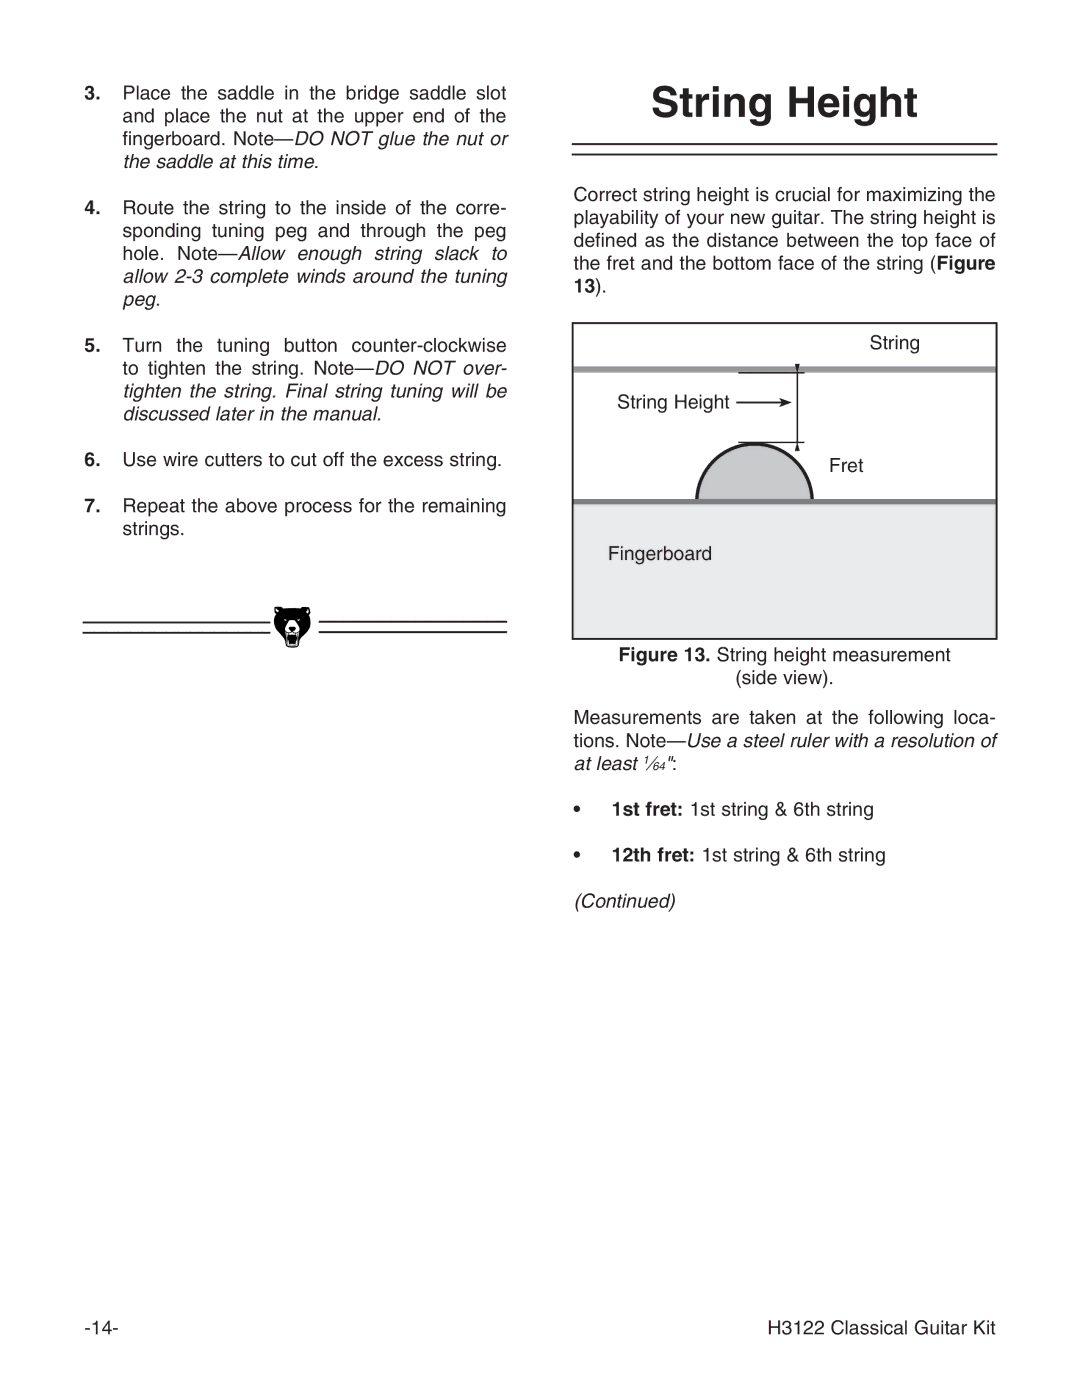
playability of your new guitar. The string height is | |||||||||||
| sponding tuning peg and through the peg | ||||||||||
| defined as the distance between the top face of | ||||||||||
| hole. | ||||||||||
| the fret and the bottom face of the string (Figure | ||||||||||
| allow | ||||||||||
| 13). |
|
|
|
|
| |||||
| peg. |
|
|
|
|
| |||||
|
|
|
|
|
|
| |||||
|
|
|
|
|
|
|
|
|
|
| |
5. | Turn the tuning button |
|
|
|
|
| String | ||||
| to tighten the string. |
|
|
|
|
|
| ||||
|
|
|
|
|
|
| |||||
| tighten the string. Final string tuning will be | String Height |
|
|
|
|
| ||||
| discussed later in the manual. |
|
|
|
| ||||||
|
|
|
|
|
|
| |||||
6. Use wire cutters to cut off the excess string. |
|
|
|
|
| Fret | |||||
|
|
|
|
| |||||||
|
|
|
|
|
|
|
|
|
| ||
7. Repeat the above process for the remaining |
|
|
|
|
|
| |||||
|
|
|
|
|
| ||||||
| strings. |
|
|
|
|
|
| ||||
|
|
|
|
| Fingerboard | ||||||
|
|
|
|
|
|
|
|
|
|
| |
|
|
|
|
|
|
|
|
|
|
| |
|
|
|
|
|
|
|
|
|
|
| |
Figure 13. String height measurement
(side view).
Measurements are taken at the following loca- tions. Note—Use a steel ruler with a resolution of at least 1⁄64":
• 1st fret: 1st string & 6th string
• 12th fret: 1st string & 6th string
(Continued)
H3122 Classical Guitar Kit |
